Tag Archives: all about angles

28 Comments

The thread featured in this post was given to me by Aurifil.

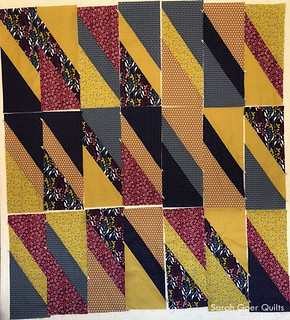
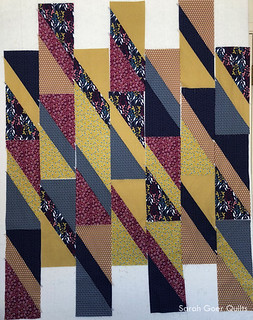
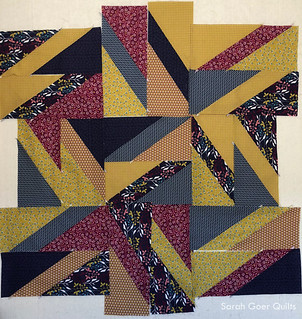
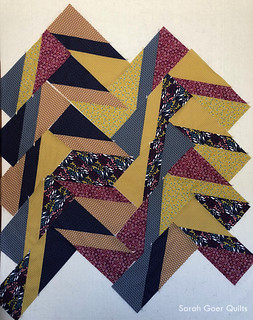
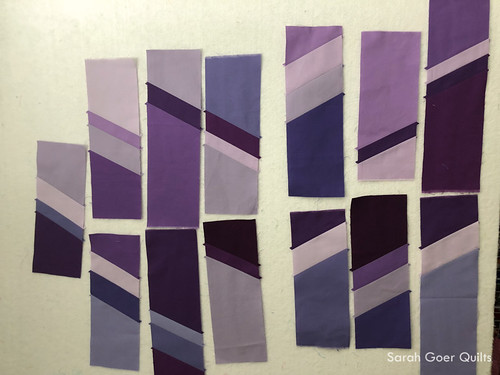
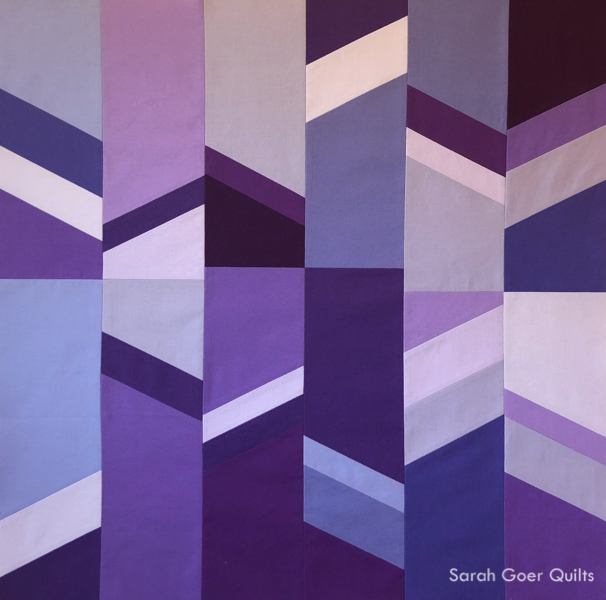
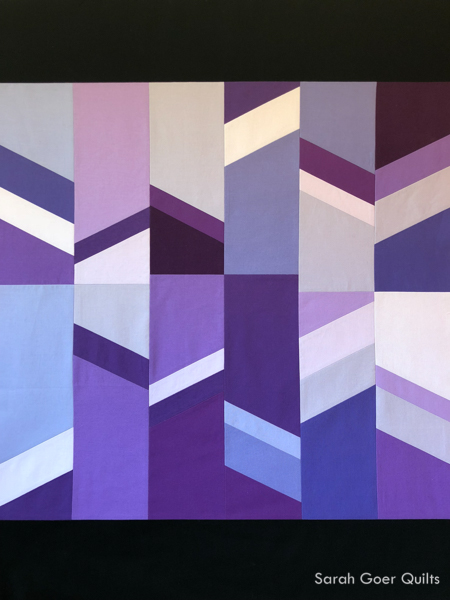
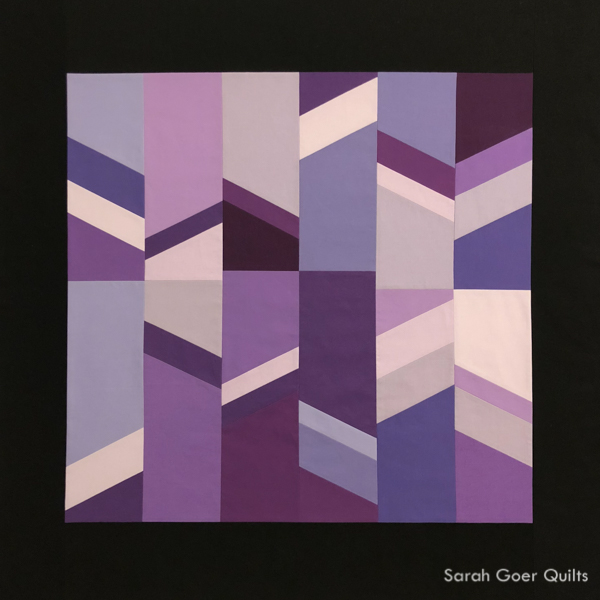
Way back in May I made this quilt top as part of the 2018 Pantone Quilt Challenge. This year's Pantone color is Ultra Violet. What a fabulous excuse to make a purple quilt! I opted for a version of my All About Angles.

It was so great to see what everyone did with Ultra Violet for the challenge, which was judged in three categories: Quilts, Mini Quilts, and Just the Top. I'm honored to have received the Judge's Second place prize in the Just the Top category of the challenge. But then my quilt top got set aside for other projects. I definitely need an external deadline to finish a project and once I decided that I wanted to finish this up to submit to PIQF I had a firm August 28 deadline.

My Aurifil Artisan package included monofilament thread, something I have never used and was excited to try. At some point I got it in my head that I wanted to do allover graffiti/improv free motion quilting for this quilt, but I wasn't excited about using a cotton thread in a color that would distract from the piecing in this quilt. With a variety of values including the black, I knew that no matter what thread color I chose, it would get lost in some sections of my quilt. At some point I decided that this would be a great opportunity to try out monofilament thread. I opted for the clear Aurifil Monofilament and did I little reading online and an informal IG survey for monofilament tips.

I feel like monofilament had gotten a stigma in my mind for being hard to work with. Mostly, it was a dream. I wound the first bobbin only halfway at slow speed. I quilted until I ran out of bobbin with no thread breaks and no trouble. Then I rewound the bobbin with... more thread. Not quite full, but way past halfway. I had many problems. These problems went away as soon as I wound a new bobbin no more than halfway.

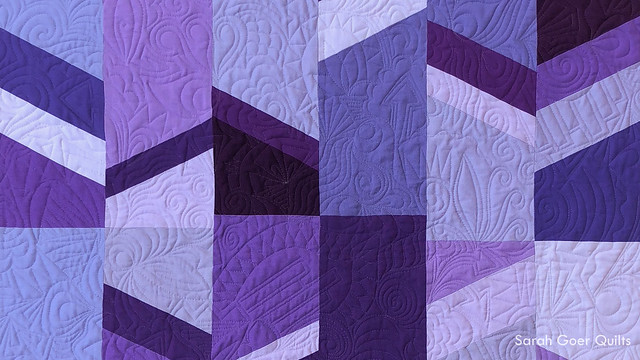
So my quilting... first inspired by Karlee Porter's graffiti designs, I have a small tool box of motifs that I include in my FMQ mash-up. These include spirals, paisleys, arrows, buildings (that's what I consider the rows of rectangles), and leaves. You can see these dating back to my first graffiti quilted projects, the Schnitzel and Boo mini swap quilt and R's Pattern. Now if I'm doing some FMQ mash-up quilting I peruse the IG hastags #graffitiquilting#wildquilting#flowquilting, and #freemotionimprov and look for motifs in the mix that aren't in my repertoire. I like to practice on paper to develop a bit of muscle memory.

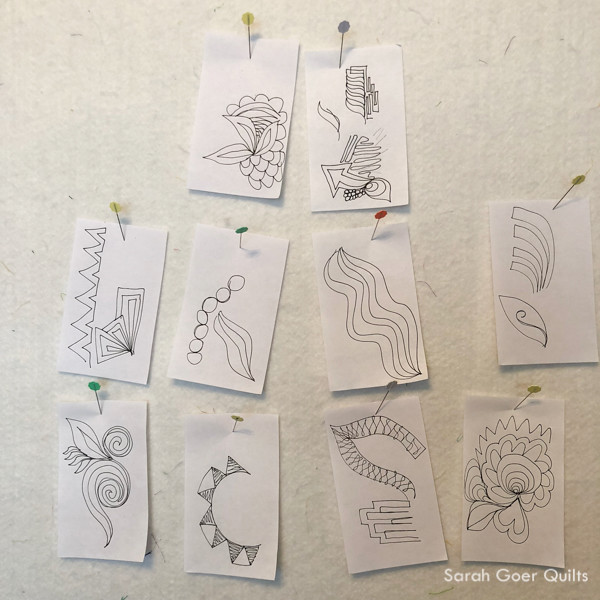
This go round I made short little sketches of interesting motifs that I wanted to work in. I pinned these up on my design wall to have a visual reminder. This helped when I felt I was being too repetitive. It allowed me to just look up and be reminded of what else I knew how to do. This technique really helped me and I prefer it over my past strategy of post-its on many pages of my FMQ inspiration books.

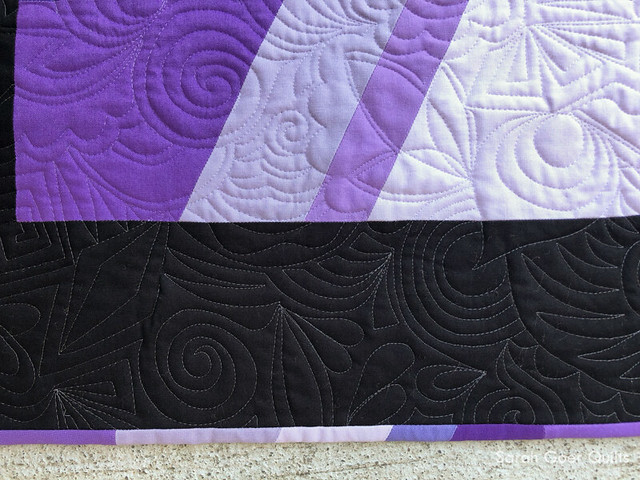
I knew I wanted a purple binding. I really wanted to make it scrappy with the purple solids in the quilt top, but due to time constraints I opted for Kona Bright Peri for the binding. I used one leftover unit from the quilt top to include a pieced section. I was glad to carry more of the colors into the binding as well as the same angular piecing seen in the quilt top. This section is on the lower right edge of the binding (shown sideways here).

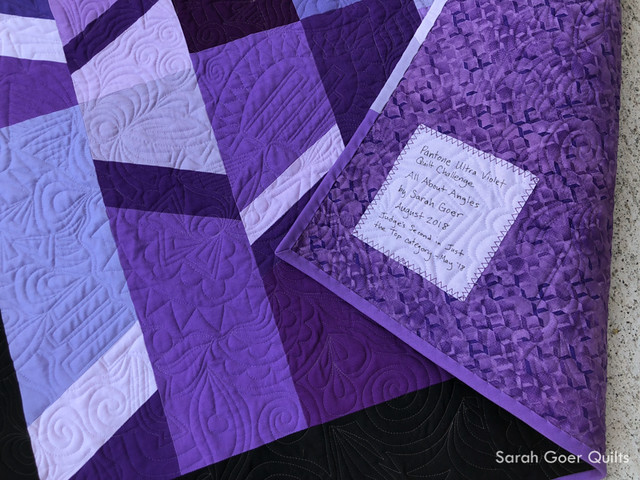
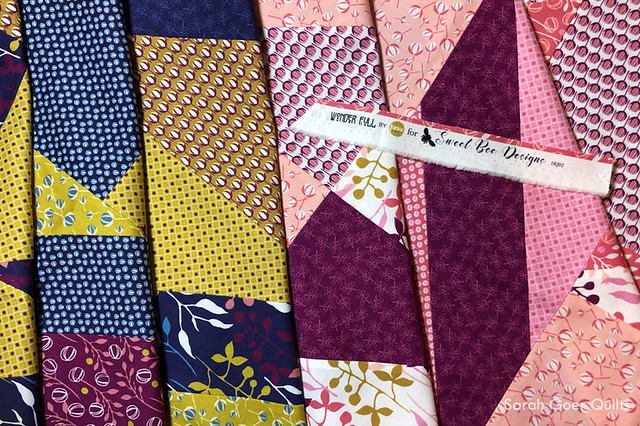
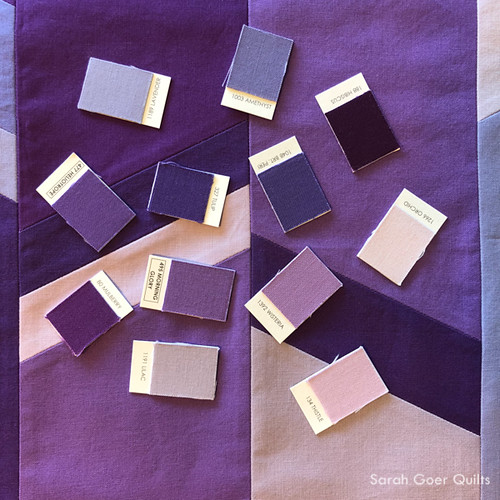
I backed my quilt with a purple print from my stash and attached my label before quilting. Most, if not all, of my purple solids came from the Kona Lavender Fields bundle. It finished at approximately 33" x 33".

I'm so pleased to have my quilt completed, and finished in time to submit to the PIQF Quilt Competition in their wall quilts division. (It was a little too small to be submitted to the Modern Quilt Competition.) I also submitted Modern Batik Scrappy Squares in the Modern Competition. Notifications will be out by mid-September.


Tips for Using Monofilament Thread

  • To avoid trouble with spool unraveling, try a mesh sleeve or a thread stand.
  • If using monofilament in the bobbin, only fill the bobbin halfway (or less).
  • Aurifil recommends you hand wind your bobbin. If winding by machine, wind on slow speed.
  • Use a new size 90/14 needle.
  • Keep a piece of blue tape near your machine to stick the trimmed bits of monofilament to so they don't end up all over.


Looking for inspiration? A couple books I love for free motion quilting motifs are The Ultimate Guide to Machine Quilting, Machine Quilting With Style, and 365 Free Motion Quilting Designs.

I'm linking up to Needle and Thread Thursday and TGIFF.

I've also linked up to the Q3 Finish Along finishes linkup. See my whole Q3 list here.

January 2020: Linked up to my Show Me Something Purple linkup.

This post contains affiliate links. Following these links will NOT affect the price you pay.


8 Comments

At Spring Quilt Market I connected with the designers at Sweet Bee Designs. This resulted in Lizzie Clark reaching out to invite me to participate in the Blog Hop for the release of her new fabric line, Wonder Full. It’s a lovely floral line with rich jewel tones and pretty pinks. I'm happy to be sharing two quilt tops with you.

The first thing I noticed when I received the bundle was how much I enjoyed the seven monochromatic pinks together. When I pulled those aside, what remained was the rich jewel tones: the navy/magenta/olive set of fabrics I used for my first quilt top.

In each project I chose a variation of my Planned Improv: All About Angles technique. This is a little more structured than my previous pieces as I altered the technique a bit to be more friendly for using one-sided fabric.

Once I created the units, I used my design wall to audition layouts. I initially planned for a straight layout, but thought a vertical shift in every other column would be interesting.

Then I tried a couple with the blocks placed in alternating directions.

In the end, I really liked the vertical shift layout and also the nine-patch design. I stuck with the vertical shift layout for this first quilt top, which finished at approximately 41" x 46".

Then I used the pinks to whip up a second quilt top. I love that these two projects show the versatility of the initial units. They original units were identically pieced. They vary in placement and the pink sections were trimmed down. This project is 35" x 35".

Thank you for visiting! I’ll update the list of participants with links to their blog posts as they are available . You can also check back on Lizzie’s kickoff post.

6/25 Sarah Goer at Sarah Goer Quilts - you are here!
6/26 Becky Vandenberg at Be So Crafty
6/27 Becca Plymale @sunflowerseams
6/28 Stephanie Jacobson at Steph Jacobson
6/29 Allison Dutton at Allison Sews
6/30 Andy Knowlton at A Bright Corner
7/1 Lissa LaGreca at Lovingly Lissa
7/2 Jennifer Strauser at Dizzy Quilter
7/3 Sherry Shish at Powered By Quilting

12 Comments

This is my entry in 2018 Pantone Ultra Violet Quilt Challenge, hosted by Rebecca Bryan and Sarah Elizabeth Sharp.

Despite my busy schedule, how could I not participate in the Pantone Quilt Challenge this year? I mean, PURPLE! I even had a dozen Kona purples in my stash from purchasing fabric for my Rainbow Remix project in 2016.

I've been wanting to play with All About Angles variations and I had yet to make one in all Kona. This seemed the perfect time. I sliced up my Kona purples. The colors I used were: Amethyst, Bright Peri, Heliotrope, Hibiscus, Lavender, Lilac, Morning Glory, Mulberry, Orchid, Thistle, Tulip, and Wisteria. One thing I love about this Planned Improv technique is how quickly it goes together. With no specific measurement, it's mostly about about pairing up interesting color combinations and I found that working with a pile of purples, all of the combinations were interesting to me!

I built a bunch of chunks and moved to the design wall to work my final layout. This stage is so fun for me, because there are many possible options. I considered sewing them together in this orientation (minus that bonus chunk on the left), but opted for a different design.

I pieced 12 of my chunks together into this mini quilt top. Then I opened the link up page for the challenge and realized that the "Just the Top" requires a minimum of 30" on a side. At this point my quilt top was about 24" square. Oops. No big deal, I decided to add some black borders on the top and bottom. That brought it up to about 24" x 32" and I went on with my day this afternoon.

After school I once again sat down to blog and link up my project. This was when I realized that the requirement for the category was 30" was that the shortest side needs to measure 30". This meant that my project was still too small. No big deal, right? Add a couple more borders! Except that I was across town from my sewing machine and my quilt top.

One quick trip to visit my sewing machine and two more borders have been added, bringing it to approximately 33" x 33". (Photographed in night lighting.) I'm looking forward to adding some graffiti quilting to it.

Every time I piece another All About Angles I have new ideas of variations I can try. This time I made a list with a bunch of options for next time. But before it comes to that I think I'll finish my three in progress versions.

I'm linking up to the 2018 Pantone Quilt Challenge, in the "Just the Top" category. Hop on over to check out all the purple, quilty goodness and vote for your one favorite in each category. Congratulations to everyone who participated. There is a beautiful pile of purple work!

Update: You can see my finished quilt in this post.

SaveSave

SaveSave

SaveSave

SaveSave