My family enjoys board games and we've been playing them nearly daily for months while we've been home during the pandemic. My son is 10 and my daughter is 8. My husband and I are in our 40s. ;-) Here are a few of our favorites. (Affiliate links are included in this post.)

Our Newest Game
I'd heard Trash Pandas recommended over and over again so it was on my board game wish list. My son ended up picking it out for my daughter as a Hanukkah gift. She opened it up Thursday evening and we played our first game. It's a fast-paced card came that was easy to learn and fun to play. There's a bit of a press-your-luck aspect to the die rolling. And while many of our current favorites are loooong games, this one is about 20 minutes which feels refreshingly fast.

The Cutest War Game Ever and My Daughter's Favorite
In early November, I gave my husband Root. I hadn't heard of it and found it on his wish list. We all love it. My daughter likes it because "it is cute and fun." It's been dubbed the cutest war game ever. Each faction of animals (Bird, Cat, Mouse, and Raccoon) has their own unique game play which makes for a myriad of combinations of play for 2, 3, or 4-player games (or even more and up to 6 players with the Riverfolk expansion which we just got but haven't played yet).

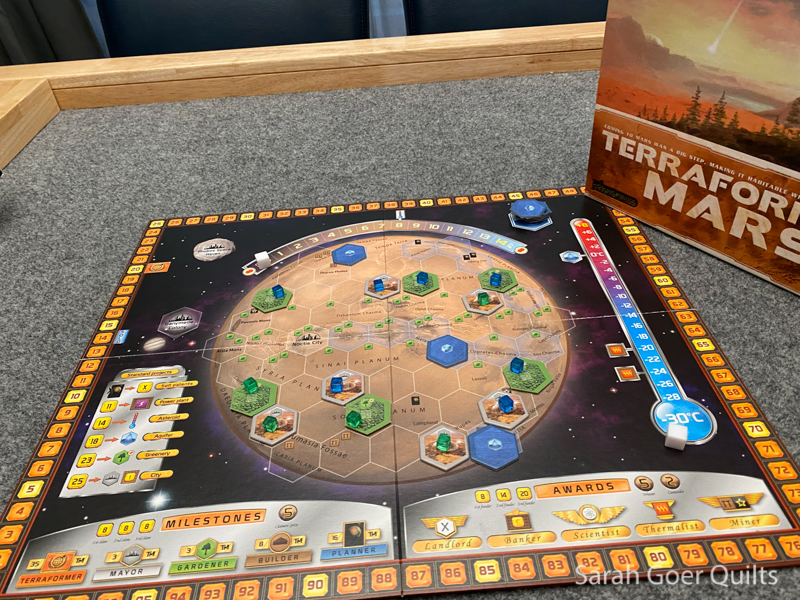
Favorite Long Game
If you're looking for a great strategy game that'll take a couple (or more?) hours, Terraforming Mars is a great one! It was originally recommended to my by Christa Watson and we loved it from the start. There's so much going on in this great strategic game and we've added the Prelude and Hellas & Elysium expansions for even more fun. It's all about making Mars inhabitable by raising the temperature, increasing the oxygen level, and adding oceans.
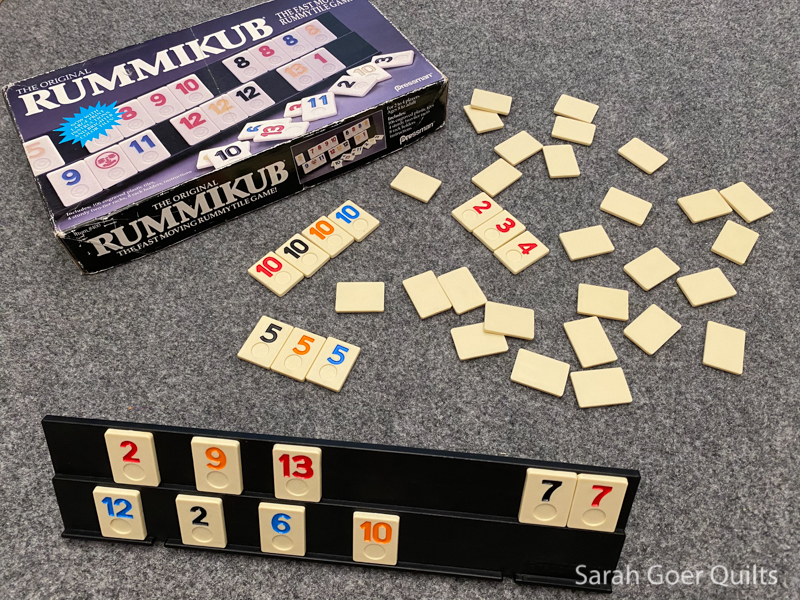
Most Nostalgic Game
I recently bust out Rummikub which I started playing in high school with my best friend's family. Similar to the card game Rummy, it's all about building melds of tiles as well as manipulating the board to open new places to play your tiles.
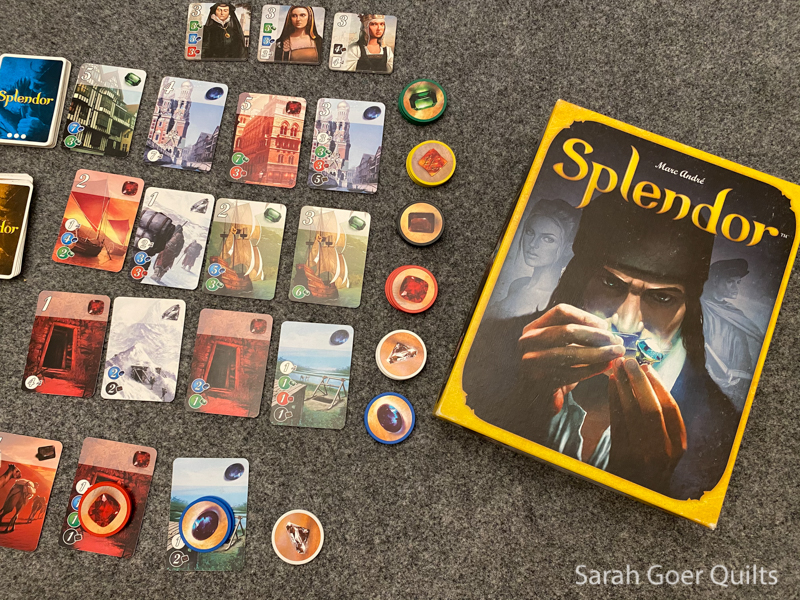
The One Everyone Loves
Splendor is a game that I was introduced to by friends years ago. I loved it immediately and have in turn introduced many friends to it, many of whom have bought their own copy. It has easy mechanics, making it but great strategy and plays in about 30 minutes making it short enough for a rematch or two in an evening. The Cities of Splendor expansion adds four twists to the standard game play.
Favorite Card Game
Before I met my husband I was introduced to Bohnanza. It's great with a bigger group and I don't really enjoy the two-player version. I have fond memories of playing with my extended family at the holidays. I introduced my kids to it a few months ago since they are old enough to handle the barter aspect of the game now. We have played so many 3-, and 4-player games in the past few months. And my kids will settle for the two-player version so they have played a couple times without me. This bean game has great graphics that make me smile.

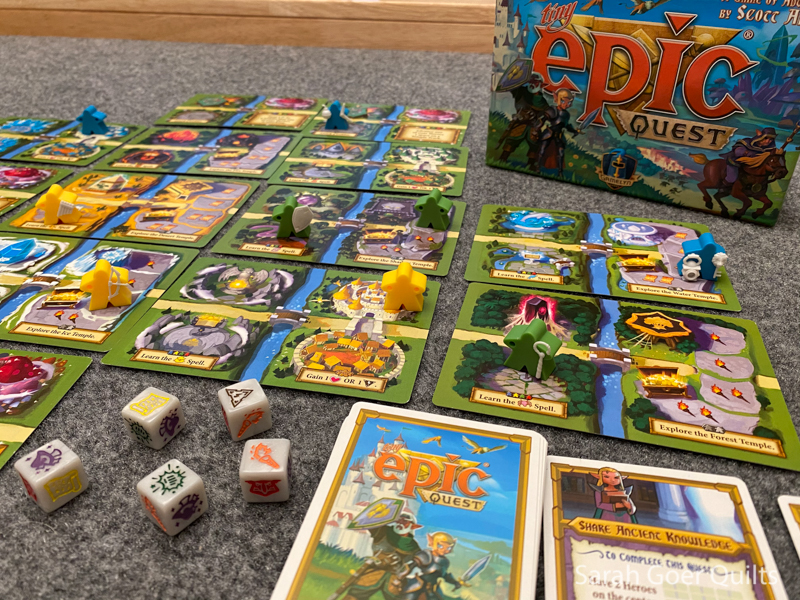
My Son's Favorite
My son's current favorite is Tiny Epic Quest. He says he actually like all of the Tiny Epic games. I have to agree. There's so much great strategy and interest packed into a small box. In Tiny Epic Quest you are moving around the kingdom to explore temples, fight goblins, and learn spells. Our most recent game took almost 2 hours, so it's a long one.
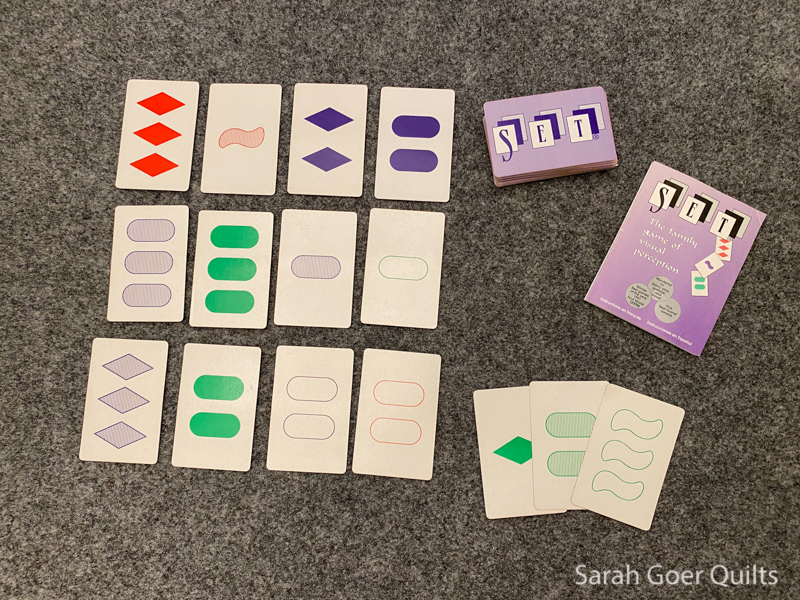
A Great Solitaire Game
Another one that goes back to high school with my best friend's family is the card game Set. It's great as a rambunctious competitive game, but my daughter really enjoys it as a solitaire game. And playing solo is a great way at improving one's skills for a competitive game.
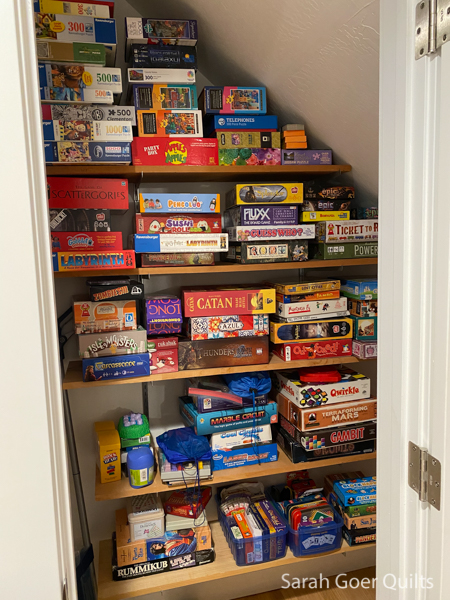
Here's a glimpse of the entire collections. The shelves just went up this week. I'm always looking for game recommendations if you'd like to share in the comments and I'm happy to answer any questions about the ones we own.
Thanks to my kiddos for helping with this post and for endless gaming hours with me. :-) I'm participating in Cheryl's 31-Day Blog Writing Challenge. Check out my 2018 favorite board games, too.
What's your favorite board game?