You may remember the mini I sent away in December for the IG Mini Swap. At the beginning of this month my IG Mini Swap quilt arrived from Lisa in Pennsylvania. It is lovely! Lots of great blues and purples in this wonky log cabin quilt. And look at that cute sea star fabric in the middle!
My 2 1/2-year-old was instantly attracted to everything in my package, asking me repeatedly to open the chocolate because "she likes chocolate and wants to eat chocolate." (Yeah, I'll be eating that when she's not around.) She's also pretty insistent that the zipper pouch is for her. She enjoyed putting all the goodies into and out of the pouch repeatedly.
Thank you so much, Lisa! What a delightful package of goodies. I'm putting my first Instagram swap in the win column!
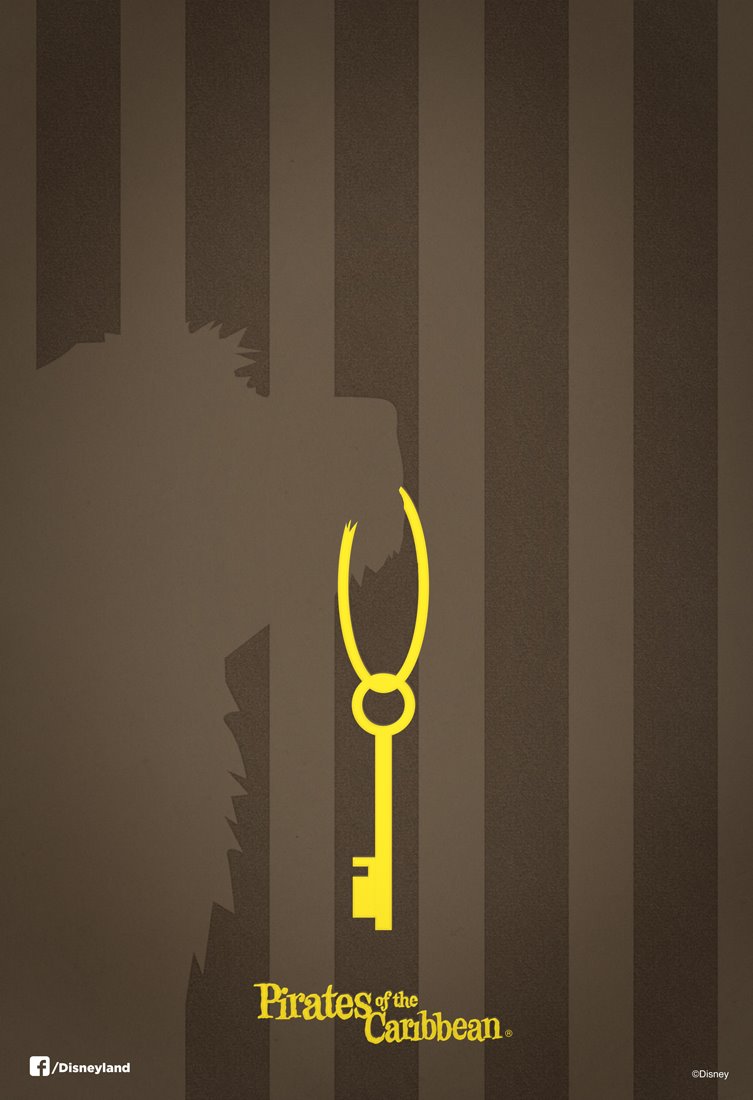
This week I completed and sent my mini quilt for my 2nd Instagram swap. I was assigned Megan in the Disney Mini Swap 2015 and she had great info to go on in her questionnaire. I've enjoyed stalking her on IG and it was fun when she started following me. I couldn't post any real clear pictures of what I had planned for the mini since I thought it would give it away. I'm excited to be able to share it now. Since her Disney likes were diverse I had quite a few good options. I was drawn to the mention that she and her husband got engaged on Pirates of the Caribbean. I'd really love to hear the details on that story, and I thought a quilt about Pirates would be fun. I put the idea in my top 3 and started looking for visual inspiration. I was looking at the minimalist Disney posters and I ran across this one.
from http://thedisneyblog.com
I decided this was it! But like me, Megan doesn't like muddy colors and I didn't want to do a quilt that was 99% brown. So, I decided to work in a palette of "bright and happy fabrics" with polka dots, and using blues and/or greens (her favorite colors). I kept bouncing my ideas off my sister and a friend to make sure that I wasn't too crazy. The group of us decided it was just crazy enough and I plugged along, hoping Megan would love it. I altered the keyring to have a heart as a symbol of their engagement. I really had a great time making this quilt. Thanks for all the inspiration, Megan!
It is, indeed, minimalist in nature. The background is pieced strips and there are two pieces appliqued on top. I used raw edge applique since it's a mini/wall hanging. It was awesome how fast that process is compared to turned edge applique. I quilted in the ditch on the background (using free motion quilting) and around the edges of the appliqued pieces. The quilt measures about 13" by 18".
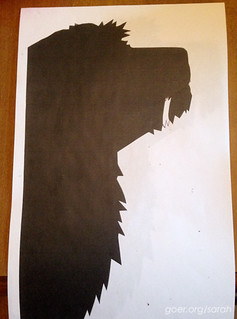
I made a quick trip to the copy shop to enlarge my dog pattern to legal sized.I altered the key ring to make it heart shaped after it was enlarged.The finished mini: 13" x 18"
I knocked one of my three current quilting projects into the finish column last week. Here's the full report on Basic Shapes, my IG (instagram) Mini Swap quilt. It has made it's way to Becky, so I can finally tell you all about it. This project was a lot of firsts for me.
first quilt swap
first IG swap
first medallion style quilt
first flying geese
first time using Rita Hutchens' tubular strip piecing method
first frankenbatting
first time quilting using aurifil (I have been piecing with it)
first time using 1 3/4" binding strips
I loved watching the progress in the IG community. It was so inspiring (and at times intimidating) to see all the beautiful work being done by the hundreds of other quilters participating. I'm hooked, seriously. I've already signed up for two three more IG swaps (the Schnitzel and Boo Mini Quilt Swap: round 3, as a late addition to be a swap angel in the Disney 2015 swap, and to the new rainbow mini swap).
Then my 2.5-year-old helper had to take a picture... apparently we had different understandings of what "Do you want to help Mama take some pictures of her quilt?" meant.
A little on my process:
I had a hard time making a plan for my quilt and decided to start with doing something I had never done. I chose a blue fabric to make some flying geese. I also made some with orange. I made the flying geese using Rita Hutchens' Totally Tubular Strip Piecing after seeing her speak at a guild meeting. Halfway in, I decided to alternate the blue and orange geese. They aren't perfect, but I'm pretty happy with them. I'll definitely be doing more of Rita's magical tube piecing. I loved the geometry of the process.
I decided the flying geese would be a fun first border on a medallion style quilt, so I found a 9" star block to use in my center, pleased that the math worked out and I had 32 geese, with a total length of 36". I got stuck there for a while. There were 120 pieces in that 14" square. I kinda didn't know what to do next.
I decided to do the thin green border as a rest from the busy center. Then having used the green, I wanted to avoid it in the final border. I was worried that the last two borders were too simple, but I think with so much detail in the middle it worked out very nicely. In the end, the quilt finished at about 18" square. I'm looking forward to another medallion style quilt. Maybe by myself, or I'd love to do one round robin style with a group.
(I guess I thought the blue side was the top when I was working... it ended up on the bottom corner.)My frankenbatting. It was remarkably easy to piece together with a 3-step zigzag stitch.
I had a great time quilting it. It's the most dense quilting I've done. I worked without marking my lines (cause I think I just don't have the patience for that) and I really felt like I was in control. It was the first time I've quilted with Aurifil thread and I am so pleased! It was so smooth and I had zero thread breaks while I worked. This is amazing compared to normal for me. I'm sold on Aurifil and just picked up some red thread for quilting the mystery quilt. (I see a collection of Aurifil in my future... I'm eyeing the Aurifil color card.)
I attach my binding by machine, and usually use a 2" width, but I've found that it's a little wider than I want it to be, and the stitching visible on the back is 1/8" from the edge of the binding. I tried the 1 3/4" width on this project and it was a little tight, some places the stitching on the back is on the edge of the binding, but I was overall pleased. I added corners at the top for hanging.
I haven't yet received my mini quilt from the swap, but there is so much amazing work being done by all the swappers. Check out #igminiswap on Instagram.


 I knocked one of my


