Tag Archives: improv blocks

17 Comments

It's about time that I start sharing about what I made at QuiltCon. I'm no longer exhausted just thinking about the whirlwind that was my first QuiltCon experience. I'm working on some other deadline sewing and just itching to get back to playing with my newest projects that were started at QuiltCon.
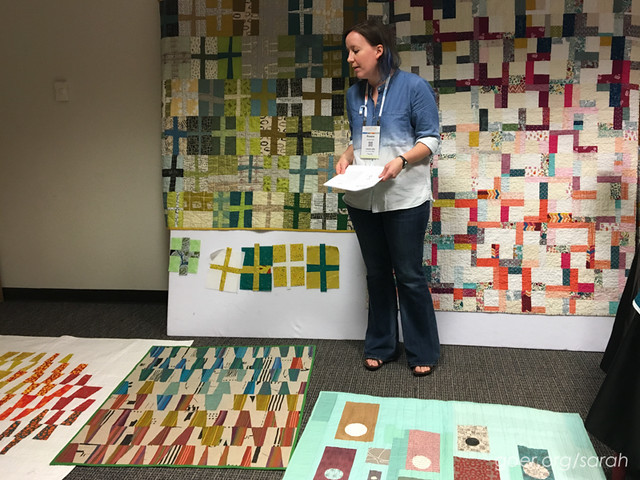
I dove in with a 6-hour class on Thursday, Intermediate Improv: Crosses, Cabins and Colors with Rossie Hutchinson. I had the pleasure of being in class with a couple of my guildmates, which was great since I only joined the Silicon Valley Modern Quilt Guild chapter in October and I'm still getting to know people. Rossie was delightful. She packed in a great amount of content with the perfect balance of instruction time and sewing time. In the first three hours of the class she taught her techniques for improv crosses, liberated log cabins and quartered log cabins, giving us time to complete at least one of each of these blocks. The afternoon included additional sewing time and instruction on color palettes and composition within a project, as well as details about combining odd-sized and irregular blocks to put it all together. Everything Rossie had to say was invaluable. She was also a lovely person and an entertaining speaker. I would take any class she taught in the future!

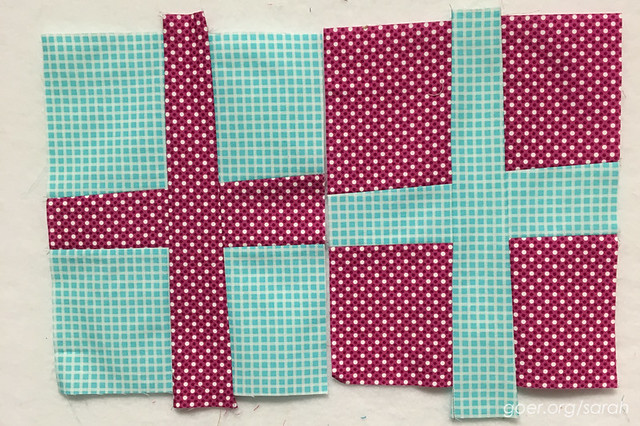
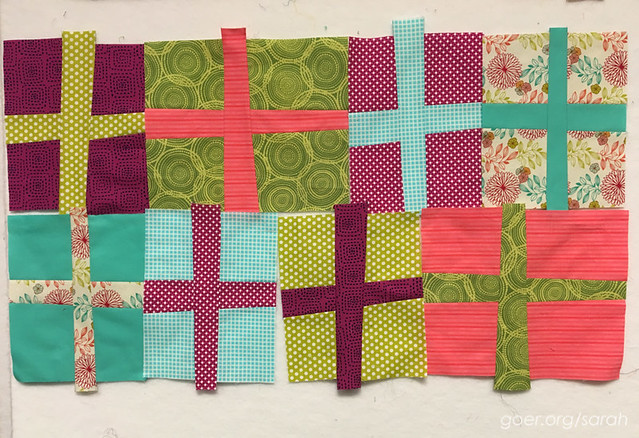
We started with the crosses. They go together quickly and only require choosing two fabrics  at a time (that contrast in color or value) as the blocks are constructed in pairs. I opted for 11" tall blocks, which will be pieced into rows in the final project. This was the project that I spent most of my extra sewing time working on. It was rewarding to see the pile of blocks add up so quickly. My fabric pull for this block was centered around the multi-color floral print you see in the second photo below. The majority of my stash is blenders, so I started with the floral to set my palette and chose my other fabrics from there, looking for a range of values and multiple fabrics in each of the colors.
The second block we worked on felt most challenging to me. A liberated log cabin has so many options. I consider the block I made incomplete, both because I don't like the pink as the final border and because I'd want to work with larger sized blocks, but this isn't a project I intend to pursue right now. I loved Rossie's sample for this block, but I think I'd do better with this type of project at home where I could spread out in my sewing room and work on multiple blocks at once. I think the benefit of working on multiple blocks at once would be seeing what patterns emerge. I didn't really have a plan as I worked on this block. You see I chose to work with a different palette (since I couldn't decide on just one for the class, I brought two), chosen around the Cotton & Steel Viewfinders fabric, and already in my incomplete block I've used 6 different fabrics. The other benefit of working on multiple blocks at once would be using the extra bits from one block in the construction of the other block, which I think would allow for some cohesion from the beginning. I didn't dislike this block technique. I just liked the other two better. I think this block is destined for my orphan block box for the time being. :-)

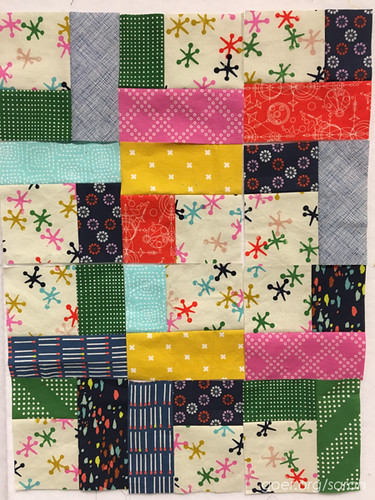
Our third block for class was the quartered log cabin. After the unlimited options of the liberated log cabin block, I liked moving on to this one since it required using only five fabrics per block. The construction was also relatively simple and fast. (Read Rossie's post with her tutorial on the Quartered Log Cabins.) I opted to use the same Cotton & Steel Jacks fabric for all my center squares. I made three blocks, that were then cut in quarters to make these twelve units, so I would have enough pieces to play with composition a bit. I'll definitely continue to work on this one. Here's what I've got so far from class.
One of my favorite take aways from this class was Rossie's perspective of "what can you add to it to fix it?" with regard to color. There was also an informal discussion in class about what we stash and cutting loose fabrics we don't love. I added, "you'll never use a fabric you don't love to try to fix something that you're trying to love." As I mentioned above, I mostly stash blenders. That's simply because that's what I'm drawn to in the shop and they are so easy for me to use. I've worked on my stash over the last year and there are two big things that have helped me. My first tip is: Have it all visible. (You can see most of mine in this post.) You can't use what you don't know you have. Also, it's easy to see what your gaps are. My second tip is: Purge what you don't love anymore. You may have loved it before, but if you don't now, get rid of it. I have used some up making quick gifts. I've given some to friends. I've donated some. You could also sell it or trade with friends.

Interested in more about how Rossie designs with color? Here's her blog post about her participation as this month's Mighty Lucky Quilting Club instructor.


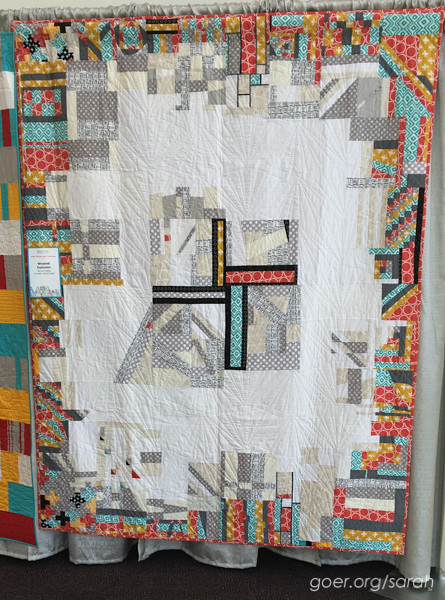
I wanted to take an opportunity in each of my class posts to share some of the quilts I enjoyed at QuiltCon. This first one is Windmill Explosion and is the Silicon Valley Modern Quilt Guild charity quilt that I contributed to. It was so much fun to see the amazing variety of quilts on display for the charity quilt challenge. I didn't take nearly enough pictures of all of them.
 

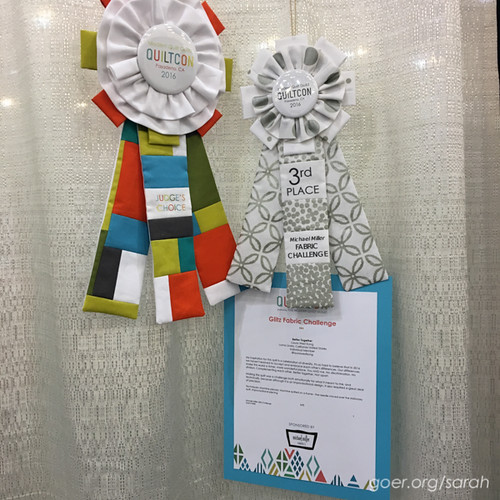
This next one was in the show in the Michael Miller Glitz Fabric Challenge division. The quilt is called Better Together and was made by Laura West Kong. It won two beautiful ribbons, 3rd place in the division and Judge's Choice. I have been drawn to ampersands lately, as my 5-year-old son is really excited about them. I love the composition in this quilt with the use of dark and light, and the bright colors in the ampersand. The combination of improv technique with careful planning is amazing. I loved Laura's message as well. The artist statement reads:

My inspiration for this quilt is a celebration of diversity. It's so hard to believe that in 2016 we haven't learned to accept and embrace each other's differences. Our differences make this world a richer, more wonderful place. You AND me. No discrimination. No division. Complementing each other. Better together. Not apart.

Making this quilt was a challenge both emotionally for what it meant to me, and technically, because although it's an improvisational design, it also required a great deal of precision.
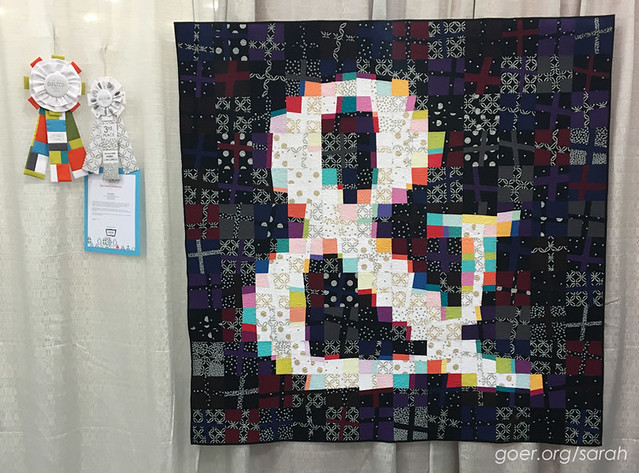
And because those ribbons are such amazing works of art themselves, a closeup of them.
 

Giveaway *closed*
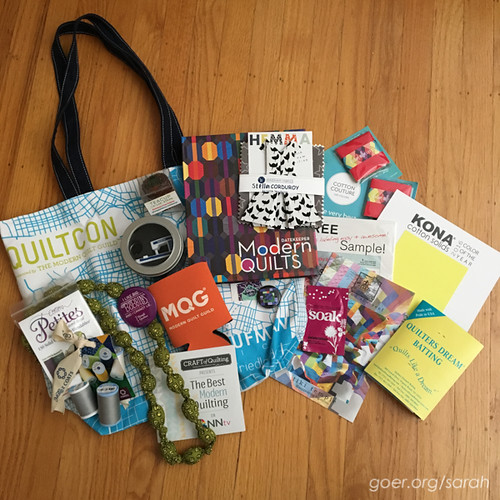
I'm sharing some of my goodies from QuiltCon with one of you. I'll draw one winner on March 24th at 1pm PST out of all entries on my five posts about my QuiltCon classes. (This is the first of the five posts.) The drawing is open to everyone. To enter, please comment below and tell me if you've tried improv and what your favorite improv block/style is. Followers can get a second entry by posting a second comment to tell me how you follow me (Bloglovin', Instagram, etc.). Thank you! Thank you to everyone who entered. The winner is Anja of Anja Quilts!


12 Comments

Here's the Q4 bee block report. I've chosen to only continue with The Bee Hive and do. Good Stitches moving forward, but I'll continue with the quarterly reports. I also share the blocks as I finish them on Instagram, if you aren't already following me there. :-)

October

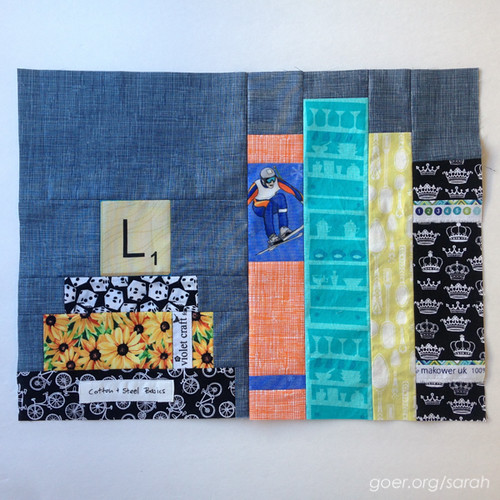
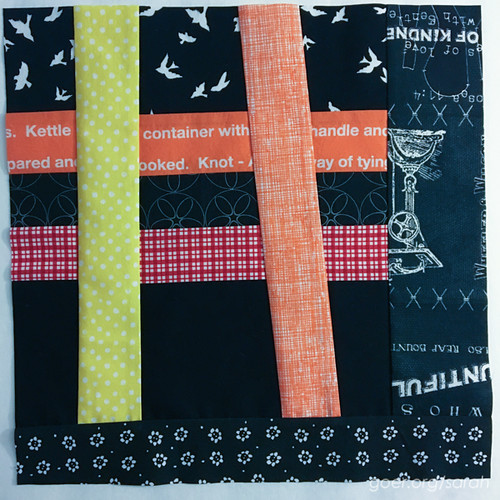
Stash Bee: Lyssa asked us to make 16.5" x 12.5" bookshelf blocks for her. In her post she shared some of her interests which I had a great time incorporating into her block. She told us, "In addition to sewing, I love gardening, baking, hiking, skiing, biking, reading, playing board games, gnomes, the beach, collecting dishes, traveling, waterskiing, and hosting dinner parties."

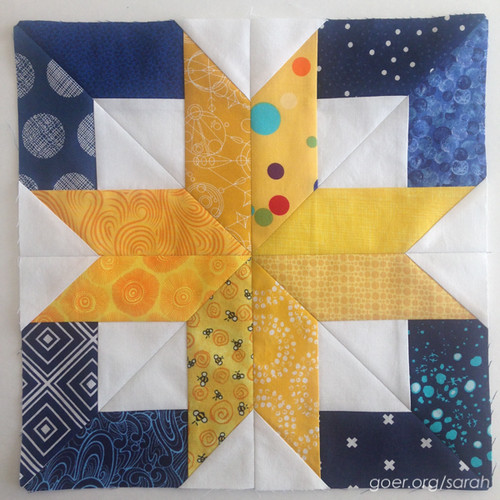
The Bee Hive: We made the paper-pieced Star Plus block for Laura. Yellow and navy is a great classic combination and I'm sure the finished quilt will be stunning.

do. Good Stitches: In October we made these Mosaic blocks by Patchwork Square for Diane. I love the fun scrappy look of these charm friendly blocks.


November

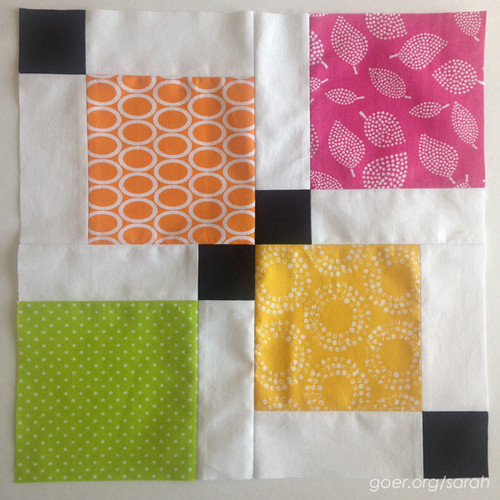
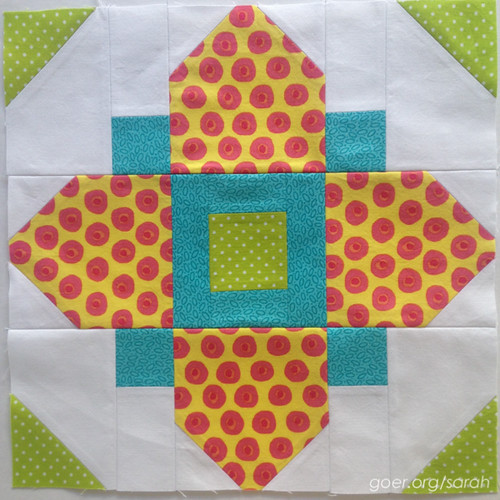
Stash Bee: For our last block of the year Bev chose the Quatrefoil block (which is actually a Bee Hive tutorial). Her colors were aqua, pink, lime green, orange, yellow and red which gave us a lot to chose from. I immediately gravitated to the yellow and pink print in my stash which I had yet to use. Since that one was a little wild, I think it paired nicely with the lime green and aqua blenders I used in the other positions.

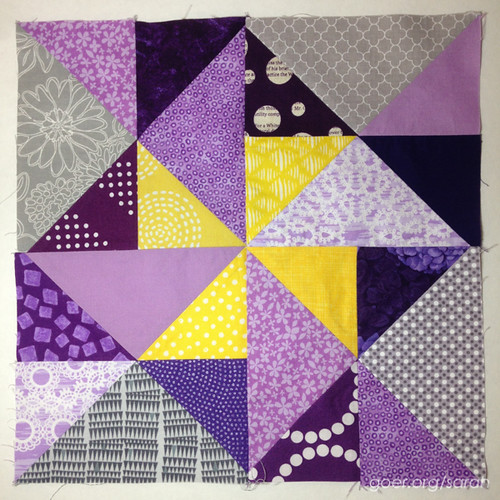
The Bee Hive: Our November block was purple, yellow and grey Spinwheel blocks for Amanda. I love the pop of yellow, and I'm always excited to be working with purple!

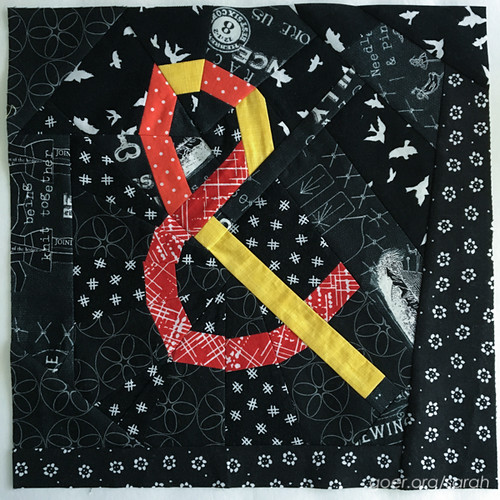
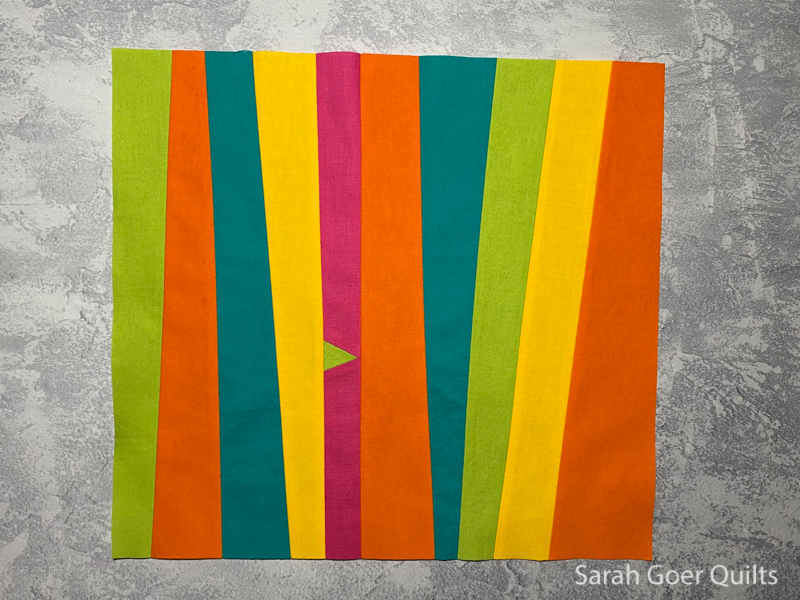
do. Good Stitches: Ailish challenged us with some improv piecing this month. The theme was symbols: "anything from plus signs, Xs, asterisks, pound signs etc." And we were asked to use bright fabrics in red, orange yellow or green with a black background. I knew immediately that I wanted to make an ampersand. I quickly got my first block done. Improv hashtags are fast! But it took me quite a while to complete my ampersand. Overall I'm quite happy with it. Though I'm not sure I'd try one again! I used eight fabrics for a total of 61 pieces to make the ampersand block. I used darting, y-seams and hand piecing (for two tricky seams). I lost count the number of times I had to rip out seams and the total time spent on the block (many episodes of Once Upon a Time, thank you Netflix).


December

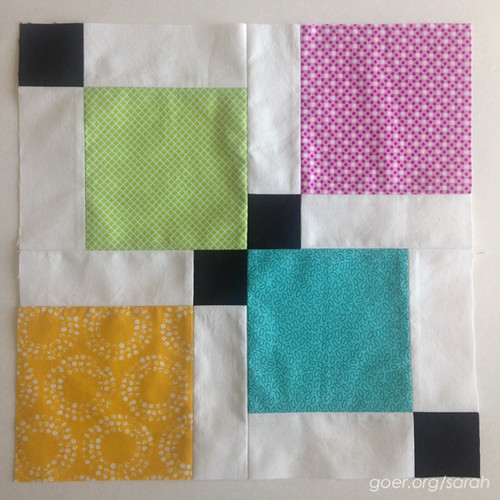
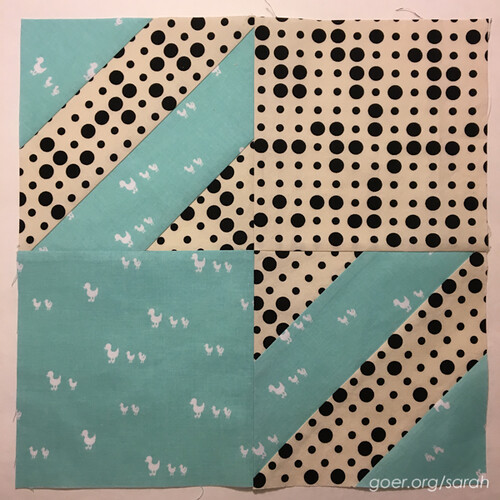
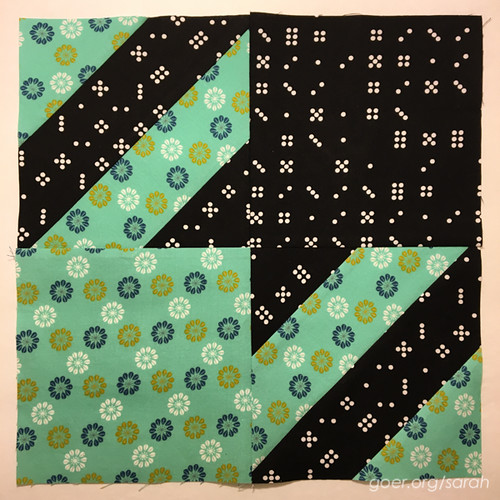
The Bee Hive: In December, Tisha chose for us to make the Houndstooth block. She picked a variety of solid colors as our inspiration and wanted our choice to be paired with a black and white print. I chose to go with the turquoise color. These blocks went together super quicky. The striped sections are paper pieced and they are easy to chain piece since they are just rectangular strips of fabric to start with. (The tutorial gives instructions for cutting these strips before piecing, which I appreciated.) A great big thank you to Tisha for running our hive this year! Next month is our last month for the 2015 bee and finally my month to be queen, but I'll be continuing for 2016 with The Bee Hive.


The rest of my 2015 bee blocks can be found in these previous posts: January, February, March, Q2, Q3.

Thanks for visiting! I'd love to hear if you've joined a bee for the first time 2016.

I'm linking up to Let's Bee Social.

22 Comments

Sometimes life gets in the way of our plans and goals. I took six weeks off of blogging from mid-October to the end of November. It was unintentional. When I got close to posting again I was surprised it had been that long. I'd been sewing. But something had had to give. And blogging was one of the somethings.

Today is my Dad's birthday. Two years ago, on his birthday he was diagnosed with cancer. He would have been 66 today, but he lost his battle with cancer on October 27th of this year.

The past two years have been very hard emotionally. Many hours have been spent discussing death, dying, and cancer with my now 3 1/2 and 5 1/2 year old children. That is an exhausting task. I feared how I would help my small children through their first experience with death and with the loss of their grandfather.

His health was a roller coaster, up and down over the last year and a half of his life. In the bad times, I watched him in pain, physically and emotionally. In the good times, he was back on his bicycle, where he loved to be.

I found out about the cancer diagnosis right about when I was working to launch my blog. The news shocked me and delayed my blogging plans. My first post featured a quilt I made for my dad when I found out about the cancer. It was what I could do. At a time that I couldn't even talk to my siblings about it because they didn't know yet. I could throw myself into quilting and make something for him. That's one of the things that quilting does for me. It provides comfort in times that are hard. While the quilt was given to Dad, that quilt was more for me that it was for him.


This project is the first project that I started after my dad passed away. An improv quilt had been on my bucket list, but I wasn't intending to start anything new before the new year. Somehow in that lost space of having lost my father, I did what I knew would comfort me. I started a new quilt. I cut out fabric. And I did it without a ruler. It was liberating. It gave me a place to spend time thinking of him while I worked on this project. It's healthy to grieve. But I think it's also healthy to not let grieving overwhelm you. As life went back to normal in the sense of my day-to-day routines, this project gives me a break from the routine. I don't know when I will finish it, but as I work on it I will be reminded of him. And again, this quilt is for me. I hope the process of making it gives me the space to process all the feelings I'm having. I hope that once this quilt is done I will be able to look back and think that things are somehow just a little bit easier. Right now things are still feeling very hard.

I haven't really done a lot of improv, mostly just a few bee blocks. And when I "improv" I usually still use a ruler and 90 degree angles. This project was born from my own set of adaptations to Sherri Lynn Wood's Floating Squares score, from her book The Improv Handbook for Modern Quilters. I really enjoyed hearing her speak months ago and bought the book when it came out. As a perfectionist, rule-follower I really appreciate that her improv has some guidelines. In practice, I am enjoying it all just going together, without the picky worry of perfect points or perfect seam allowances. I guess the true test will be how much I love it when it's done.

I know Sherri presses her seams any which way... I was struck by the slide she showed us of the back of one of her projects. As a press-seams-open-er I thought it was complete madness. You can see here that I tried desperately to stick with pressing seams open. That middle seams was just wonky enough for that to not be happening there. I've darted in a couple places and I've pressed seams how the fabric wants them to be pressed. I can definitely see how important this flexibility would be in a project that had more curved piecing. I'm already seeing that the longer my seams get the more likely something is a bit amiss.

For those of you who are familiar with Floating Squares, one of the adaptations I've made was how many different fabrics I'm using. Seven. While I love the look of the basic three fabric versions, I wanted to work from my stash, and the larger cuts of fabric just weren't speaking to me so a number of my chosen fabrics are from half yard cuts. I have a vague notion that I'm working in three zones; these are parts of zone one.

I'm a bit of a blender addict. I don't buy much in the way of multicolored prints, and when I do, I find it hard to use them. I decided to use the stripe fabric as my filler fabric, and cut my squares from the blenders and bicycle print. I'm trying not to overthink the selection of pieces to put together and I'm enjoying the process.

I think one of the challenges of improv is knowing when you're done. In my case, when I run out of fabrics, I think I'll be done. I have no idea how big the quilt will end up being. That feels so weird and backwards. The solid black will be used in another zone of the quilt. Since I want some of my fabrics from the other two zones to cross into the zone with the black, I've started making some units with the black. And true to form, I'll likely jump back and forth between the three zones so I don't get bored. There's a rough vision in my mind. Time will tell if this is going to come out as I'm envisioning it.

Thanks for visiting.