In September, Elizabeth asked us to make an improv beetle. When I told my 16-year-old about the prompt (spoken "beetle" you can't tell the spelling) he asked if I was going to make John or Ringo. Haha.
Elizabeth's prompt asked us to make one large or two small beetle blocks, floating in a green (e.g. Kona Green Tea, Pear, Sour Apple, Kiwi, Clover, Pesto, etc.) background. Our feature colors were: black (required), dark pink (e.g. Kona Pomegranate), red-orange (e.g. Kona Chili), dark-ish yellow (e.g. Kona Grellow), and deep turquoise (e.g. Kona Oasis). I used them all with Kona Pear as my background.
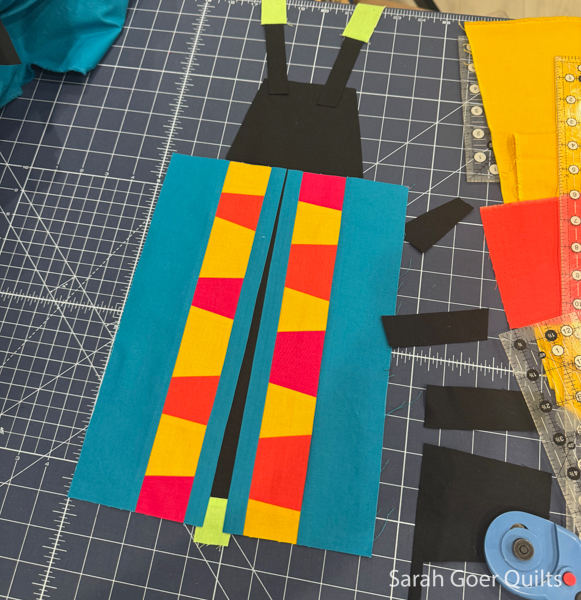
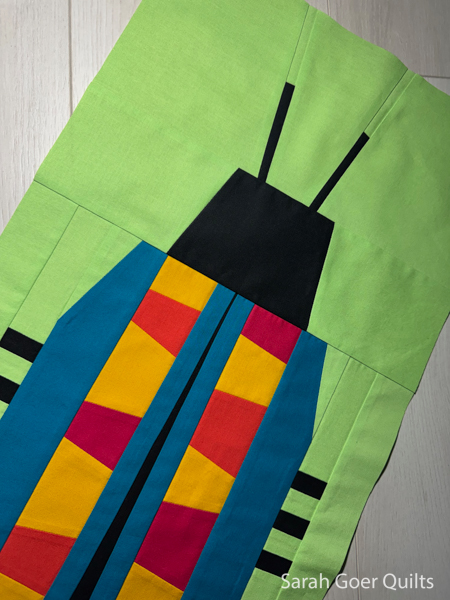
I only took this one process photo, so I'll explain my process. I decided to use Pomegranate, Grellow, and Chili as feature colors in the beetle and pieces a wedge strip alternating pink, yellow, orange, yellow, etc. This strip ended up being about 4" wide and I cut it in half vertically. I initially thought I might piece blue onto both sides and then make horizontal slices to shift the sections horizontally and sew back together. But when I cut my wedge strip into two pieces I realized it was interesting to me to have the two sections vertically shifted in relation to each other. (Maybe you can imagine that if you shifted up the strip on the right the wedges would match up in the two strips.) So I decided to piece these strips as is to Oasis background. I made the wings of the beetle slightly separated by cutting a long skinny wedge of black that was just over 1/2" wide at the top and about 1" wide at the bottom. I pieced on a little piece of the green background to show that the body under the wings was slightly smaller than the wings. All the while I was mindful that I needed to fit my beetle into a 12" finished width with at least one inch of background on either side (per the prompt). This resulted in me trimming down the inner blur strips before attaching to my black/green wedge. I knew I would change the outer shape of the wings which would make the overall beetle narrower. And I decided on very small legs, eventually choosing 1" x 1/2" finished black legs. At the stage above I was still considering size and placement and my black scraps were used to audition options. In the photo above you can also see that I cut the head out of block and cut long black antennae, pieced on to green background at the top.
Beyond the above photo I decided to trim the outer blue strips narrower and to cut off triangles on each corner symmetrically. I cut a triangle off one corner and then flipped it over to use as the template to cut off the corner on the other side, repeating this process for the upper and lower pairs. Then I pieced three legs for each side into green background and added those strips and additional background to the body portion, then I put my three sections of beetle (antennae, head, body) together and added extra background at the bottom.
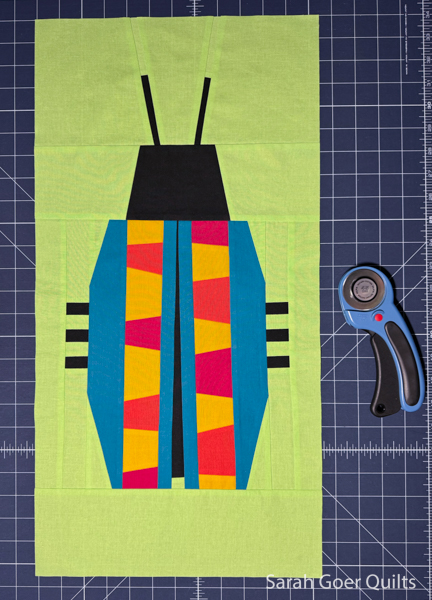
My finished block is a whopping 12 1/2" x 24 1/2".
I've seen just a couple other blocks from folks in the bee and look forward to seeing all of them together.