Tutorial

Welcome to my stop on Tutorial Week with Finish-a-Long. I'm sharing my process for using scraps to create pumpkin blocks.


Grab your orange (or yellow or white or whatever color you want your pumpkins to be) scraps. Depending on the size of your scraps and the size of your desired pumpkins you can use your scraps as is (which I've done with my single fabric pumpkins) or you can piece together your smaller scraps to form a scrappy slab (as shown in the large pumpkin) before constructing your pumpkin. You'll also want fabric for a stem and a contrasting background fabric.

Pumpkins come in a variety of sizes and shapes. Cut the largest rectangle (can be square or not) from your orange fabric.

Background is attached to the pumpkin by adding snowball corners to each corner. To determine the size of these background triangles I recommend cutting squares that are 1/5 to 1/3 the length of your pumpkin's shortest side. Make these calculations using finished dimensions. For example, for my 5" x 6" orange rectangle, subtract 1/2" in each dimension for finished size: 4 1/2" x 5 1/2". Next, calculate 1/3, 1/4, or 1/5 of the shortest length, in this case 4 1/2".

1/3 of 4 1/2" (4.5 divided by 3) is 1.5" or 1 1/2"

1/4 of 4 1/2" (4.5 divided by 4) is 1.125" or 1 1/8"

1/5 of 4 1/2" (4.5 divided by 5) is 0.9"

There isn't anything super precise about the choice you make here. The range of these calculations in this example is roughly 1" to 1 1/2". You can round to the nearest 1/4" for friendlier measurements. Then add 1/2" to your choice to get the dimensions of the unfinished square. Cut 4 squares in these dimensions. I used 1" finished (since it is between 0.9 and 1.125), so I cut four 1 1/2" squares for my corners on this pumpkin.

Use your preferred marking tool to mark the diagonal on the back of each of your four background squares, align pumpkin and background fabrics right sides together and sew on the marked diagonal line.

Trim 1/4" from stitching line and press open. (Tip: if you are working with larger pieces, you can sew a second line of stitching 1/2" from the first so that the remnant you trim off is a finished HST as shown in this previous tutorial.)

The simplest stem option is to include a rectangle of brown fabric on the top edge of the pumpkin. (You can experiment with different shaped stems and even add leaves!) For my stems I cut a brown rectangle the same width as the background square above and 1/2" taller. In this case I cut a 1 1/2" x 2" brown rectangle and two 2" strips of background each approximately half the width of the pumpkin. Piece the strip with two background pieces and one stem piece, trim to same width as pumpkin, and attach. You can center the stem on the pumpkin by folding each part to find the centers and align to attach the stem. I just eyeballed it since in nature the stems aren't necessarily perfectly centered.

Add background fabric to bring up to your desired block or mini quilt size.
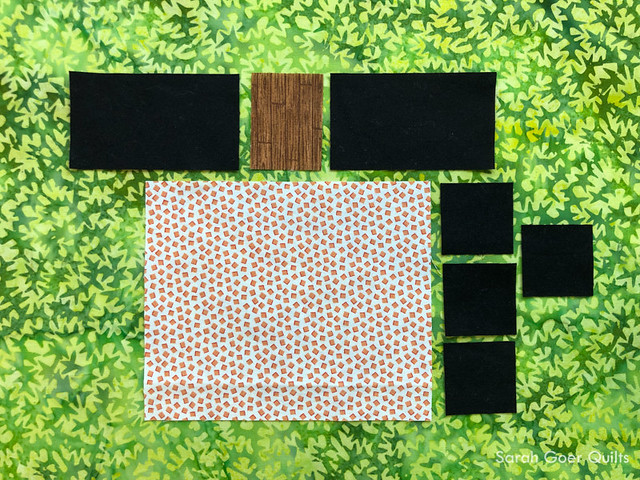
Here's a glimpse of all the pieces (except for background strips).


Bet ya can't make just one!
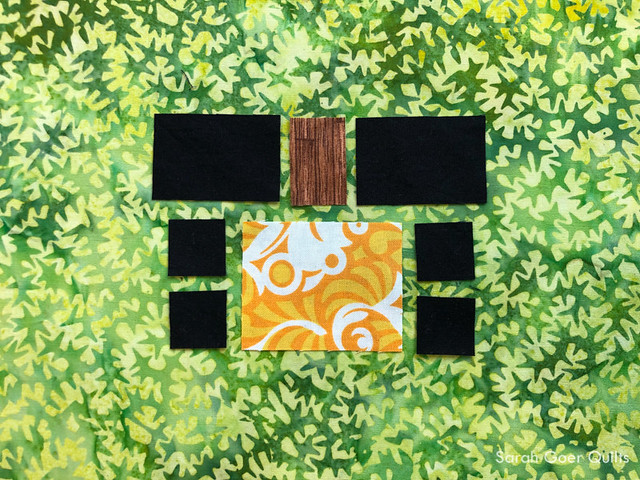
This mini pumpkin is made from a 2" x 2 1/2" scrap of orange fabric, with 1 3/8" corner squares. The stem is 1 3/8" x 1 7/8".


This Scrappy Slab version is made from a 6 3/4" x 7 3/4" scrap of orange fabric, with 1 3/4" corner squares. The stem is 1 3/4" x 2 1/4". You can find all my tips for making your own Scrappy Slab in my on-demand class.

Happy Sewing!

14 Comments

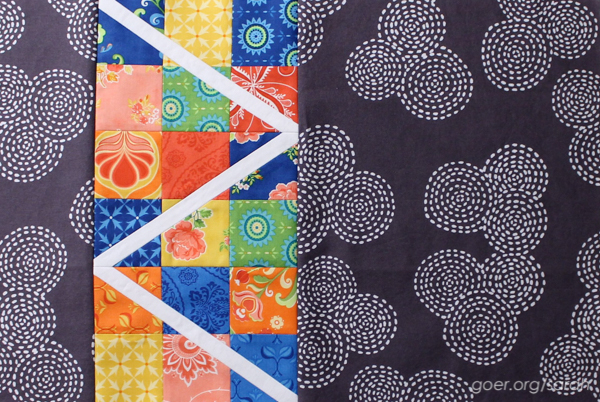
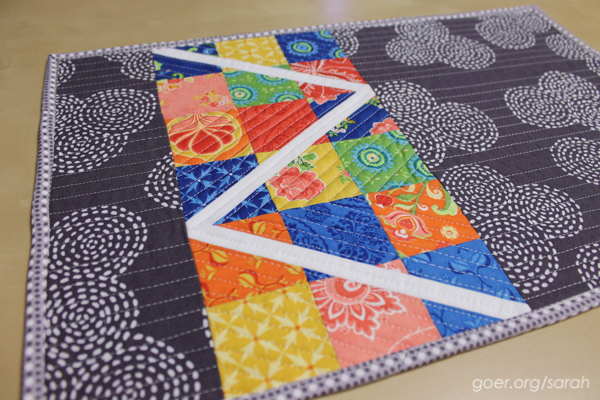
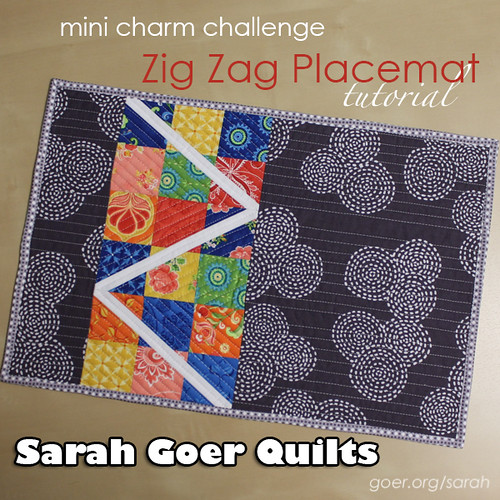
I'm participating in the Mini Charm Challenge, organized by Kylie (@sewkylie on Instagram). Welcome to my tutorial for the Zig Zag Placemat.

Materials (for one placemat)

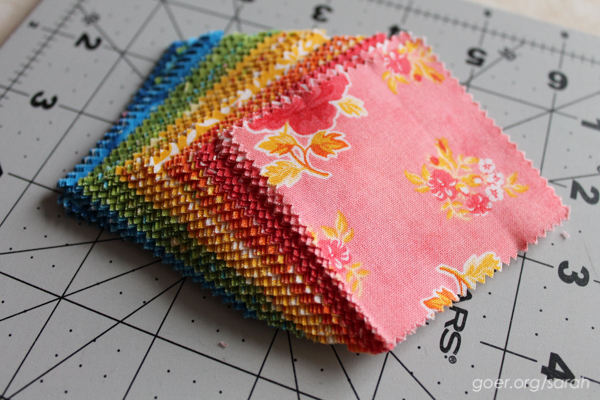
  • 18 - 2 1/2" squares from a mini charm pack (or cut your own!)
  • 3" x 8" contrasting fabric (white shown)
  • fat quarter of coordinating front fabric (grey/white round stitch shown)
  • fat quarter of backing fabric
  • 14" x 20" piece of batting
  • 62" finished binding (be sure to make a little extra)

For this project I used Fancy by Lily Ashbury for Moda. All of my seams are stitched with a shorter stitch length and 1/4" seam allowance. Seams are pressed open.

Cutting Instructions

Step 1: Cut your contrasting fabric into three 1" x 8" strips.

Step 2: Cut your front coordinating fabric into two pieces, 3 1/2" x 12 1/2" and 9 1/2" x 12 1/2".

Step 3: Cut backing fabric and batting 14" x 20".


Sewing Instructions

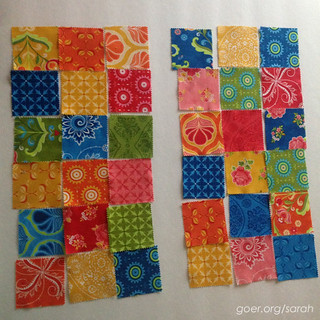
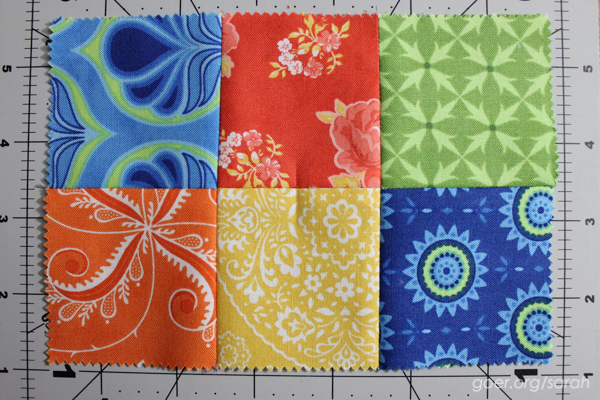
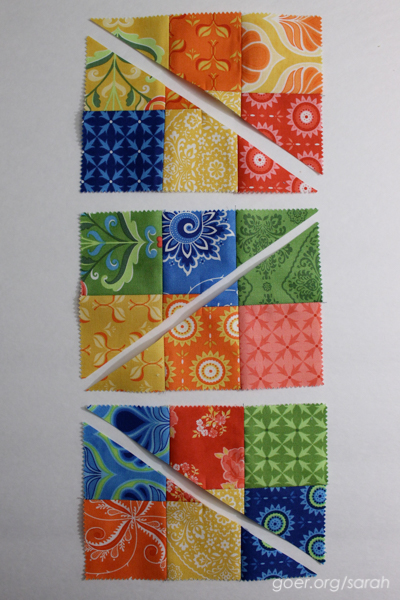
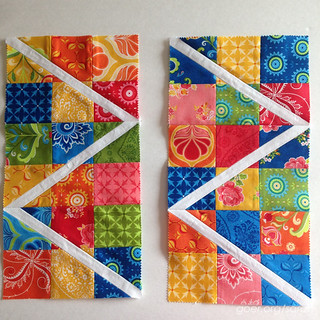
Step 1: Choose a layout for your charm squares. Each placemat will use a 3 by 6 array of squares. Here are my layouts for the two placemats I made. The beauty of using a mini charm pack is that everything coordinates perfectly!

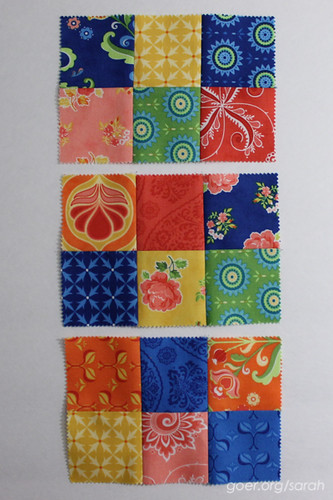
Step 2: Stitch the charm squares into "6-packs" so you have three units per placemat, three squares wide by two squares tall. These units should measure 6 1/2" wide by 4 1/2" tall, unfinished.

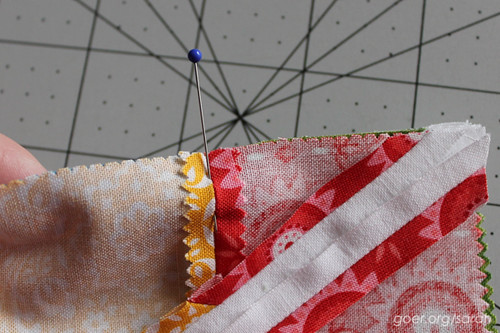
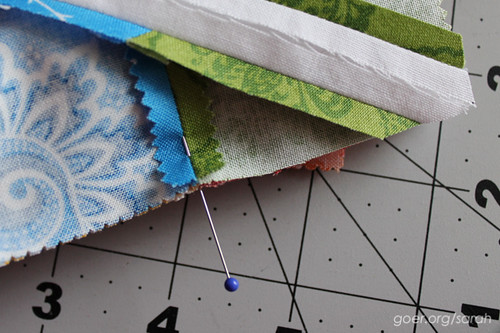
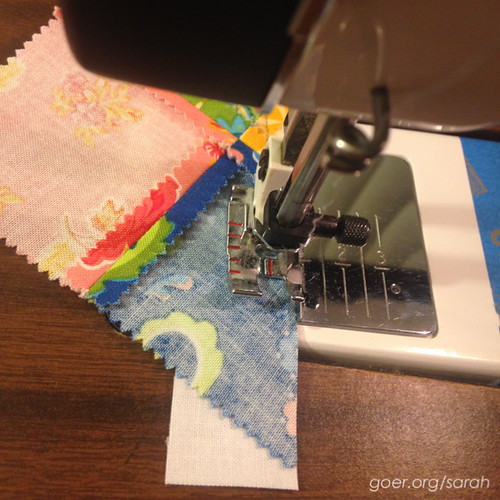
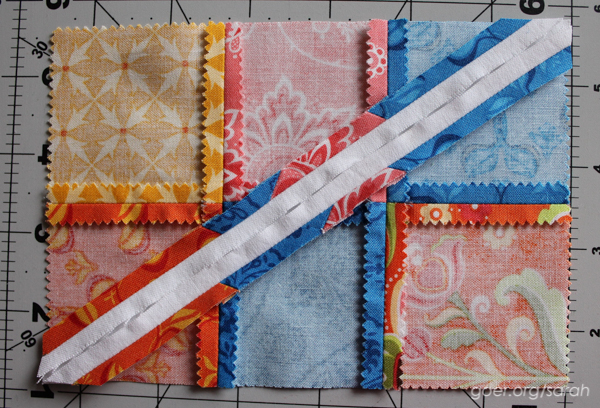
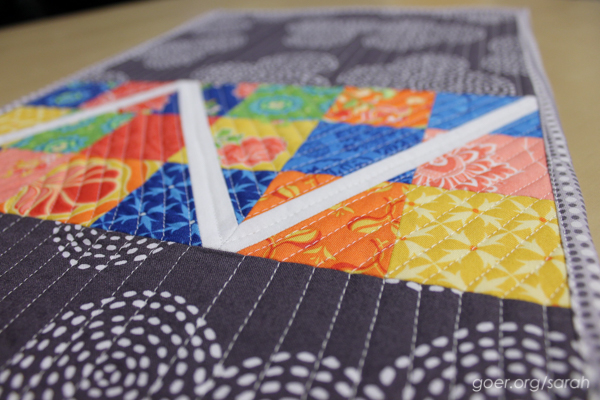
TIP: To get those seams lined up as perfectly as possible, I press my seams open, and then use a straight pin right through the seams in both layers. Here, you can see what that looks like from the top and bottom. (Note: These pictures were taken from a later step in the process, but the idea is the same to build the 6-packs.)

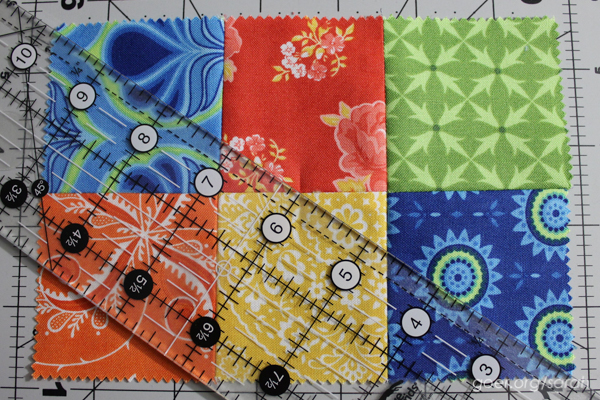
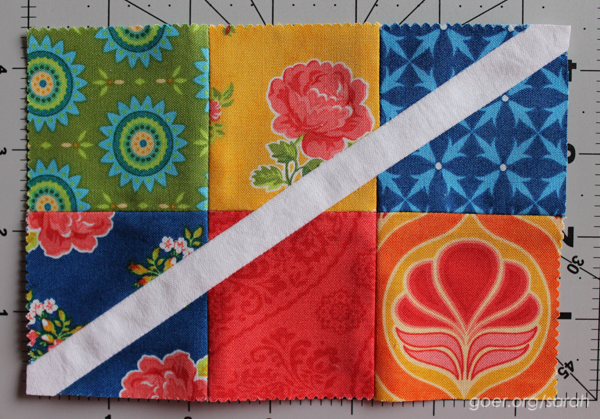
Step 3: Slice the 6-packs in half, corner to corner. You'll need one to go the opposite direction of the other two. I have two going "downhill" and one going "uphill." I started by marking the center of my block by folding a crease into the middle of the center squares. Then I lined up my straight edge from corner to corner (a bit hard with the pinked edges on the charms) and through that center point made by my crease and the seam.

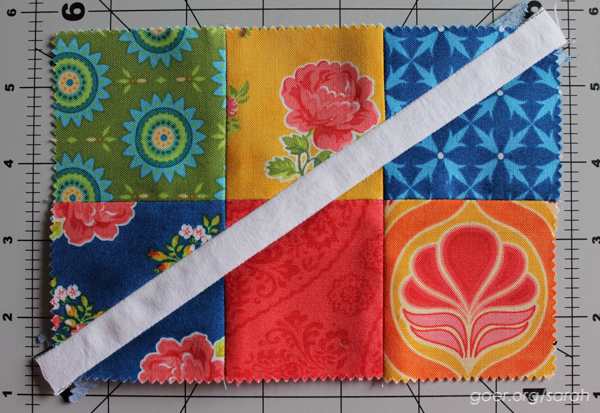
Step 4: Stitch the 1" strips of zig zag fabric into your 6-packs. The 8" long pieces should be just a smidge longer than your diagonal cut edge of your 6-pack. When lining up edges for sewing, the strip should hang past the edge of the 6-pack equally on each end, roughly 1/8" to 3/16". Piece with an accurate 1/4" seam allowance. This will allow this strip to simply replace the seam allowance and the finished unit should remain 6 1/2" x 4 1/2". Viewing the back of your seam you should see the edges of the strip touching each other.

Step 5: Trim each 6-pack down to 6 1/2" x 4 1/2". This should mostly be trimming of the edges of the strip you've just sewn in.

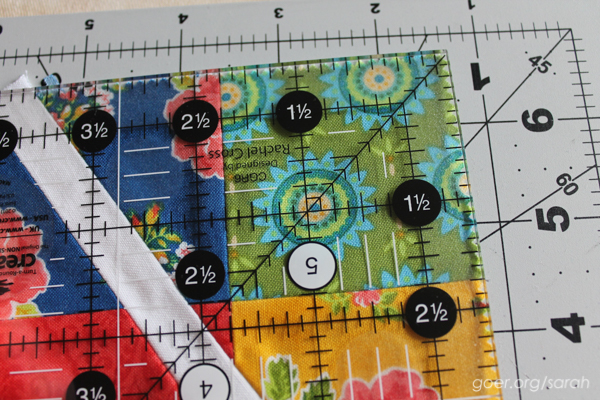
TIP: Since the edges may be hard to line up accurately, use your ruler to line up the corner square's seams at the 2 1/4" mark in both directions.

Step 6: Piece together your three 6-pack units to create the zig zag. Here are my zig zags for two placemats. These units measure 6 1/2" x 12 1/2". Refer back to my tip in step 2 for lining up seams.

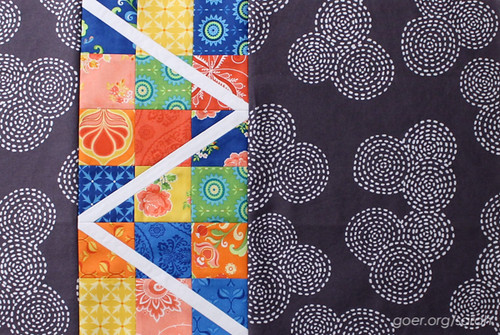
Step 7: Attach the 3 1/2" wide piece to the left of the above unit and the 9 1/2" wide piece to the right. This gives you the full placemat, with an unfinished measurement of 18 1/2" x 12 1/2".

Step 8: Quilt and bind as desired.


Please visit other bloggers in the Mini Charm Challenge:

Sept. 14 - Jennie at Clover and Violet: Curvy Top Pencil Pouch
Sept. 15 - Lisa at Banana Cherie: NaKoa Mini Quilt
Sept. 16 - Me. Thanks for visiting!
Sept. 17 - April at The {Studio} Blog: Mini Charm Baby Bib
Sept. 18 - Nina at Nina with Freckles: Cute as a Button Mini Quilt
Sept. 19 - Konda at Moose on the Porch Quilts: Happy Hexi Flowers Small Quilt
Sept. 20 - Mary at See Mary Quilt: Rainbow Byte Mini Quilt
Sept. 21 - Kylie at Sew Kylie: Patchwork "Sew" Wall Decor


2 Comments

fire trucks with laddersThese may be the second most detailed cookies I've made (second to Rapunzel). I'm mostly happy with them. I think my biggest problem was in not flooding full enough so they caved in a little as they dried. Oh, and that dent from my finger (oops!) on the cab of the bottom truck. Oh, AND how I forgot that I had made regular truck cookies and had it all in my head that I'd baked fire trucks. So yeah, you can totally make a fire truck from your REGULAR truck cutter as well. ;-)

All my icing is flood consistency, 18-20 second icing. I didn't pipe around the borders, but you could. Here's how I did it.

Make white windows on the cab of the truck.
Make black tires.
Make black tires.
Fill the tires with white. (Since it's wet-on-wet you can fill enough to connect to the black.)
Make grey along the bottom edge... I wasn't thrilled with how this came out, I came a little too close to the wheels in some cases -- I think I'd pipe a border for this part before flooding next time.)
Floor red for the body of the truck, getting nice and close to fill in up against the windows (that have hardened up a bit by now).
Flood red for the body of the truck, getting nice and close to fill in up against the windows (that have hardened up a bit by now).
Make ladders on parchment paper or wax paper and allow them to dry overnight.
Peel a ladder carefully off of the wax/parchment paper.
Attach ladders to trucks with a few tiny dots of icing.

Note, I highly suggest that you don't transport these with the ladders attached. I broke a ladder putting them in the box.