Quilting

6 Comments

The products featured in this post were given to me by Island Batik, including products from Hobbs and Aurifil.

My second project as an Island Batik Ambassador was to make a small Valentine for a friend. I opted to make two mug rugs in honor of Galentine’s Day, a celebration of some of my best gal pals.


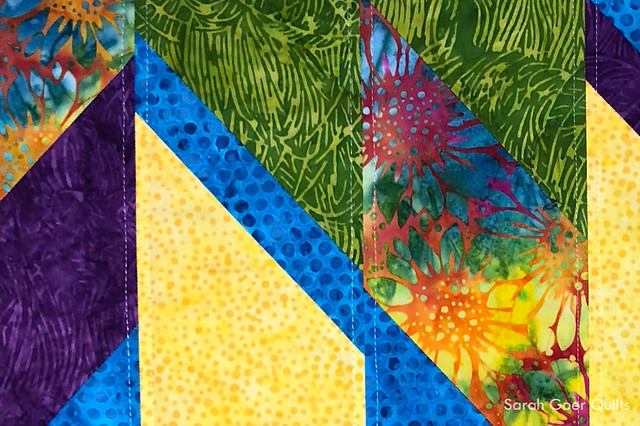
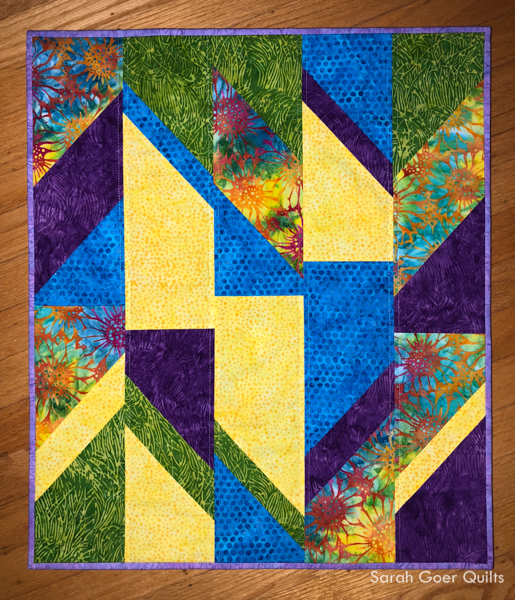
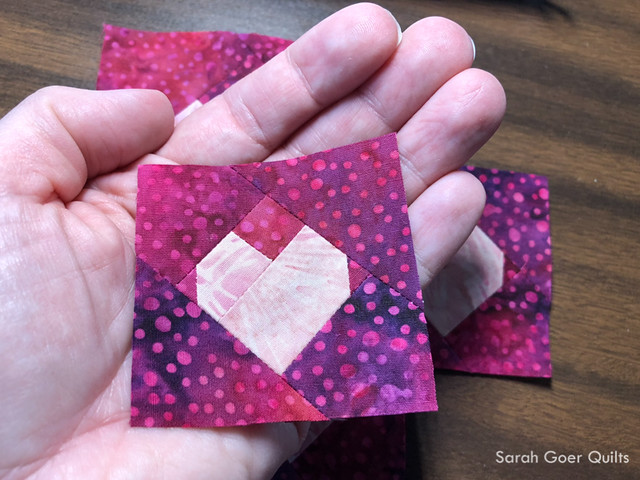
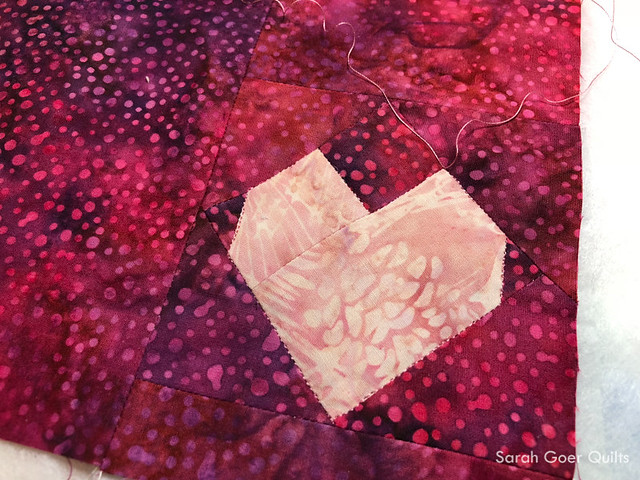
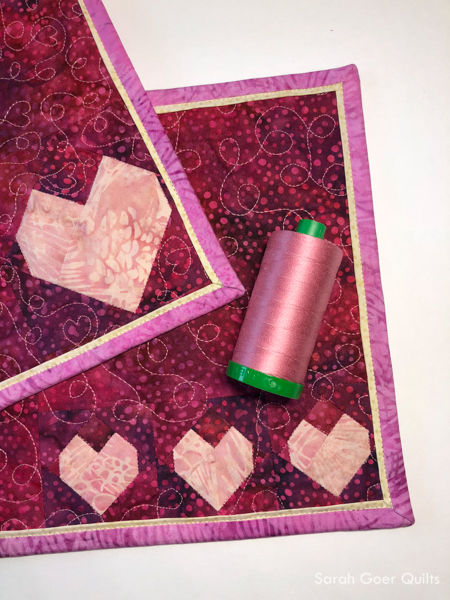
I chose to use four of the fabrics from my Valentine's Island Batik bundle. As soon as I saw the bundle I knew I had to feature the print on the top (which I think is Mixed Berry Mini Dots from the Plum Delicious collection). That's how I chose it for my background fabric. I chose the pale pink for my hearts to contrast the dark tones of the background.

#islandbatikambassador Valentine's Day palette of Island Batiks with purples, pinks, cream, and red

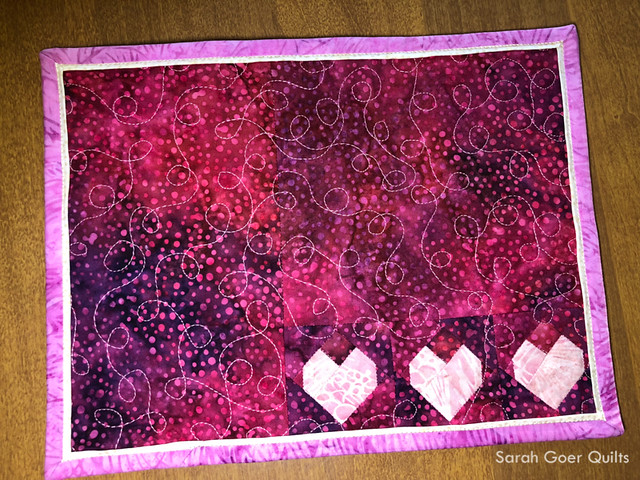
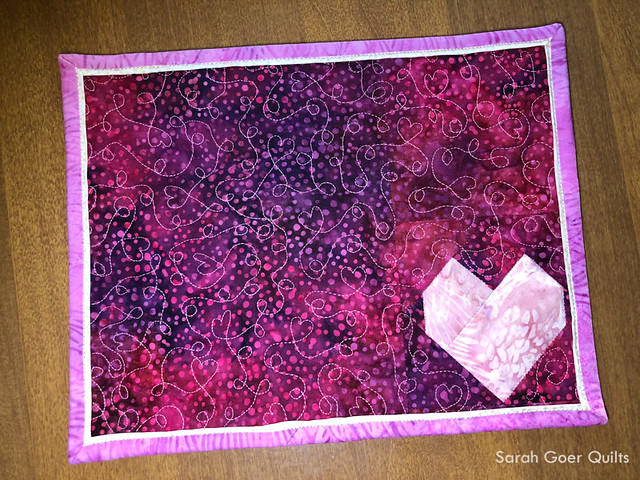
I pieced two sizes of heart blocks. The smaller ones fit in the palm of my hand. I opted for a triple heart in the small size heart blocks for one mug rug and used a single larger heart for the other mug rug. I like the idea of the main design of a mug rug to be on an edge or corner so it can still be enjoyed even with a mug and a snack in place.

#islandbatikambassador #islandbatik tiny pieced heart block

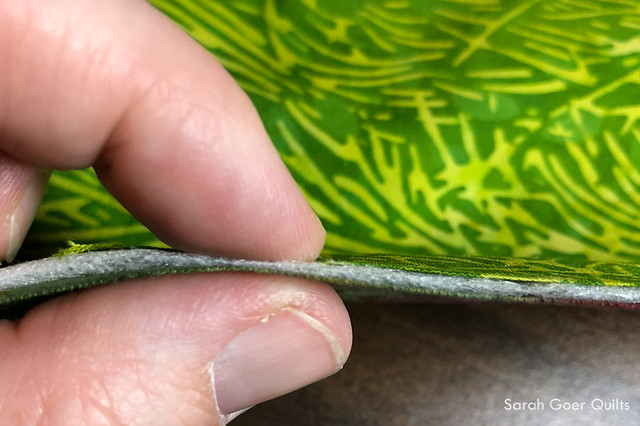
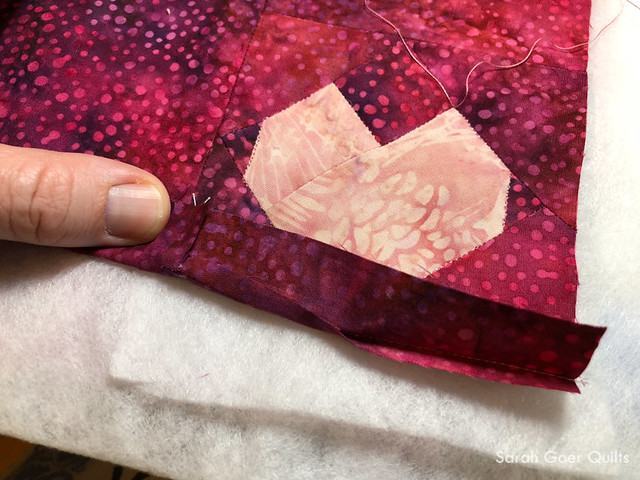
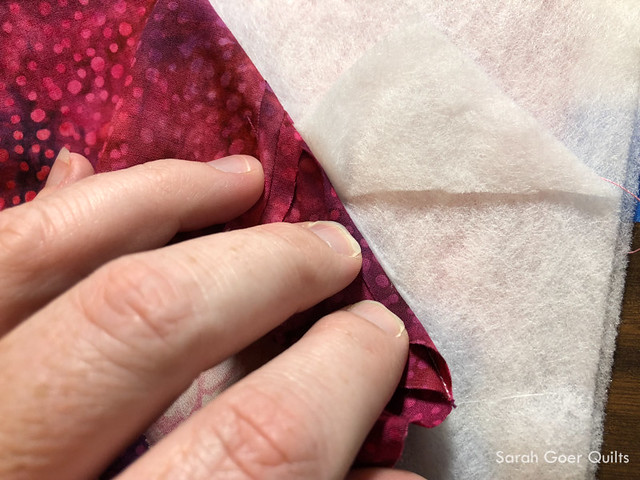
I used the same ultra-thin polyester Thermore Hobbs batting that I used in my last quilt. I'm not sure polyester is the best choice for a mug rug, (anyone have thoughts on that?) but I like the idea that it'll stay flat and not get crinkly when washed. I used one layer of the batting on my triple heart mug rug, and on my single heart mug rug I doubled the batting and added a third layer under the heart. On that quilt, I started the quilting by stitching the perimeter of the heart, then I cut away the third layer of batting as shown below. This gave the heart just a little more puff to it, especially once I added the dense quilting to the background. It's subtle, but I like it.

#islandbatikambassador #mugrug quilting on the perimeter of the pieced heart by Sarah Goer Quilts

#islandbatikambassador #mugrug showing extra layer of batting under pieced heart

#islandbatikambassador #mugrug cutting away extra layer of batting under pieced heart by Sarah Goer Quilts


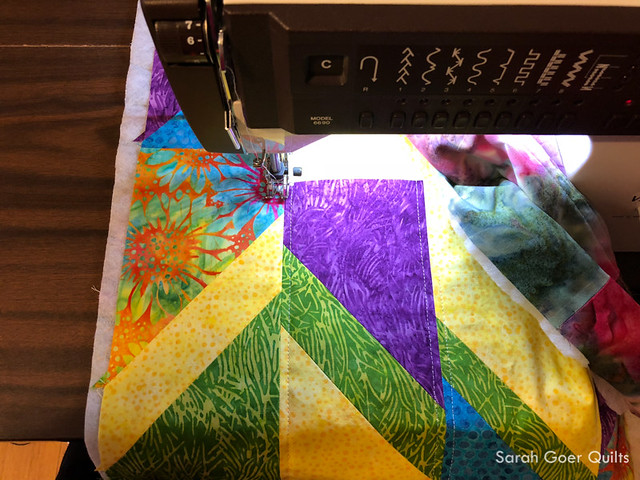
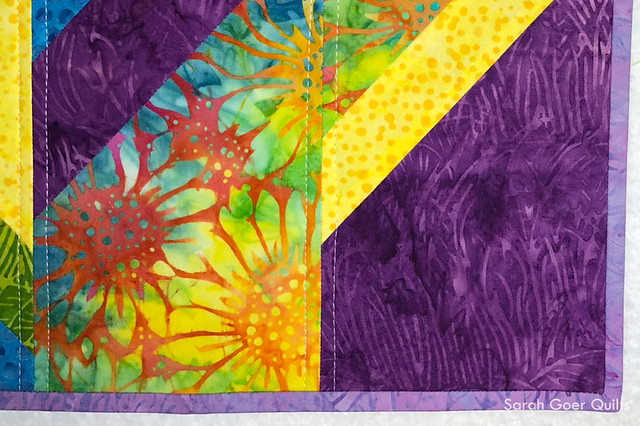
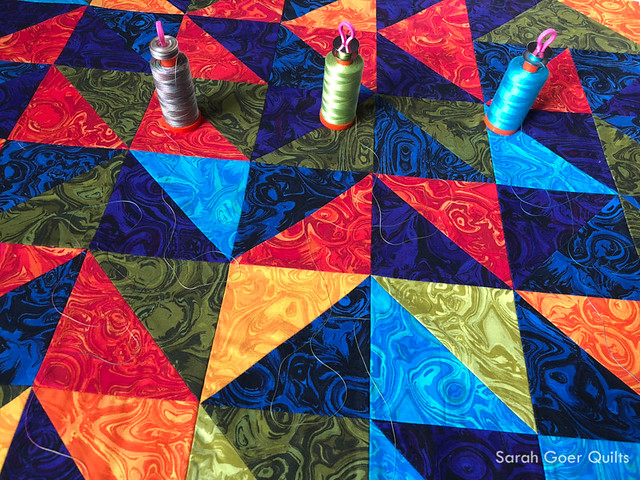
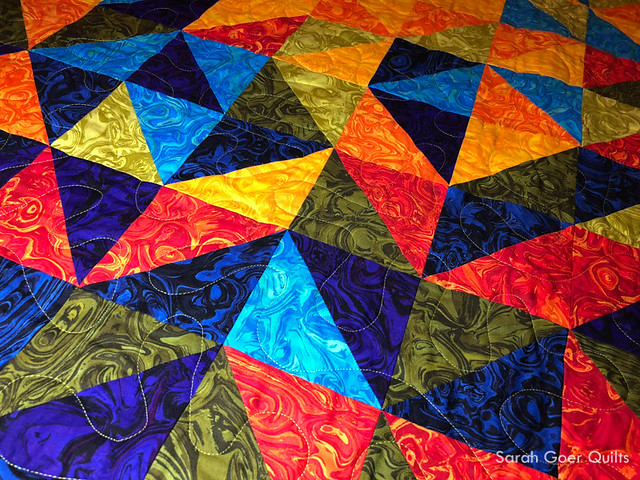
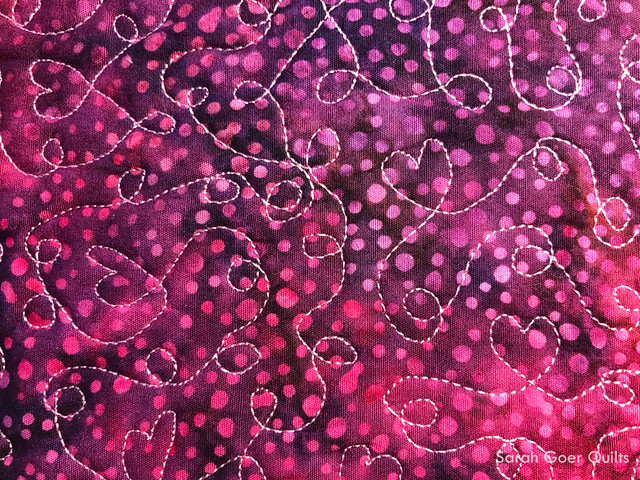
I opted for loops and hearts on this first mug rug and went for pretty dense all over quilting in the background. This was my first time using Aurifil 40wt thread. The Antique Rose (#2430) from my ambassador box was a perfect choice to contrast my background fabric. I the second mug rug I omitted the hearts from my design and used a slightly larger scale loop motif.

#islandbatikambassador #mugrug loops and hearts free motion quilting

#islandbatikambassador #islandbatik #aurifil Antique Rose thread was used for free motion quilting.

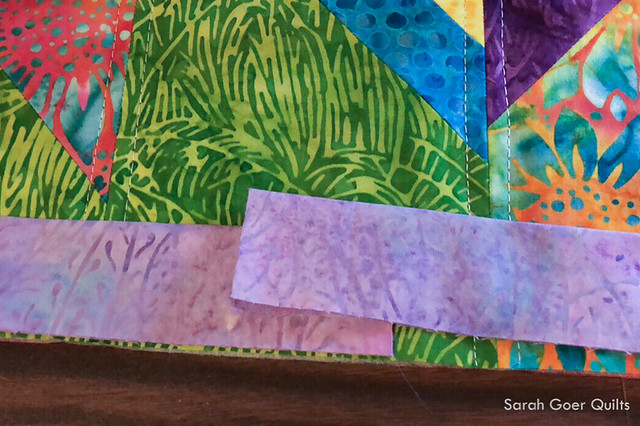
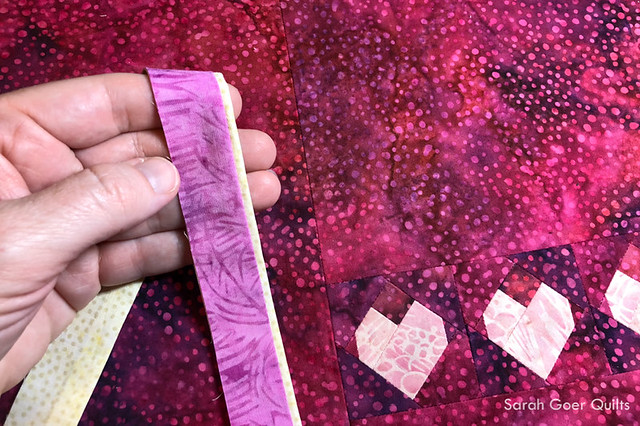
In order to incorporate two more fabrics I made a flange binding. I pieced the cream and pink fabrics for a pink binding with a cream flange. The binding was attached by machine with a Light Beige (#2310) 50wt Aurifil from my stash.


These are my 12th and 13th quilt finishes in 2018. The triple heart mug rug finished at 10.5" x 8" and the single heart mug rug is about 10" x 7.75".


Check out some of the other Galentine's Day projects by my fellow Island Batik Ambassadors.

Myra @ Busy Hands Quilts

Steph @ Steph Jacobson

Jeanette @ Inchworm Fabrics

Connie @ Kauffman Designs

Joan @ Moosestash Quilting

Maryellen @ Mary Mack Made Mine

Jackie @ If These Threads Could Talk

Laura @ Slice of Pi Quilts

Annie @ Masterpiece Quilting


Next month's Island Batik Ambassador challenge is to try a technique that is new to us. Maybe I should have saved my flange binding for next month! ;-) I'm looking for ideas. Leave me a comment below with your ideas for a new technique for me to try.


SaveSave

SaveSave

24 Comments

The products featured in this post were given to me by Island Batik, including products from Hobbs and Aurifil.

I'm a multitasker at heart. Sometimes when I am planning a project, I like to figure out how I'll incorporate multiple goals. This includes quilt challenges and personal design goals. This week's Project QUILTING challenge of Bold and Brave wasn't really calling to me, so I was dragging my feet on formulating a plan. Then I found out that my Island Batik Ambassador box was due to arrive on Wednesday. I figured that meant I was supposed to dive right in and use it for my PQ challenge. It also meant I could procrastinate for a couple more days until the box arrived. ;-)

This project ties to the Bold and Brave theme in a couple of ways. This is the first official month in my role as an Island Batik Ambassador. It was brave of me to put myself out there and apply, and I'm excited to work with their bold colors. Also, I am excited to have started my quilt teaching career. I was a middle school math teacher for eleven years and it's great to be back in a classroom setting. The design of my mini quilt comes from my second Planned Improv workshop, All About Angles, which I'll be debuting soon. The workshop is designed to feature reversible fabrics (solids, hand dyes, cross weaves, batiks) so it lent itself well to choosing from my box of Island Batik fabrics. I love all the bright colors in the Morning Sunshine collection and chose a variety from that bundle to get started. After much debate, I settled on:

  • Sunflower in Rainbow
  • Mini Dot in Sun
  • Grass in Lime
  • Dot in Turquoise
  • Grass in Purple

Back to that multitasking that I mentioned. This mini quilt is my Project QUILTING Bold and Brave challenge quilt, my Island Batik Ambassador Mini Love project, and a class sample for my Planned Improv: All About Angles workshop. A three-fer!

It finishes at 20.5" x 24", pieced and simply quilted with Aurifil white 50wt thread, and features Hobbs Thermore Ultra-Thin Polyester batting.

I chose my binding from one of my Stash Builder rolls. It was a 5" x WOF strip and I managed to make it work by piecing my binding with straight seams since I was worried I didn't have enough fabric to piece on an angle... and I was right! It was a very close call.


I love mini quilts. They provide a great opportunity for a fast finish, an especially nice option for gifts. They can provide a splash of color on a wall or table. And mini quilts are my favorite way to try out a new technique. Something about their small size means it isn't too big of a commitment for a first run with a new skill.

Thanks for visiting. I'm linking up to Project QUILTING 9.3. Voting opens Sunday morning, so be sure to check out the other projects and vote for your ten favorites. (Mine is #57.)

140 Comments

Welcome!

I'm thrilled to be here for the Wonderlust Blog Hop with Benartex. Paula Nadelstern's intricate prints and beautiful colors are a joy to work with! Her line is centered around four detailed prints in three different color ways – a kaleidoscope of colors. I chose to feature the Marbella prints, the blenders from her series. Check out the entire line of the collection.

I chose to use my Ombre HST pattern for my quilt top. It's based on creating an ombre effect through different values of a color palette and was designed with monochromatic solids in mind. I decided to mix things up and create my Ombre HST pattern with a rainbow of colors since the Marbella prints were not only beautiful color, but a variety of values. I arranged the ten Marbella prints in order of value, light to dark, and omitted two colors since my tutorial is based on using eight fabrics. In order of value, 1= lightest and 8 = darkest, I used the following Marbella prints:

1 - Tangerine
2 - Olive
3 - Turquoise
4 - Orange
5 - Red
6 - Green
7 - Navy
8 - Purple


I auditioned a pile of different thread colors for my all over meandering quilt motif. Laying the thread over the different colored fabrics gave me an idea of how the thread would look once quilted. This was round two, and the Spring Green (Aurifil #1231 50 wt) won.

The Spring Green thread blended nicely with the light fabrics and had a good amount of contrast to the darker fabrics.

I love how it sparkles with the majority of lighter values in the upper portion of the quilt. Below is the same photo in black and white to see the values of the fabrics. [Tip: Take a black and white photo of your fabrics to determine their relative values.] My quilt finished at 32" x 40".

Be sure to check out my full tutorial for my Ombre HST Quilt. The tutorial includes a calculator for determining the size quilt which can be created based on starting square size. And my Craftsy shop has a coloring page for sale to help plan your project.

My quilt is bound in solid black using my machine binding technique.

The quilt back is Tapestry in Multi, a perfect complement to the rainbow of color on the front! I love how happy this quilt is.


GIVEAWAY (US addresses only) - GIVEAWAY HAS ENDED

For your chance to win a fat quarter bundle with a selection of 8-10 Wonderlust fabrics, leave any comment below (NOTE: If you've viewing on Bloglovin' be sure to click through to my blog to comment.). Newsletter subscribers can leave a second comment for a bonus entry. (Not a subscriber yet? Subscribe in the purple bar at the top of my blog, click to confirm your subscription in the email that comes to you, and leave a comment on this post telling me you're a new subscriber.) Entry deadline is 11:59pm EST on Friday, February 2. I will email the randomly selected winner and they will have 48 hours to reply with their (US) shipping address or I will select a new winner. EDIT: Teresa Knittingdancer is our winner!

Be sure to visit the other stops on the Wonderlust Hop:

Wonderlust Blog Hop Introduction @ Sew in Love with Fabric
Wednesday: Sandra at mmm! quilts
Thursday: Alison at Little Bunny Quilts
Friday: Stephanie at Stitched Together Studios

Thank you for visiting!

SaveSave

SaveSave

SaveSave