This morning I shared a tutorial of this block with a few dozen fellow guild members of SCVQA during our virtual meeting. We miss having meetings and are enjoying the Virtual Coffee Break Zoom meetings that Mel and Geri have been hosting. Have your local quilt groups been meeting virtually?
Also, this is your final reminder to link up your improv projects by the end of the month for Show Me Something Improv. :-)

Split Complementary
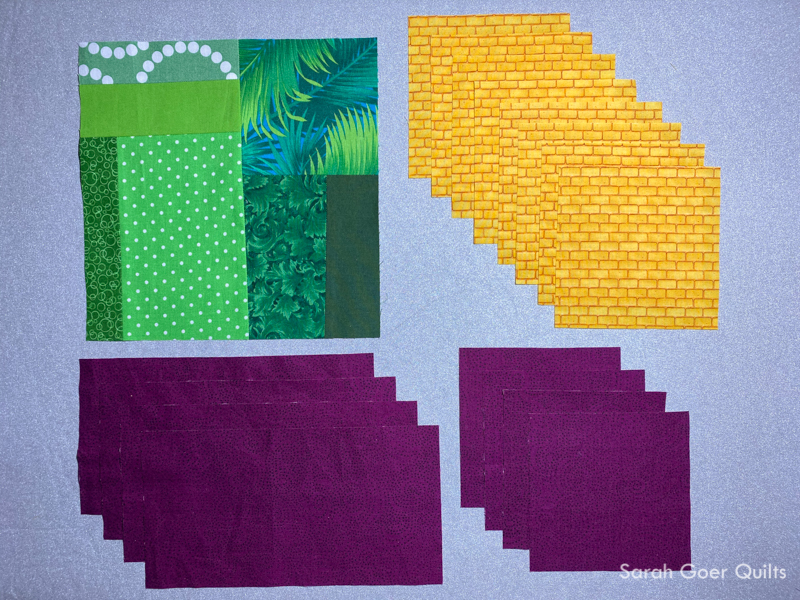
My color palette for this block grew out of some color play with my Kona fabric chips. Analogous Colors are a group of three colors that are adjacent on the color wheel. For example, yellow, yellow-green, and green. Complementary Colors are opposite each other on the color wheel. For example, yellow and violet, or yellow-green and red-violet. A Split Complementary color palette uses one color, combined with the neighbors of its complement. I've chosen red-violet with yellow and green.
Scrappy Slab*
I used a scrappy slab for the center of my block. This "made fabric" can be built from any scraps on hand and can be used alone, in a design of your own, or in any position in a traditional block or pattern you already own. The possibilities are truly endless.
I don't concern myself with starting pieces being square or seams being parallel and perpendicular. I simply sew together pieces of scrap fabric choosing mates that have edges that are roughly the same length. If necessary, I trim the edge of the fabric (with scissors) so I am sewing straight seams, and I attach them with 1/4" seam allowance, same as if I were doing precise piecing (though this is more forgiving in that sense). I press my seams open (having used a reduced stitch length during sewing) which is my personal preference. If necessary I trim off any overhanging fabric to give me a new straight edge for the next seam.
Generally, I start numerous scrappy slabs at once that can be pieced together as my project grows. Smaller slabs can be used just like individual pieces of fabric, combined with single or pieced chunks*. I find once slabs get large enough to be unwieldy that I have an easier time trimming edges with a rotary cutter and ruler.
Keep building to the size necessary for your project.
Edited to add: You can find all my tips for making your own Scrappy Slab in my on-demand class.
*I use the words slab and chunk to describe a pieced unit that is not a specific "block" size. Blocks are a predetermined, specific size. Slabs are what they are. You can trim down to a specific unit or block size as needed for a project.
16" Sawtooth Star Block
Color 1 (green): Using monochromatic scraps, piece a slab large enough to cut one (1) 8 1/2” x 8 1/2” square.
Color 2 (yellow): Cut eight (8) 4 1/2” x 4 1/2" squares.
Background/Color 3 (red-violet): Cut four (4) 8 1/2” x 4 1/2” rectangles and four (4) 4 1/2” x 4 1/2” squares.
Construct four one-at-a-time Flying Geese units.
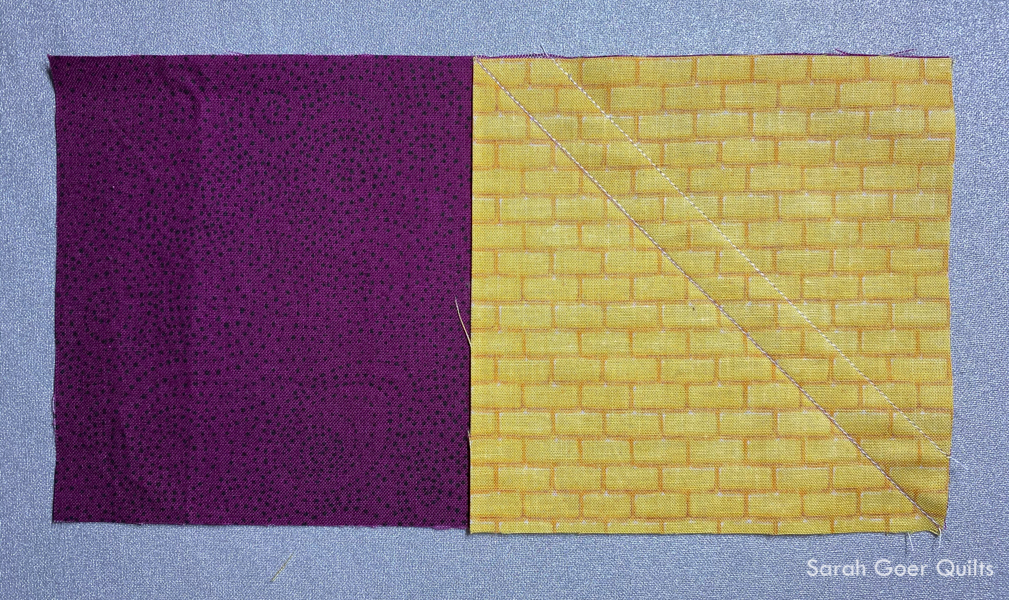
Step 1: Aligning the edges, place a 4 1/2” x 4 1/2" yellow square on top of an 8 1/2” x 4 1/2” red-violet rectangle, right sides together. With your favorite marking tool, mark the stitching line corner to corner on the yellow square.
Step 2: Stitch on the marked line. Optionally, sew a second line of stitching 1/2" from your first line as shown. This will create a bonus HST when you trim 1/4" from your marked line.
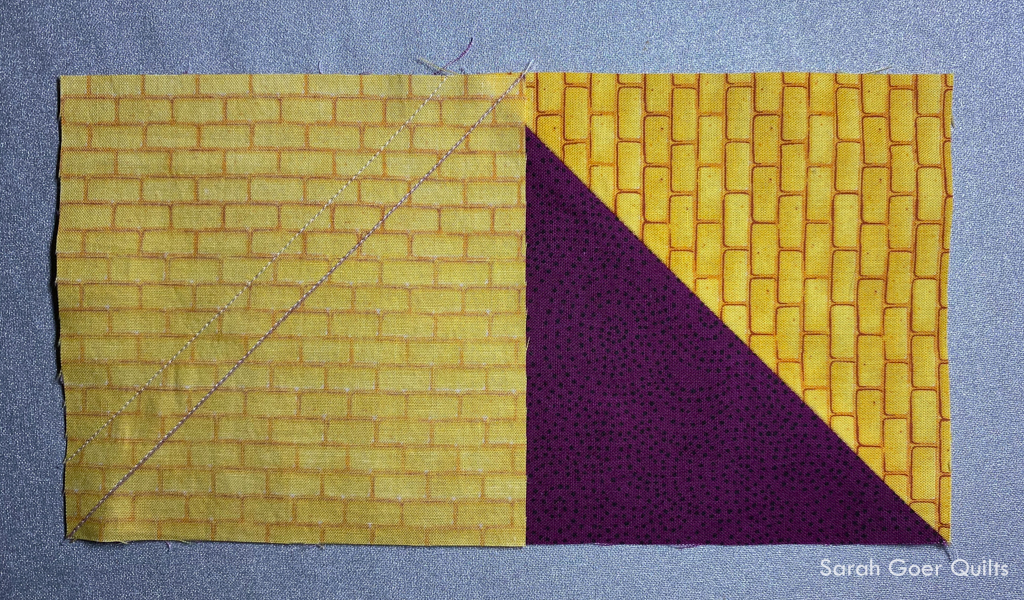
Step 3: Trim 1/4" from your marked line as shown (or halfway between your two lines of stitching).

Step 4: Press your seam.

Step 5: Repeat on the second side.


Unit finishes at 8 1/2" x 4 1/2". Make 4.
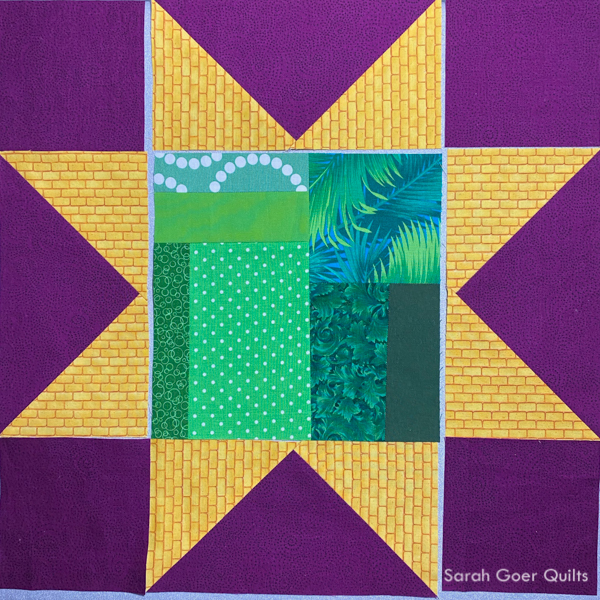
Layout your nine pieces as shown. Sew each row together and combine rows for the finished block. Unfinished dimensions are 16 1/2" x 16 1/2".

Three blocks would make a 16" x 48" table runner. Sixteen blocks (or 9 blocks with an 8" border) would make a 64" x 64" lap quilt. These could all be identical color placement, a variety of placements of the same three colors, a variety of different split complementary combinations, or anything you'd like!
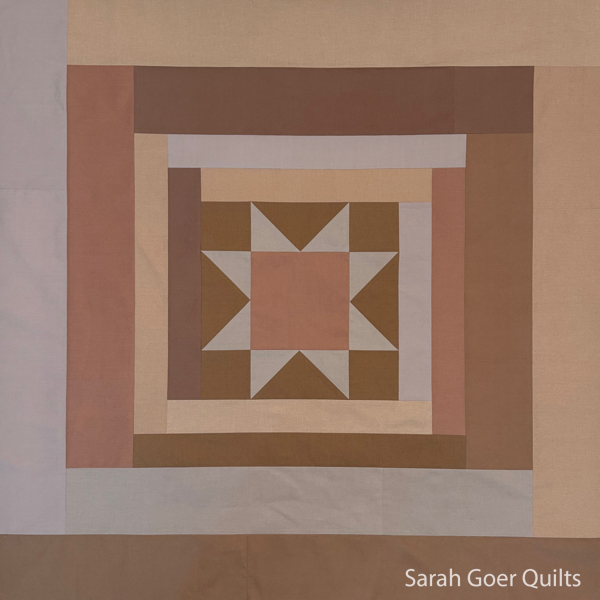
P.S. Here's another Sawtooth Star where I used my scrappy slab in the background and binding.
Happy quilting!