Hello and welcome to Sarah Goer Quilts (formerly Things I Make). I'm so pleased to be a part of the 2015 New Quilt Bloggers Blog Hop this year. I sew and quilt for my sanity and blog to help keep myself motivated and to inspire others. I love colorful. I love bold.
I grew up around a sewing machine. My mom and my grandmother were crafters, and my mom made clothing for me when I was little. However, she's only ever made one quilt because she "just can't understand cutting fabric into little pieces just to sew it back together." I don't know when I learned to use a sewing machine, but I can't remember a time that I didn't sew. The first thing I remember sewing as a kid was scrunchies. I used to sell them at craft shows in my mom's booth. After college I decided I wanted to start quilting. I did a bunch of book reading and made my first two quilts from the book Quilting for Dummies.
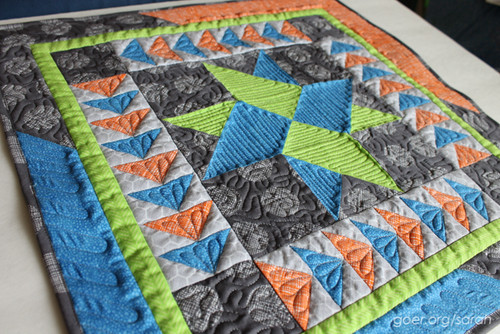
I'm really enjoying swaps on Instagram. I like that swaps challenge me to try something new. I feel like I can push myself to try something for a few square feet that I wouldn't be up for committing to a whole larger quilt for a first go. The first swap I participated in was the IG Mini Swap quilt, which shipped in December of 2014. Basic Shapes was a lot of firsts, including my first time doing such dense quilting with a variety of quilting patterns.
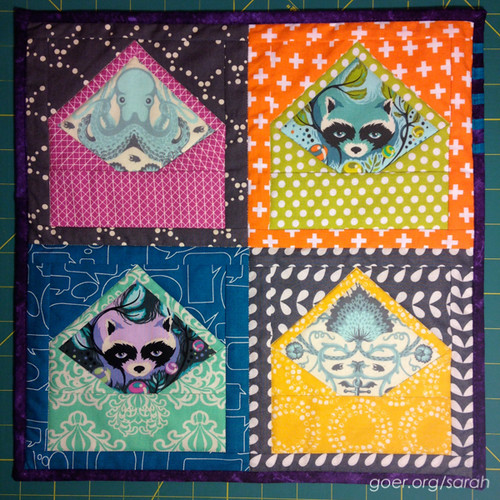
I used the Schnitzel & Boo Mini Swap (round 3) to reteach myself how to paper piece. I hadn't done it since my Ribbit quilt in maybe 2009. I'd been admiring these adorable envelope blocks for some time and thought it was a great way to feature some Tula Pink fabrics. This was also the swap that was my excuse to start adding Tula to my stash. Win! ;-)
I participated in Ms. Midge's blog hop in March when I made her Charm Dash pattern as a lap quilt. I don't use solids much, but I just love the solid background on this one! :-)

The first project that I think I went bold on was when I participated in the Shop Hop by the Bay mystery quilt in 2003 (in my first year of quilting). I decided my theme would be crazy and wild and at each shop I bought a couple fat quarters in bold colors: stripes, dots, or patterns. I used the black and white print as my contrasting accent fabric. I didn't finish Candy Shoppe for many years (due in large part to wanting to learn to free motion quilt first), but now it lives in my family room and makes me happy every time I see it.

I'm currently teaching my 4 1/2-year old son to quilt. He completed his first quilt in March in time to be in my guild's quilt show. He loves that it "made him famous." He currently has a second project underway. It's a surprise for his sister, which presents the problem of finding time to work on it when she isn't around. It's a small project and he's quilted 2/3 of it, so the end is in sight.

Blog Photo Tip
There's been some discussion in the New Bloggers group about taking quality photos. One thing some of us late night quilters struggle with is having good light for taking photos. Here are my two best blog photo tips.
1. Invest in a foam core poster board (or a few). I buy mine at The Dollar Tree. A lot of my progress photos are taken using the foam board as a background. They are great for photos any time of day with any type of camera. If you have a couple, you can use one as the base and one as a background. Here's my setup. Please note the honest craft room surrounding my shooting site.
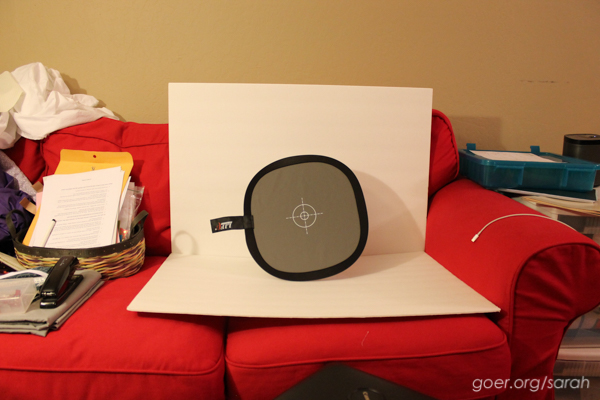
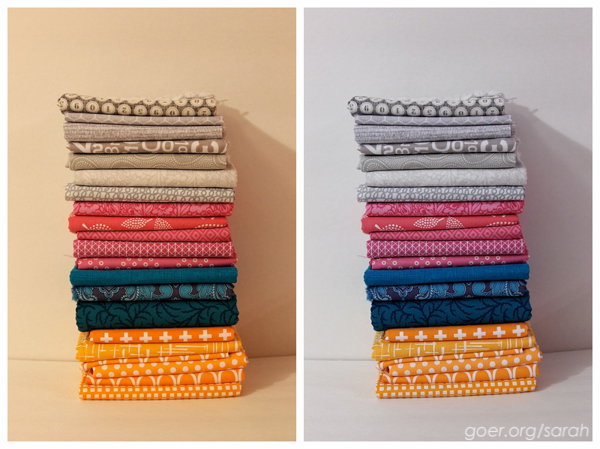
2. Adjust the white balance on your camera. (For reference, I use a Canon Rebel T3 DSLR.) Step one is to play with settings to choose a setting more appropriate for your location (daylight, cloudy, tungsten light, etc.). For working with a camera that will allow you to set custom white balance, you can use a grey card. I was given a 12" x 12" White Balance 18% Grey Reference Reflector Card with a Carry Bag from my sister, the photographer. It's super easy to use and compact enough to take with me when I leave the house. (It's worth noting that you don't have to have a white background, my examples just happen to be using my poster board.) Here's how it works. You place the card/disc in the location you're photographing (see photo above) and take a picture of it, zoomed in so you only shoot the grey section, like this:
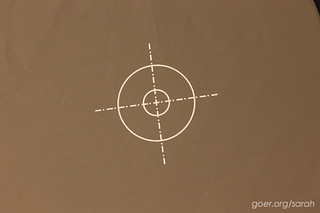
Then you choose "Custom White Balance" from your camera menu and select this photo you just took as the reference photo.
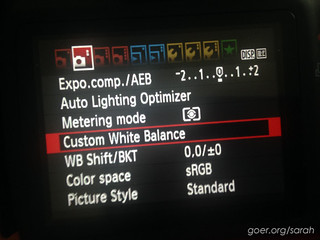
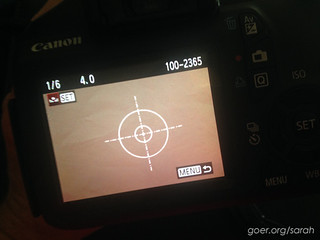
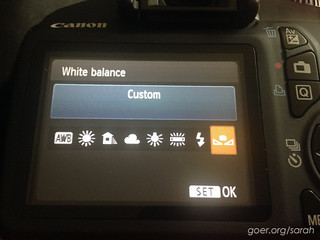
The last step (don't forget this one!) is to make sure your camera white balance settings are set to Custom.
Here's the result...

Quilting Tip
In an effort to save time and thread while piecing I do a couple things.
Step 1: Chain piece. Without lifting the presser foot between sections, you can more quickly piece your project. By not starting and stopping for every piece, you save time trimming and you save thread. I make a pile of sets of each pair of fabrics to be pieced, all right sides together and oriented in the direction they go through the machine. Then when I get to the end of the first seam, I just start the next set and keep sewing. There's generally 1/8 to 1/4" between each of my seams which makes it easy to trim before or after pressing.
Step 2: Work on two (or more!) projects at a time. This might sound crazy, but hear me out... I piece nearly everything using a medium grey thread (aurifil #2605) which allows me to work on multiple projects simultaneously (time saver!). Working on multiple projects allows me to chain piece, going back and forth between projects, hardly ever lifting the presser foot. I prep two piles to chain piece, one group from Project A and one group from Project B, then I start chain piecing. Once I get all the way through the Project A group and into the Project B group (so what's under the presser foot is Project B), I pause sewing (don't lift the presser foot) and snip the thread between the last Project A seam and the first Project B seam. Then I take the Project A group to the ironing board to press my seams, snip the sections apart, and use those units to make my next pile of Project A pairs of fabrics to be pieced. Once I get done sewing the first batch of Project B seams, I repeat the process. I just flip back and forth between the projects until I'm done with one or both.
Four Fun Facts About Me
- I binge watch Friends and Gilmore Girls again and again while I quilt. (I do mix it up with other shows as well, but I always go back to those two series and rewatch them.)
- I have 14 years of newspaper and yearbook experience, from middle school through college and as a middle school yearbook teacher for 4 years.
- I'm a huge Disney fan. After being a Disneyland annual pass member for 14 years, I have only been 3 times in the last 5 1/2 years (since kids). I miss my frequent trips with my Disney-loving buddies.
- I'm the handy one in my house. Putting up level shelves is one of my specialties.
Maybe you haven't yet seen my rather lengthy WIP list... So, what is your best tip for managing multiple projects at once?
Thank you to Cheryl from Meadow Mist Designs, our hive leader, and to our other New Quilt Bloggers hosts, Yvonne (Quilting Jet Girl), Stephanie (Late Night Quilter), and Terri Ann (Childlike Fascination).
Thank you so much for visiting! Please check out the other bloggers from my hive posting for Week Two of the hop:
Cristy @ Love You Sew
Patty @ Walnut Street Quilts
Eileen @ Eileen In Stitches
I'm linking up to Tips and Tutorials Tuesday at Late Night Quilter.


