
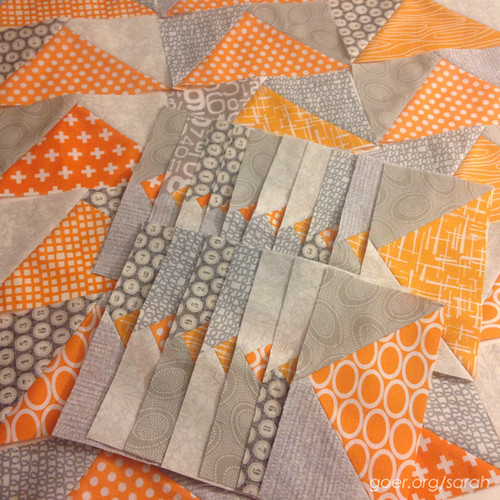
In July we got started with the Midnight Mystery Quilt, hosted by Cheryl at Meadow Mist designs, by cutting all of our fabric. In August, the sewing began. Our task was to make 36 flying geese units. I love the no-waste sewing method that Cheryl chose. Here are my flying geese. 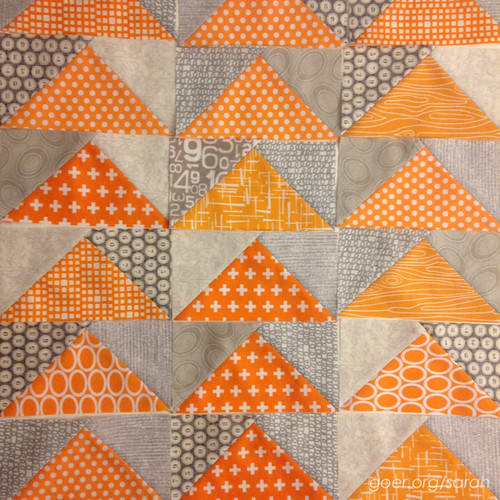
 Since I'm a little behind on posting about last month's sewing, this month's directions are already out. We'll be making square in a square units in September. I have a few other projects in the queue before I'll get a chance to work on those, but I hope to be showing them off soon.
ALYoF September Goal
My next mini swap in the queue is the Home Sweet Home Mini Quilt Swap. The shipping deadline is Wednesday. Eek. So this is not only a September goal, it's a 72-hour goal. Luckily, I've got some time in my schedule to sew sew sew today and tomorrow.
This is the first swap I've been in that we've been assigned partners and we're making for each other. I generally am so excited about what I'm making that I show it off while it's in progress, since nobody knows who will be receiving it. This time, I'm making for Brittany and she knows it. (And she's making for me.) So, I'm not showing much along the way. In fact, this glimpse below is all anyone will see before Brittany receives her package.
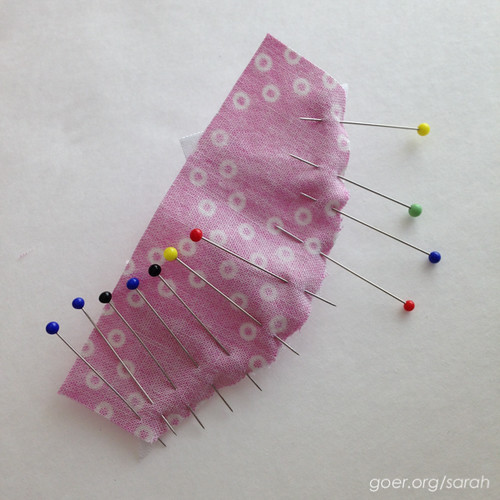
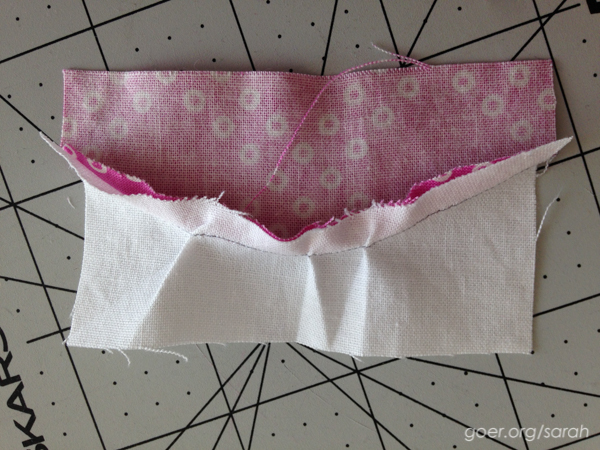
I designed my mini and included one pieced curve (gasp!). Since I'd never done this, job one was to figure that out. I cut pieces from my hand-drawn templates and then pinned the heck out of it. I think it was a mistake to piece it with the outer curve on the bottom. It was a puckered mess when I finished. Oops.
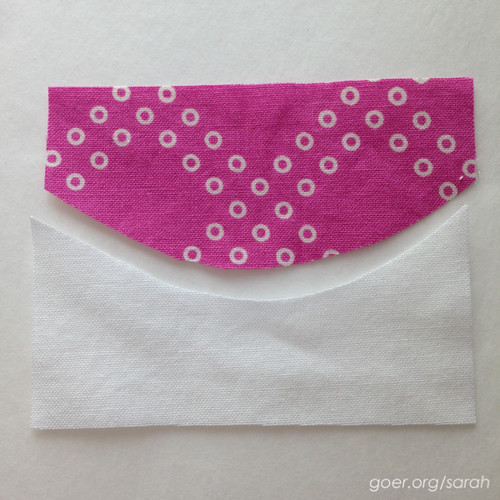

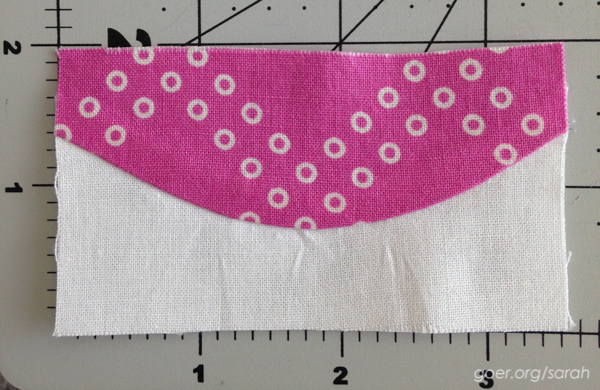
I shared on Instagram and Amanda and Jessica both recommended Leanne's curve sewing tutorial. Oh my gosh! Game changer. I never would have attempted to pieces a curve without pins, but her short video illustrated it beautifully. Here's the result of my second attempt. No pins were used in the making of this one.
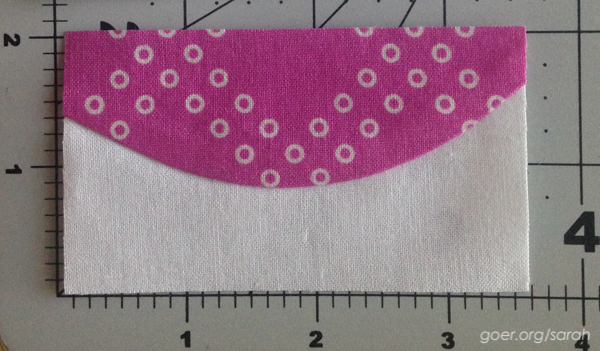
Overall I'm happy with it, but it is just a smidge shy of the intended size. I made one more (oh, cause I've decided to make this mini twice, one for Brittany and one for me) and cut my pieces larger than necessary so I could trim down to 2" by 3.5". (Unfortunately I didn't pay attention to the position of the shape of the fabric as much as to the pattern on it when trimming, so it's not quite symmetrical, but I think it'll be fine.) Here's my third curve.
Now on to all my straight seems. Stay tuned for my big finish after it reaches its destination. And after that I'll be wanting to sew all the curves! This little piece and Leanne's tutorial opened up a whole new world of possibilities. Once again I'm glad I've used a mini swap to push myself beyond my normal quilting skills.
Do you participate in quilt (or other craft) swaps? What's your favorite part?
Linking up to ALYoF September Goal Party.
Fabri-Quilt New Block Blog Hop: Watermelon Plate
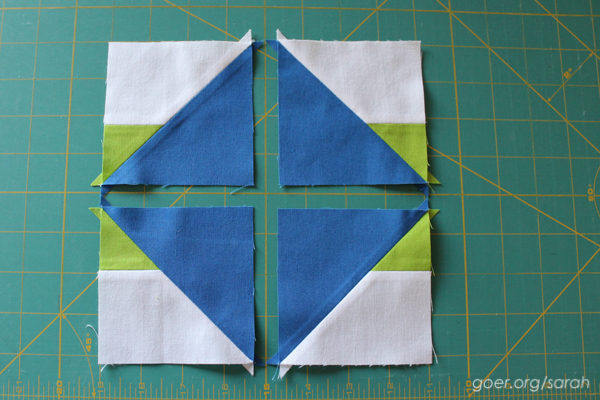
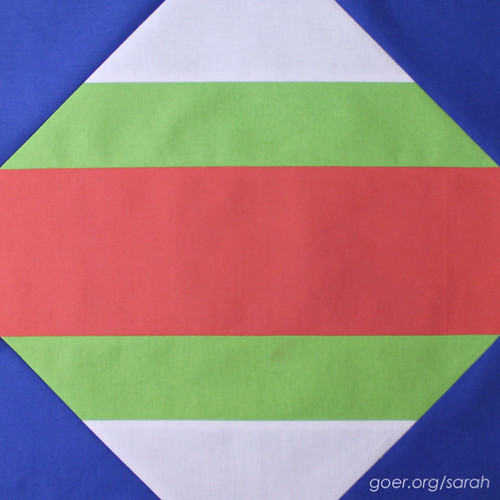
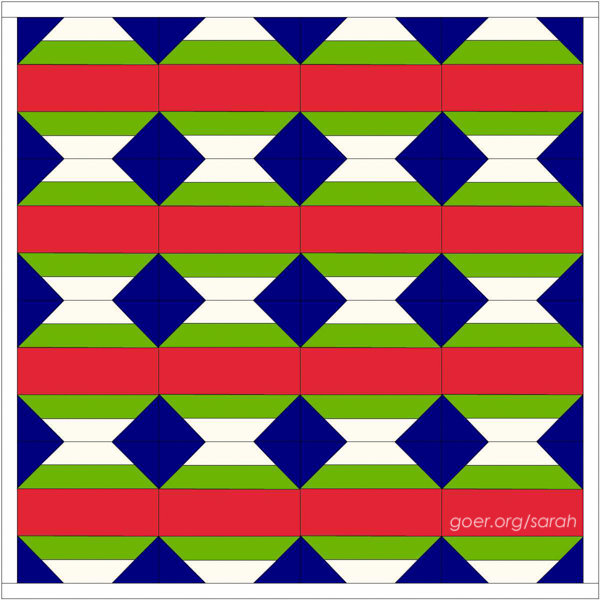
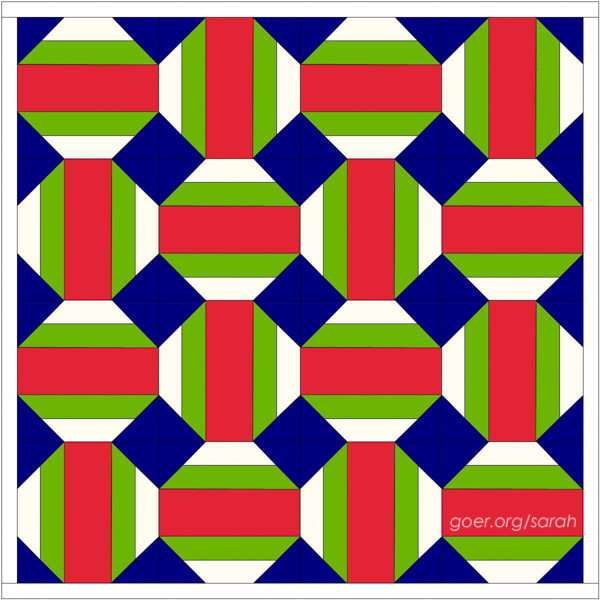
Watermelon Plate is a simple, traditionally-pieced, geometric block featuring a secondary pattern when tiled. It goes together fast and I'm showing it in two quilt layouts.
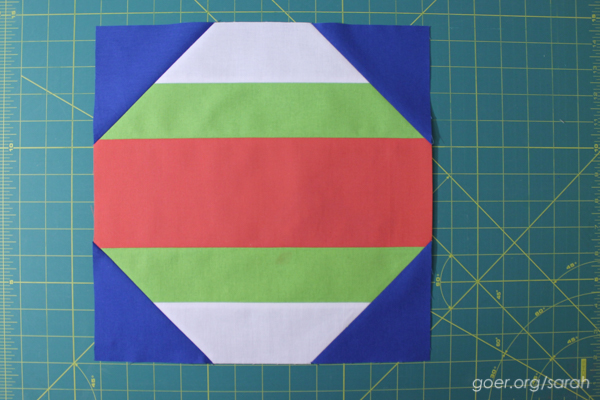
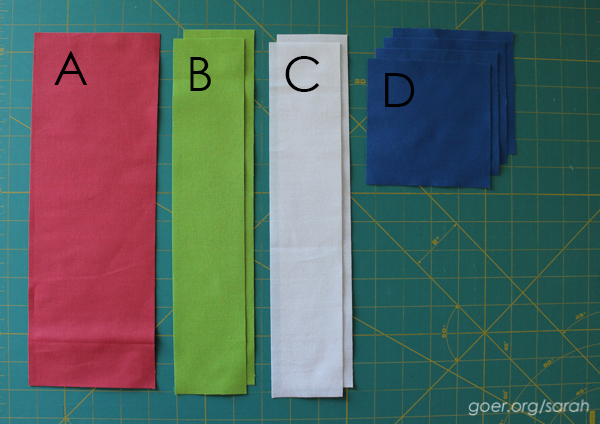
I chose to use Coral, Chartreuse, White and Lapis Blue for my block. You'll need a fat eighth of each color.
Cutting Directions
- Fabric A (Coral): Cut (1) 4.5-inch by 12.5-inch rectangle.
- Fabric B (Chartreuse): Cut (2) 2.5-inch by 12.5-inch rectangles.
- Fabric C (White): Cut (2) 2.5-inch by 12.5-inch rectangles.
- Fabric D (Lapis Blue): Cut (4) 4.5-inch squares.
Piecing Directions
Sew all seams with an accurate 1/4" seam allowance. My seams are pressed open, using a shortened stitch length of 2.0.
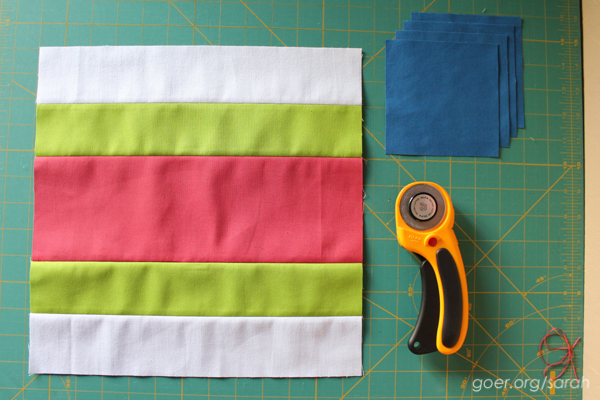
Step 1: Piece together C + B + A + B + C to create a 12.5-inch square striped unit. Press all seams.
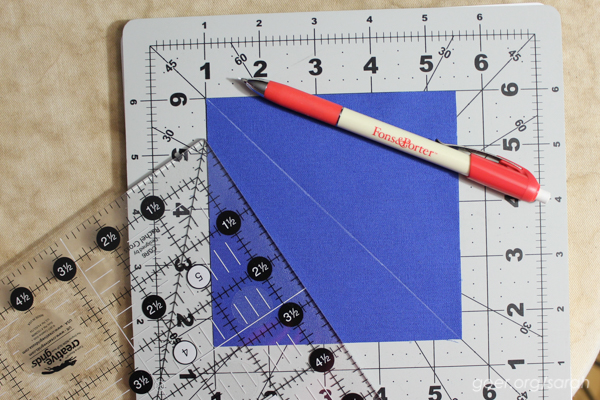
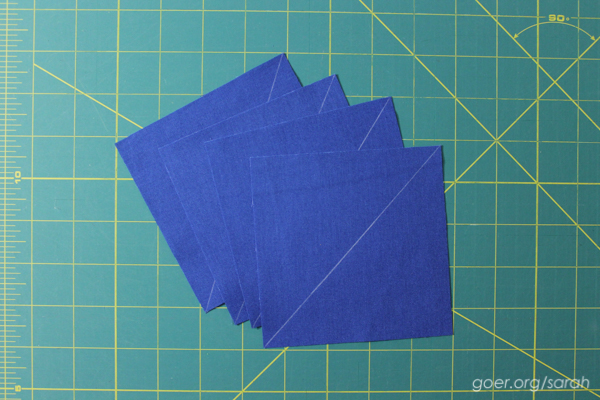
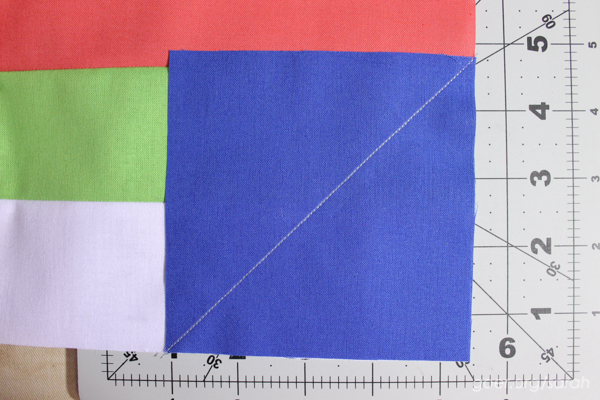
Step 2: Mark each square (D) with a line on the diagonal.
Step 3: Attach each square (D) to a corner of the pieced square from step 1 by stitching on the marked line.
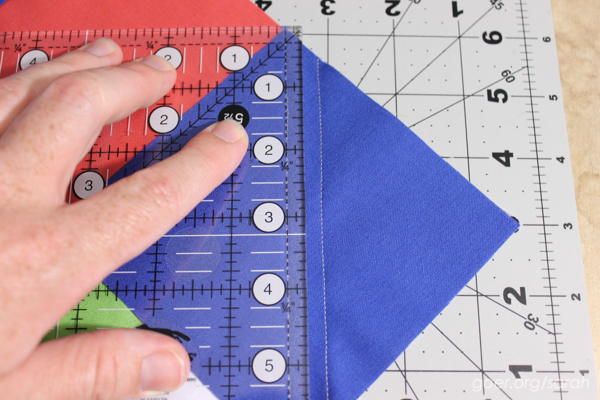
Step 4 (optional): Sew a second line of stitching 1/2-inch from your first to the side toward the corner. This will create a bonus HST unit that can be used in a border treatment for this quilt or for another project. (Quilting tip: Whenever I am attaching a square to a square/rectangle in this way, I sew the second line of stitching before trimming my fabrics. This alleviates sewing bias edges together later to use the leftover triangles.)
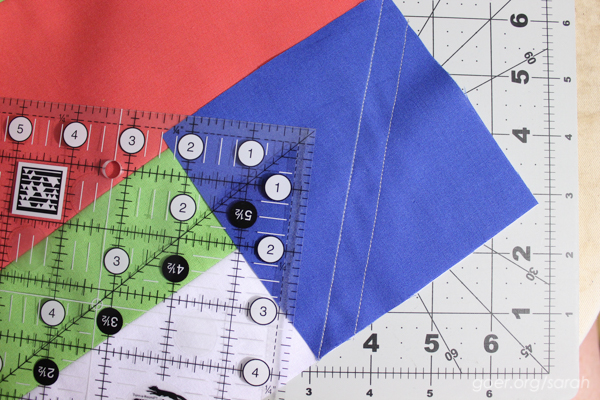
Step 5: Trim excess fabric. Cut 1/4-inch (toward the corner) from your first/marked line of stitching (or between two lines of stitching if you did step 4, shown below). Press seams.
Finishing
Option 1: Straight set of blocks.
Option 2: Straight set of blocks, alternating horizontal and vertical placement.
Edit: I'd love to see project if you use my block. You can use #watermelonplateblock on IG. :-)

Fabri-Quilt provided fat eighths of their Prairie Cloth Solids of each color from the Watermelon Summer color palette (Chartreuse, Turquoise, Coral, Aqua, Lapis Blue, and White) to the over 60 bloggers participating in this week's blog hop. Each blogger has designed a 12" x 12" (finished) block to share with you. Our finished blocks will be put together by our hosts to create at least three charity quilts. Please check out today's other hoppers:
Josi @Avocado Quilts
Stephanie @Quilt’n Party
Cristy @Love You Sew
Shelly @The Carpenter’s Daughter Who Quilts
Jayne @Twiggy & Opal
Sharla @Thistle Thicket Studio
Adrian @Making It – Family Food Quilts Crafts
Julie @Pink Doxies
Sarah @123 Quilt
Jane @Jolly and Delilah Quilts
Carrie @The Zen Quilter
Thanks to our blog hop hosts for organizing. They are linking to each day's participants. And they are each offering a Fabri-Quilt giveaway. Please visit them.
Monday, August 31 – Yvonne of Quilting Jetgirl
Tuesday, September 1 – Cheryl of Meadow Mist Designs
Wednesday, September 2 – Stephanie of Late Night Quilter
Thursday, September 3 – Terri Ann of Childlike Fascination