On Thursday I shared about my first class at QuiltCon. After a one hour dinner break, my second class on the first day was English Paper Piecing with Johanna Masko. Again I ended up in class with a guildmate, which I enjoyed. Our whole table was filled with lovely people. I think we chatted more in this class due to some combination of the late hour and not having sewing machines between us.
Johanna asked us to introduce ourselves and share why we chose to take the class. A number of people before me shared that they love handwork. When it was my turn I promptly shared that I do not like handwork, but that I am at a stage in life where I keep finding myself in places where it would be beneficial to have a handwork project to bring along. I have no grand dreams of queen-sized hexie quilts, but I'm pleased to have added a skill to my repertoire. I'd like to get a hexie kit together to keep in the car for the times that I am a few minutes early to school pickup, or I'm waiting for the kids at a class.
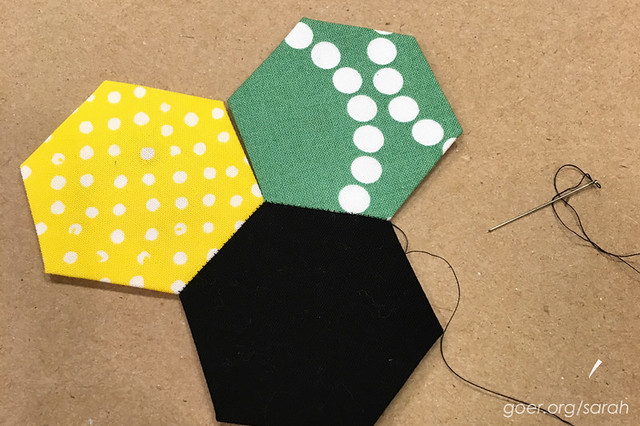
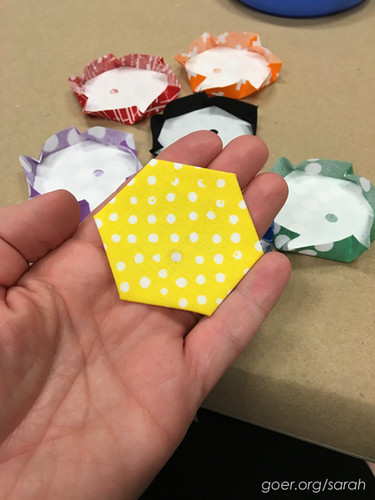
It was a great beginning class, focused on how to English Paper Piece without purchasing specialized templates or tools. Johanna led us in making our own templates and we used the freezer paper method for prepping our hexies before sewing them. I had a little trouble with the freezer paper coming loose and moving around as I was trying to baste them, so I might try paper templates and use wonder clips to keep the edges folded over while I baste. I'm pleased at the progress I made that night. I still need to throw the pile into the car so I'll have them with me when I want them. I'm still just not likely to sit down with handwork at home. (I don't even hand sew my binding most of the time!)
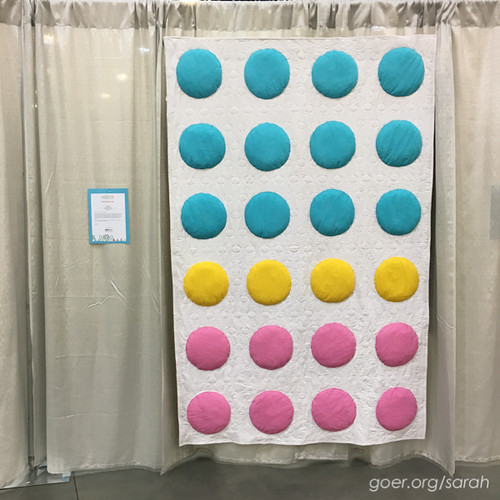
A few more of my favorites from the show. This first one is Samarra Khaja's Candy Dots quilt, from the Minimalist Design category of the show. My photo doesn't adequately illustrate the 3D design of the dots. That lovely shadow on the lower portion of the dots was simply the shadow that the overhead lighting cast from the raised dots. (I missed getting a close-up photo of Samarra's artist statement.)
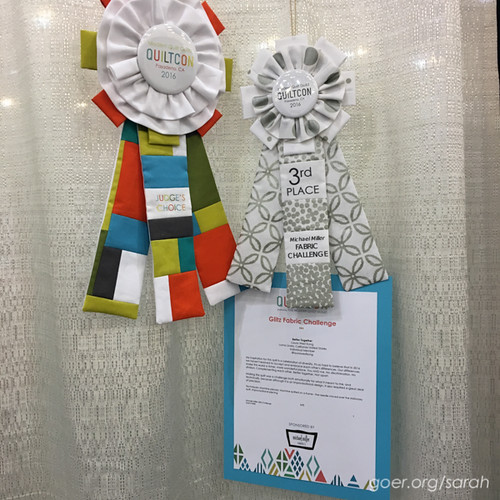
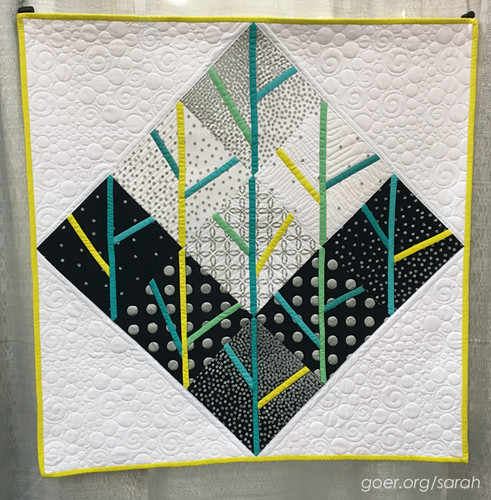
The next two are from the Michael Miller Glitz challenge. (I showed off another from the challenge in my last post.) First, my friend Tami Levin's Putting on the Glitz. I admired this on IG and then was excited to see it in person at a guild meeting. It was so fun to see it hanging in the show. I just love it. Her design. Her choice of pop colors. Her perfect quilting! Tami's artist statement reads:
The Michael Miller challenge fabrics reminded me of the glitz from Art Deco designs. Keeping that in mind I wanted the overall look to be on pointe. The squares were a bit too static which is why I opted to slash organize sub sections on the diagonal for each block. They were filled with contrasting solids that made me think of trees wrapped in fairy lights during the winter months, thus the surrounding white corner triangles.
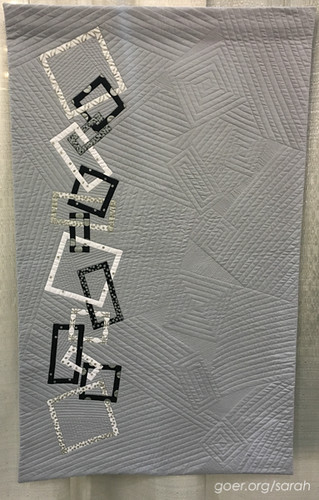
This next one is Linked In by Julie Anderson. I really loved the geometric design of the rectangular links. And the quilting was a perfect complement to her design. Julie's artist statement reads:
Linked in... Even before creating the piece I wanted to challenge myself to use a piece from each fabric that was a part of the challenge set.
Linking all the squares and rectangles together before machine appliquéing them to the background.
Giveaway *closed*
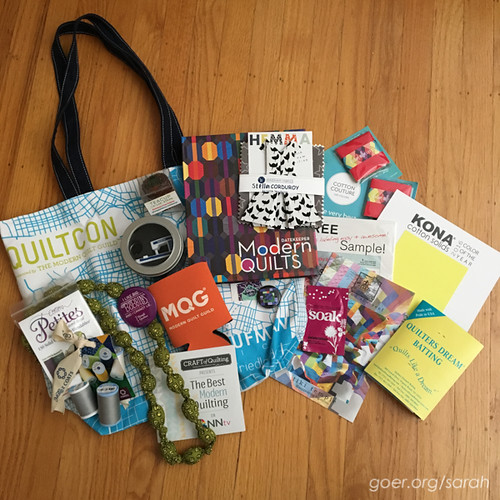
I'm sharing some of my goodies from QuiltCon with one of you. I'll draw one winner on March 24th at 1pm PST out of all entries on my five posts about my QuiltCon classes. (This is the second of the five posts.) The drawing is open to everyone. To enter, please comment below and tell me your best EPP tip. If you don't English Paper Piece, share a general quilting tip. Followers can get a second entry by posting a second comment to tell me how you follow me (Bloglovin', Instagram, etc.). Thank you! Thank you to everyone who entered. The winner is Anja of Anja Quilts!