6 Comments

I couldn't resist the appeal of the mini swap with The Modern Quilt Guild in which we would exchange our mini quilts at QuiltCon. I was assigned Ginger as my secret partner and found inspiration in her Pinterest account. Specifically, I was drawn to the colors in this pin and loved the color wash design and spiral quilting in this one. I'm not sure how I came up with the idea to make improv tumbler blocks. It mostly started as an exercise in figuring out if I could achieve it.

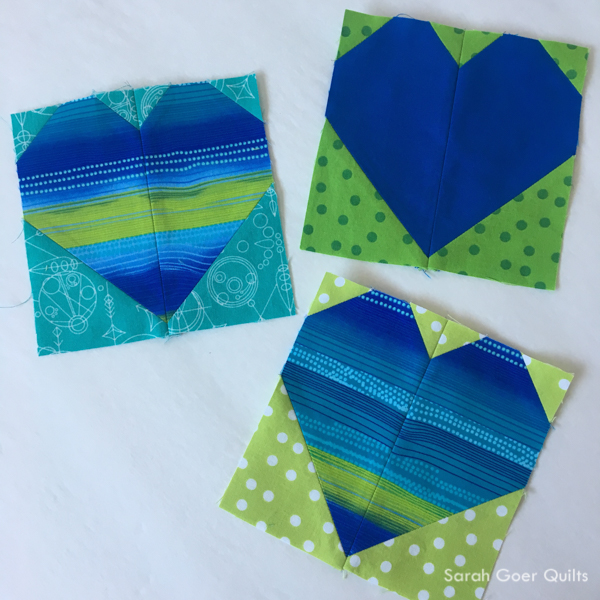
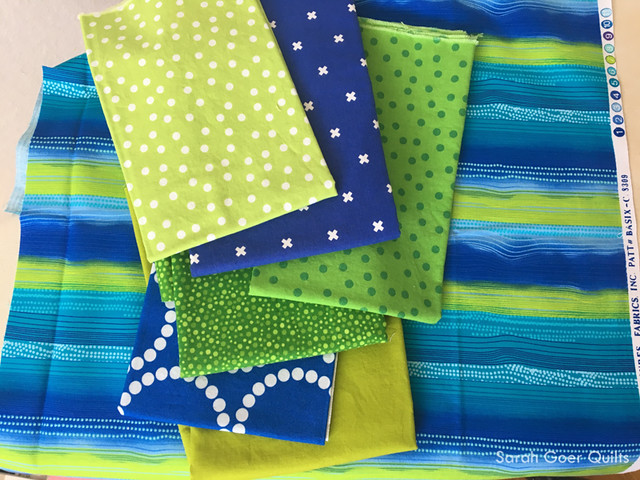
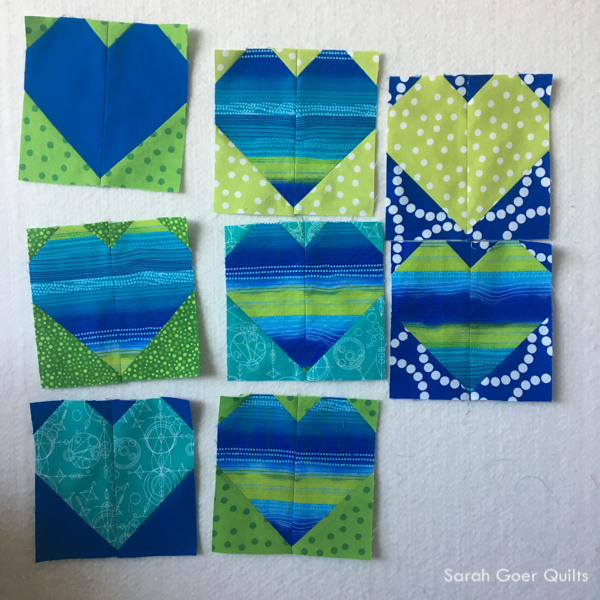
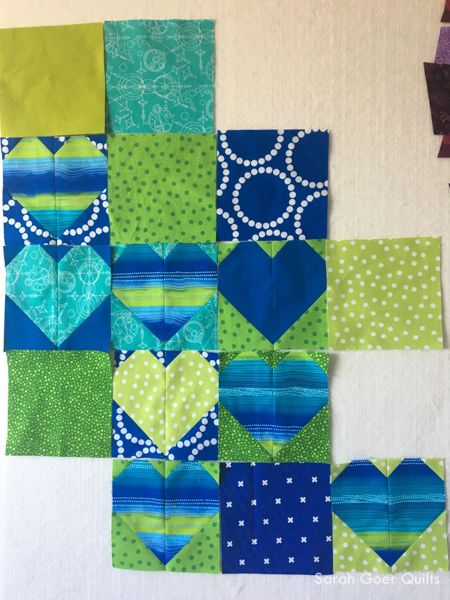
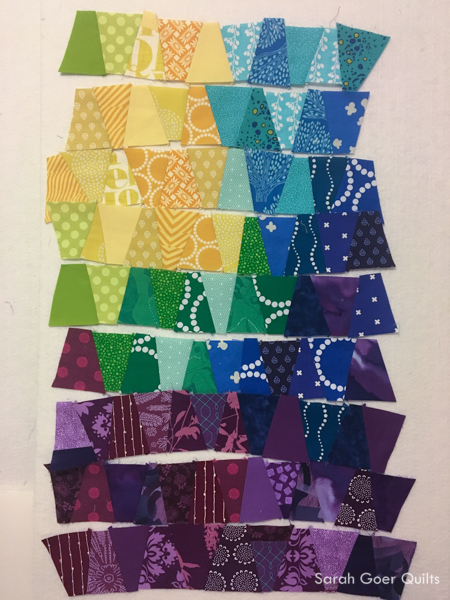
I started by cutting three tumblers from each fabric as I worked through scraps and stash choosing fabrics. I aimed for about 3" tall using my cutting matt as a guide, but all of my cutting was done with a rotary cutter and no ruler. I wanted a variety of tumbler shapes, but aimed for generally 1 1/2 - 2" wide on the narrower edge and 3 - 3 1/2" wide on the wider edge. Once I'd cut a bunch of tumblers, I started fiddling with layout on my design wall and ended up with this plan.

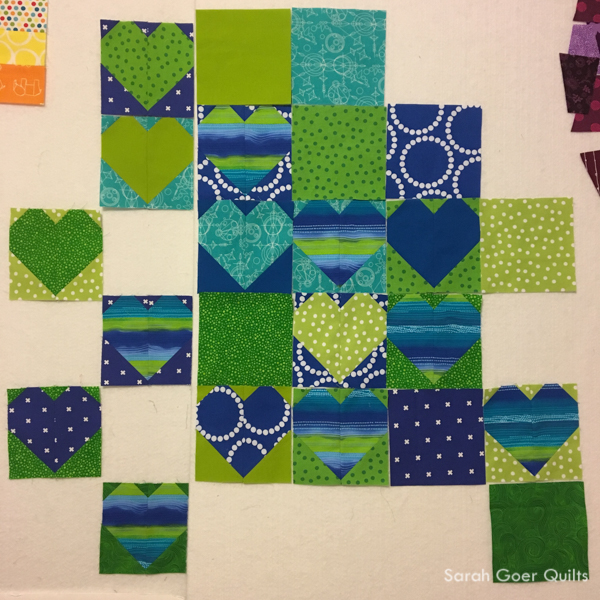
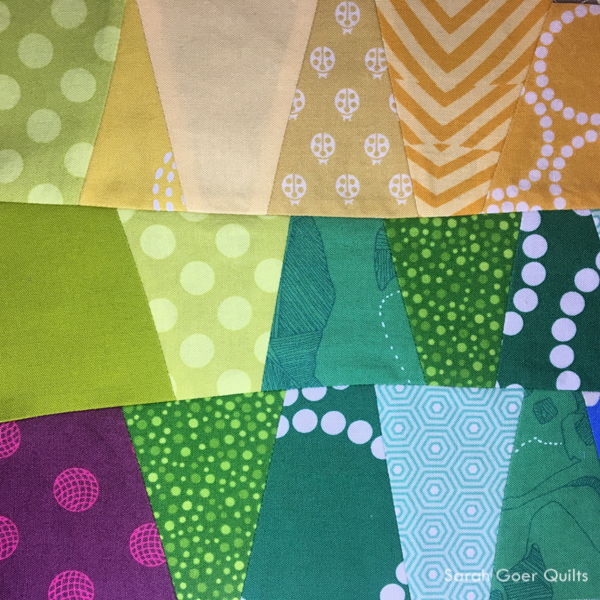
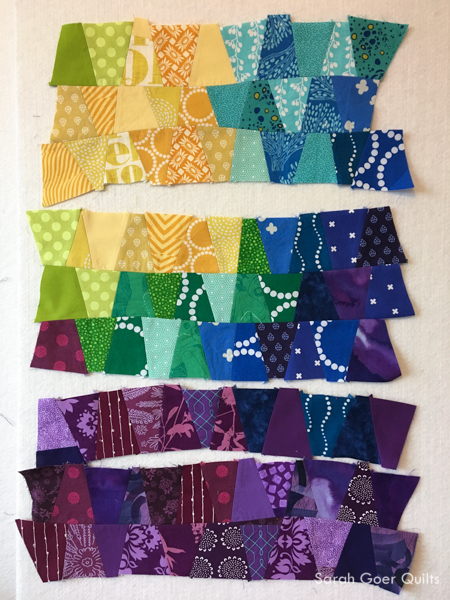
The easiest part of the piecing was connecting the tumblers in each row. The first row I pieced (the bottom row) came out to be pretty curved (which I adjusted a bit by picking out one seam), so from then on I worked to compensate for that a bit as I pieced. It's fun to watch the project shrink up as the piecing happens.

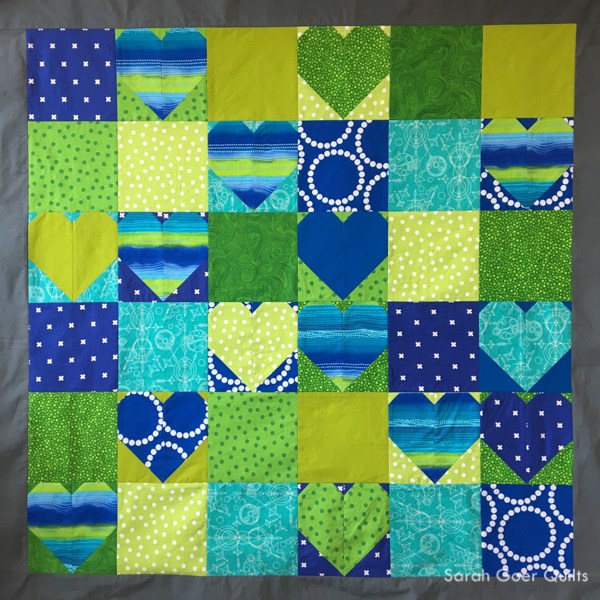
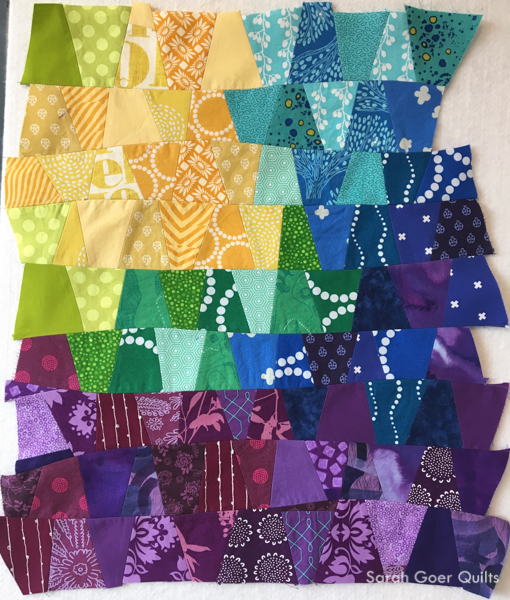
Once my rows were complete, I decided to use smooth curves to connect the rows.

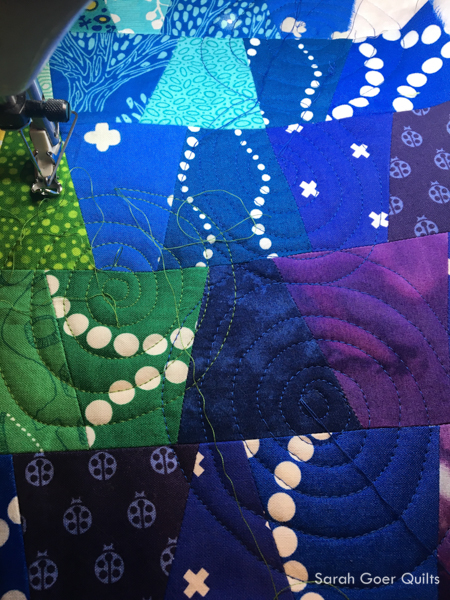
So what's a girl to do when she's up against a deadline and also needs to pack for QuiltCon? Well, naturally, she should decide to use thirteen thread colors and dozens of starts and stops to quilt her mini! Right? That's totally a sound decision, eh?

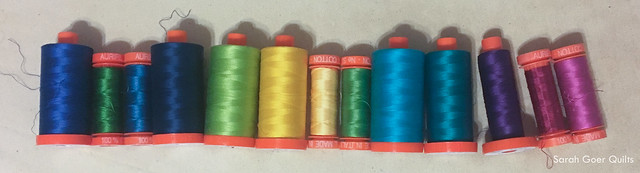
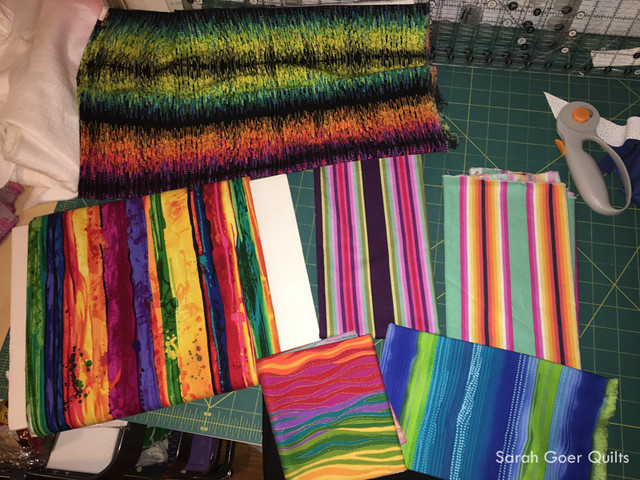
I pulled all my Aurifil (50 wt.) that was even close to a color used in the quilt. From left to right they are #2735 Medium Blue, #5018 Grass Green, #1125 Medium Teal, #2783 Medium Delft Blue, #1231 Spring Green, #2135 Yellow, #3920 Golden Glow - Variegated, #1114 Grass Green, #2810 Turquoise, #4093 Jade, #2582 Dark Violet, #1100 Red Plum, and #2588 Light Magenta. Plus I attached the binding with #2605 Grey. If I stashed different weights of thread, I totally would have thrown them in too!

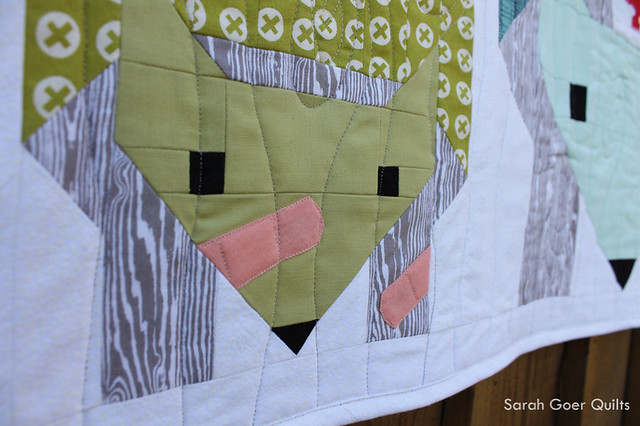
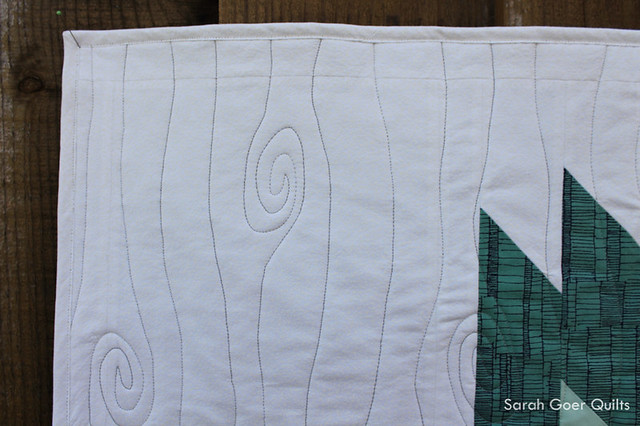
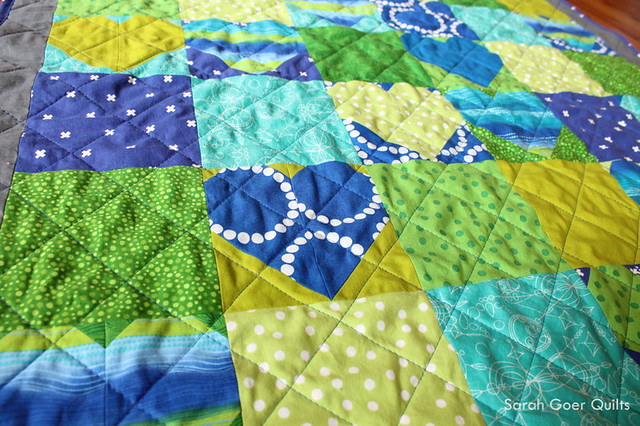
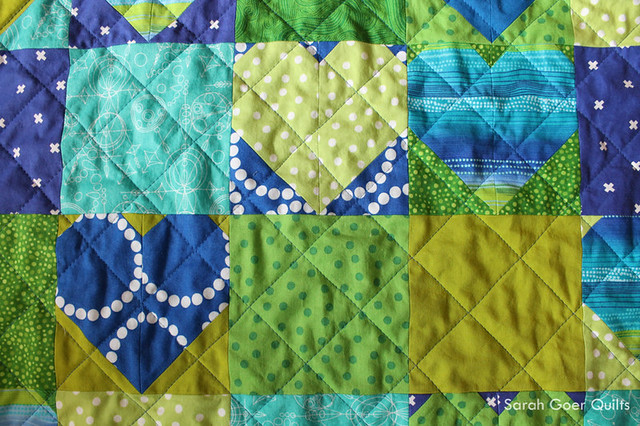
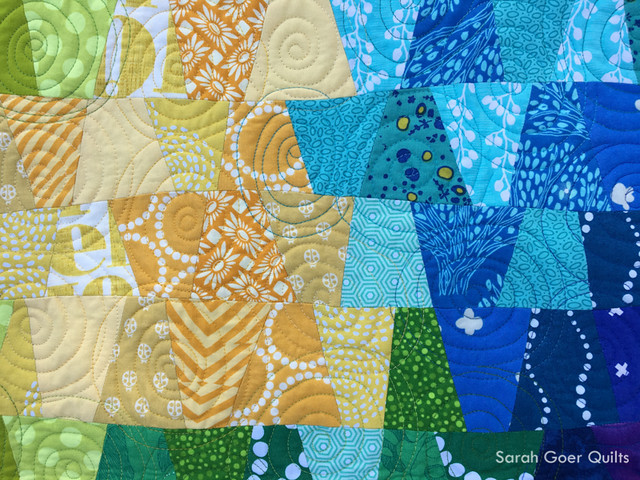
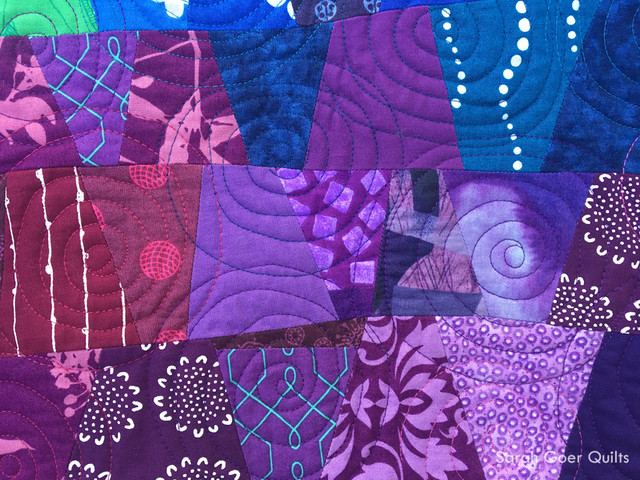
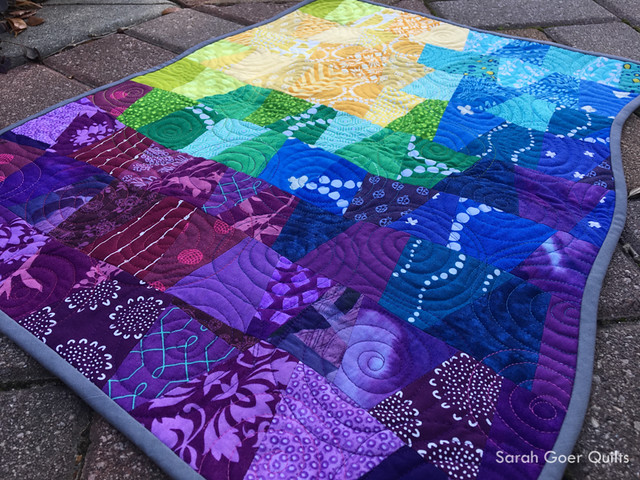
Then I stitched overlapping spirals that were approximately 3" in diameter. I mostly aimed to match the thread color to the area of the fabric that I was quilting on, but of course there were some great spots where strong contrast occurred as well. Here's where I started.

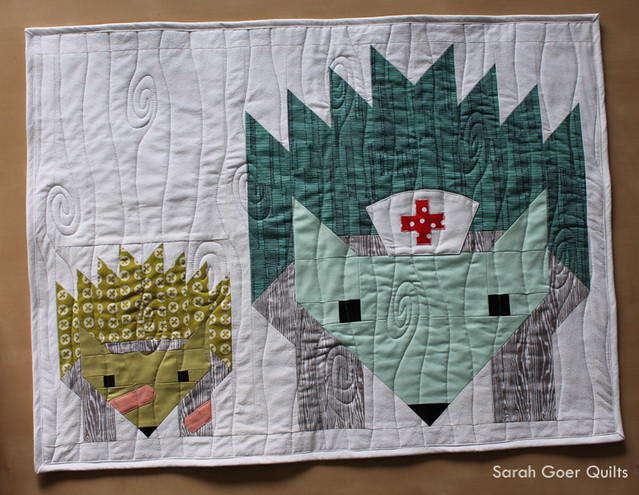
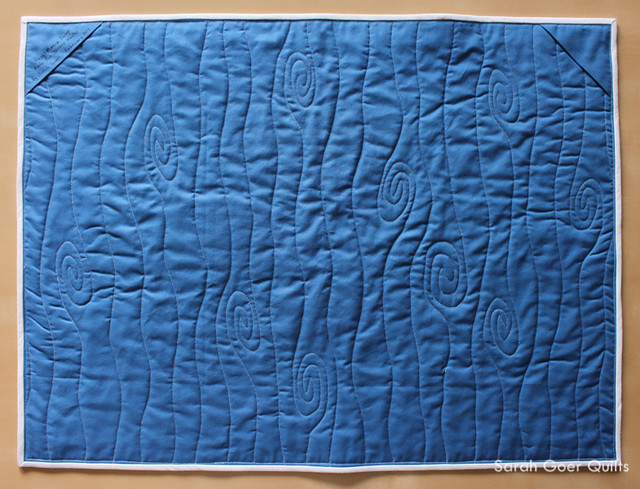
And some finished views.

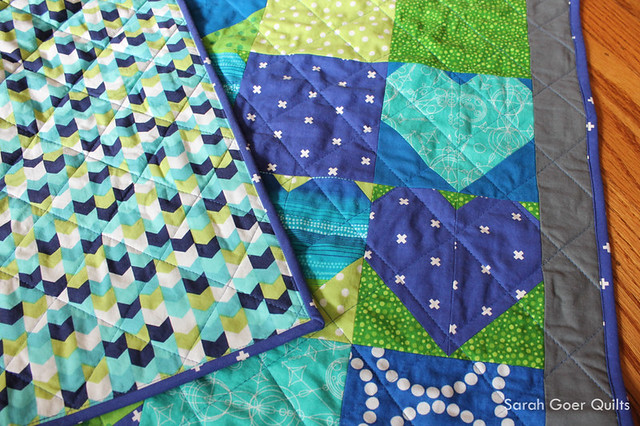
I went to Savannah with zero threads tied and buried and my binding was only attached to the front of my quilt. I worked on burying threads on Thursday and Friday while watching demos and sitting near outlets to charge my phone. I got to give a handful of one-on-one demos myself on how to bury threads. ;-) Friday evening after dinner, I finished the final stitching on the binding. Once a procrastinator, always a procrastinator? I like that my late night hotel photo shows the texture of the quilting so well.

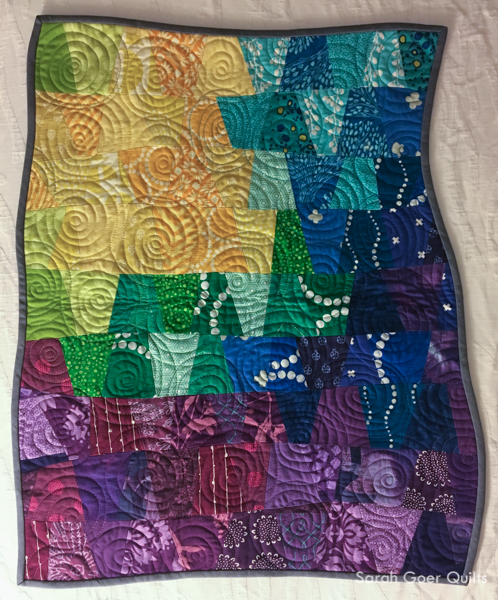
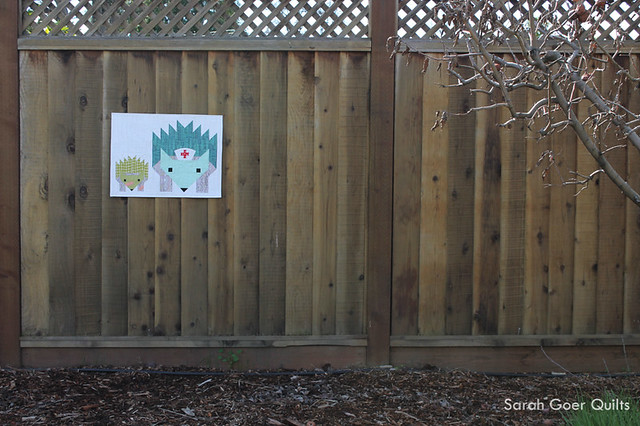
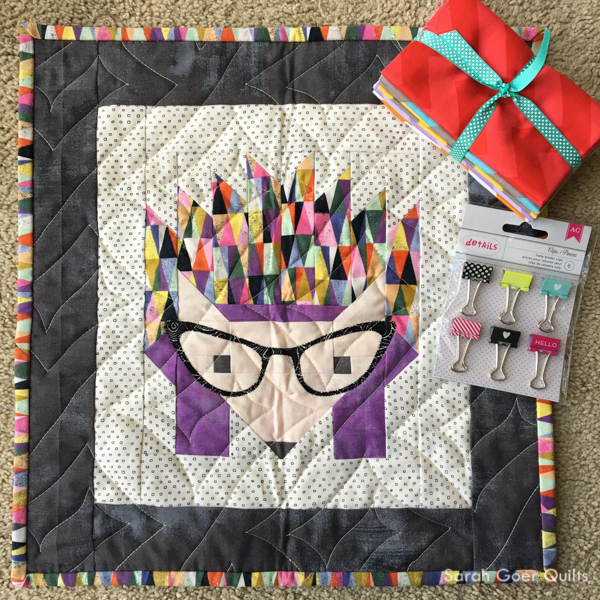
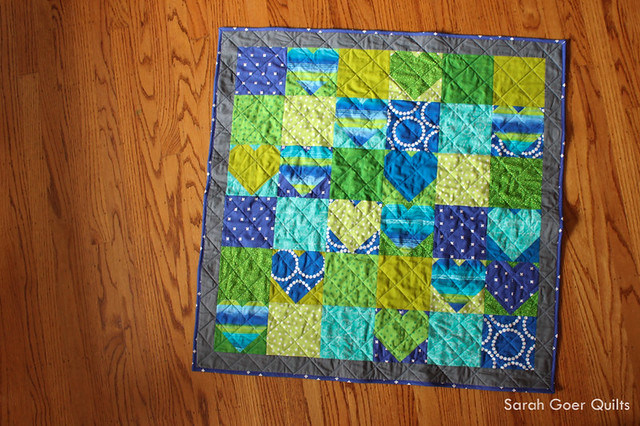
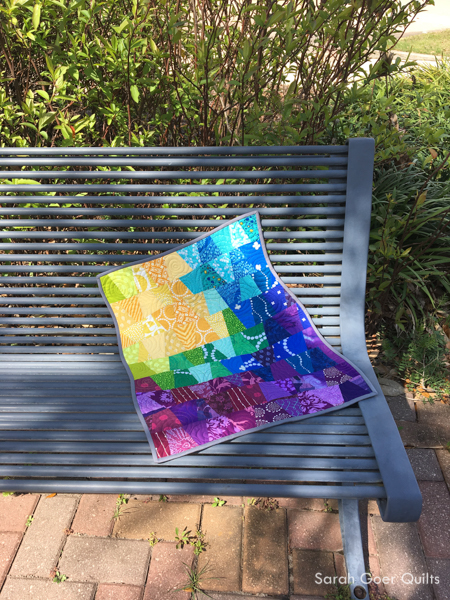
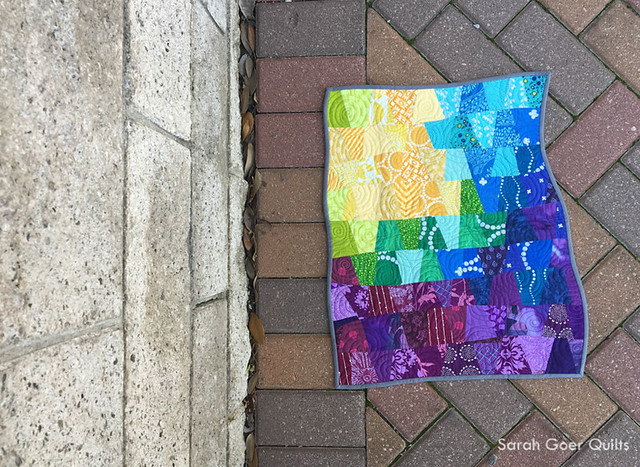
And of course, I took the quilt out for a mini photo shoot before delivering it to Ginger.


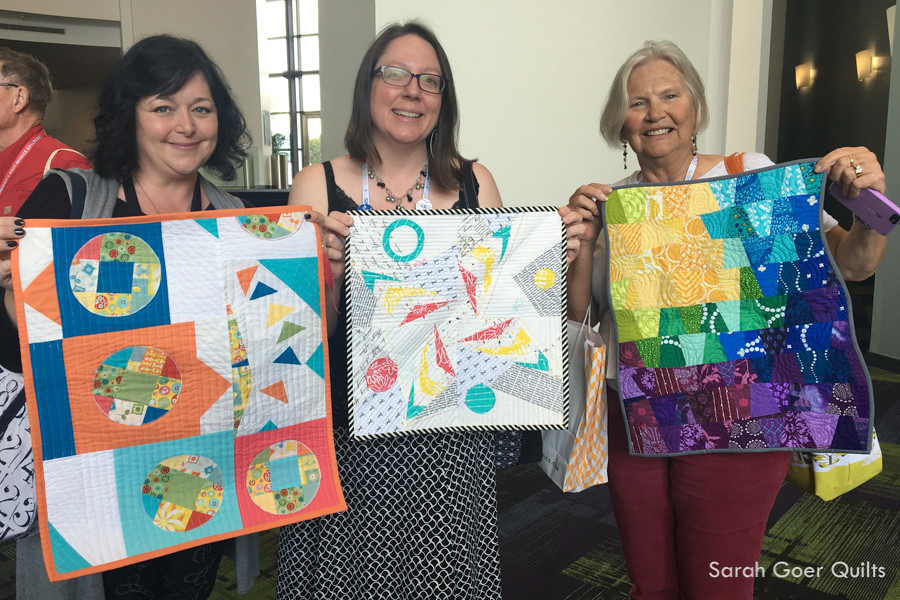
Here are Susan, myself and Ginger. We were connected in a little loop for the swap. Susan made for me, I made for Ginger, and Ginger made for Susan. We're each holding the quilt we received. I love the beautiful mini I received from Susan. It has some lovely embroidery detail that you can't see in the picture. And I adore the striped binding!

Thanks for visiting! I'm officially on an IG swap break for the time being... but boy are they fun!

SaveSave

6 Comments

After a break from Instagram quilt swaps, I caved for two swaps, the Hazel Mania Swap and the MQG swap. I've admired Hazel for quite a while and this was just the excuse for me to finally make one. The secret partner assigned to me is a Pediatric Nurse Practitioner. She tends to favor cool colors and greys/whites/creams or low volume as neutrals. Her mosaic mentioned that she loved the idea of a nurse's cap on the Hazel. I decided that I would make a nurse and a patient for the mini quilt and opted for a nurse's cap as well as bandaids on the "kid" Hazel to personalize it.

There are so many pieces in a Hazel block. It's very important to keep things properly labeled as you go. I opted to use my Alphabitties to keep track of all my pieces. The blocks went together pretty quickly. I admire Elizabeth Hartman's creative piecing to build the block, but with both Hazel and her Preppy the Whale pattern, I've found that reading the directions carefully is key.

Once I made both Hazel blocks, I had to decide how I would appliqué the cap and bandaids to the mini. I like a finished edge. I sketched the cap until I found a shape and size that I liked, then cut it out of two pieces of fabric, pieced them together, clipped the curves and corners and turned it right side out. The cross on the nurse's hat was raw edge appliquéd. Once the hat was made, I machine appliquéd by stitching along the edge of the cap.

For the bandaids, I once again sketched the shape and cutout my fabric, but for these I just pressed under about 1/4" around the finished edged. Then I seam ripped the seams on Hazel and inserted the bandaid into the pieced seam to really give it the look of being wrapped around Hazel. After closing the seam with the bandaid inserted, I added a small piece of batting in the bandaid for a puffy center before machine piecing the edges of the bandaid. This detail is my favorite part of the mini quilt.

I finished the quilt with organic woodgrain free motion quilting. I've used a variation of this motif before on a larger scale and really love the look of it. I find it has a forgiving ease to the design unlike some other more detailed, dense or precise motifs.

The mini has been received by Jessica. I had such a great time creating for her!


Here's the adorable Hazel mini that I received from Stephanie in the swap. I love the colorful print fabric, the fun glasses and the funky quilting. Such a fun addition to my sewing room wall.

Thank you for visiting!

12 Comments

I'm happy to be participating in the fourth week of Project QUILTING. (You can find me at #110 if you'd like to vote for my project.) This week's theme is Brighter the Better. We were asked to crank up the saturation in our projects. Let me just say, my stash was made for this challenge. My initial pull of bright, vibrant fabrics resulted in a variety of bold stripes.

I was inspired on the morning of Valentine's Day by the heart blocks being posted on Instagram. I decided to go with fully saturated hearts for my project and chose one of my stripes to inspire the color palette.

I settled on the 5" finished size of the Simple Heart Block by Cluck Cluck Sew. I had a limited amount of the striped fabric and this size seemed to maximize the number of blocks I could create – seven. I cut a variety of background fabrics for these striped hearts. Then I went on to make additional pairings for more heart blocks. I decided early on I would include some square blocks interspersed with the heart blocks. In the end, I stopped sewing heart blocks when I got tired of making them. ;-) Inadvertently, I sewed 14 heart blocks on February 14th.

The next morning I filled in the remaining spots with squares and began work on a final layout. I could have spent days rearranging blocks on the design wall. I didn't want like fabrics to touch on an edge (corners were okay) and I wanted hearts (and more specifically striped hearts) in each row and column, and I wanted some balance.

I added the grey border so I wouldn't lose my points when I added my binding. I machine bind and it's not a perfect 1/4". I should probably do some work to figure out how to plan that my machine binding land in the right place by adding a little space around the quilt top when I trim it after quilting.

I thought I would walking food quilt crosshatch spaced 1 1/2", but when I started my quilting after 10pm last night I decided on 2 1/4". Two hours of quilting later, I finished that step at 12:40am. After I slept, my 4 year old daughter supervised my work attach the binding and then helped with my photo shoot. ;-) I had planned to bind it in grey to match the border, but decided in the vein of "Brighter the Better" I would use one of my blue fabrics. I had the perfect amount of this print! The backing fabric (also from my stash) was purchased a while ago to back a project that I recently gave away (in WIP status). I thought it was the perfect combination for this quilt.

My quilt finished at 34" x 34" which I think means it's the perfect size to go to a NICU.

I'm linking up to Persimmon Dreams for the Project QUILTING Brighter the Better Challenge and to TGIFF at A Quarter Inch from the Edge.

Thanks for visiting! Voting for Project QUILTING is open! You get to vote for your ten favorite projects. Mine is #110. Voting has ended. :-)