8 Comments

The Kids Quilt Round Robin started in May with each of the participating kids creating a 20" x 20" block or a 10" x 40" row and deciding on their theme and/or color scheme. We had 9 kids participate across the US.

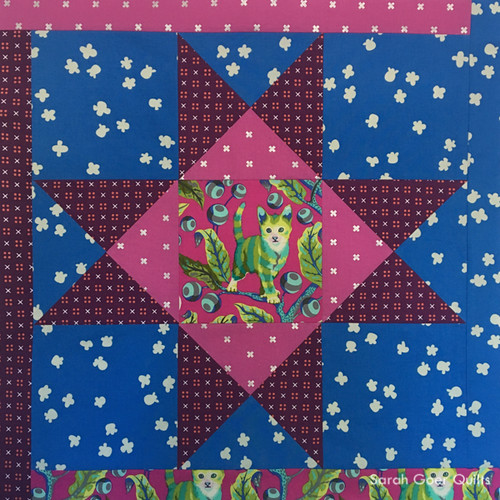
My daughter R (age 5) chose animals as her theme and picked a Tula Pink Disco Kitty print to feature in her block. She wanted to make a star block so we looked online and decided on this 8 pointed star featuring quarter square triangle units. Each of her fabrics was from her stash except for the blue print that she chose from my stash.

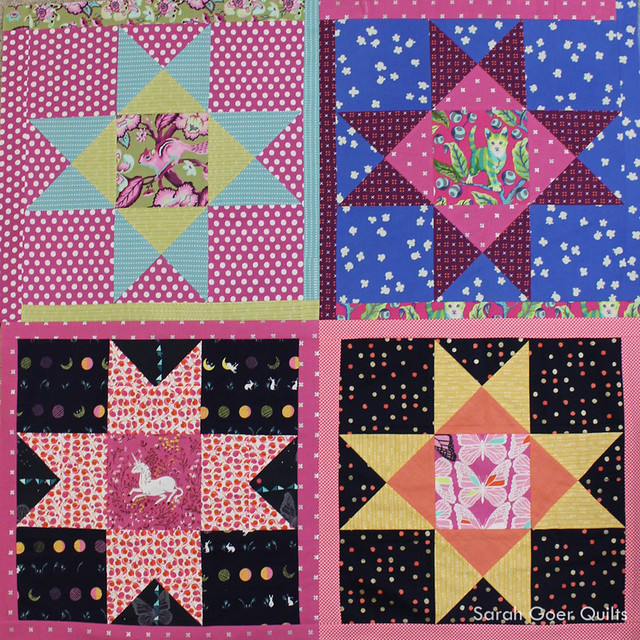
The following month Z (age 5) chose to make the same star block and featured a butterfly print in the center her star. In July, Norah (age 7) chose a unicorn for her feature print and used snails and rabbits in two of the other prints inner block. The final month, sisters A & C (ages 8 and 6) chose a chipmunk for the center of their block.

R is working on a pieced backing using almost every cat fabric from her stash (and some rabbits) to finish her 40" x 40" cuddle quilt. I love how cohesive the quilt looks.


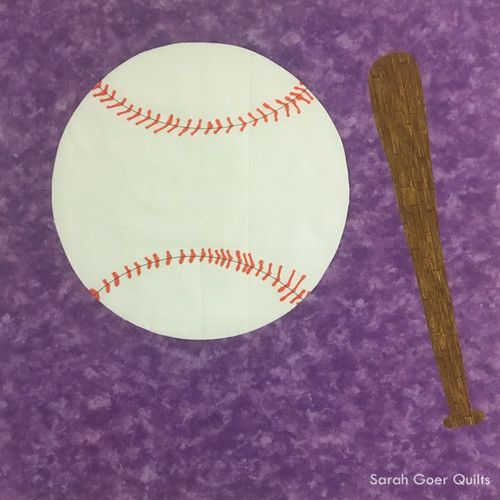
My son G (age 7) chose a sports theme for his round robin project and began by making the baseball block. He drew the stitching on the ball with fabric marker, machine pieced the inset circle, and appliquéd the bat.

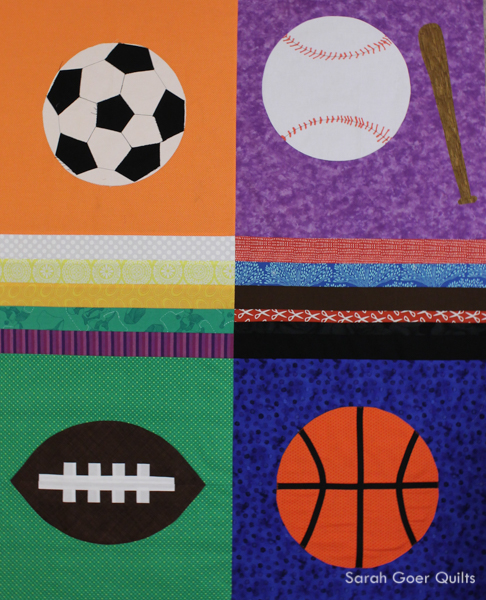
In June, Caitlyn (age 8) made the football block using paper piecing and curved piecing. Then Sophie (age 9) created the appliquéd basketball. The lines on the ball were created with bias tape appliqué. In August, H (age 5) created the final block, an appliquéd soccer ball.

G was really excited about the blocks everyone made for him, but since nobody featured aikido, he decided that he wanted to add something to represent that sport. He chose fabrics from my stash to create each of the belt colors for the center section of the quilt. His quilt will finish at 40" x 50". My favorite part of this quilt is the variety of skills used.


Thank you to all the kids (and moms) who participated. I'm so proud of the sewing that all the participants did on the blocks for themselves and for each other. Both my kids have a goal of finishing their quilt this month so they can submit them to QuiltCon. I hope some of the others will submit as well. It will be fun to see them in person.

You can read more about my kids round robin sewing from May, June, and July.


Please hop around to see the other quilts being created from the round robin.

A & C's treehouse and outdoor play quilt on Berry Barn Designs and @berrybarndesigns.

Norah's flying geese quilt on Swim Bike Quilt and @swimbikequilt.

Z's stars quilt on A Stranger View and @astrangerview.

Caitlyn's scrappy hearts and stars quilt on Tiffany Baxter Quilts and @tiffanybaxter.

Sophie's stars and constellations quilt @thefeltedpear.

SaveSave

SaveSaveSaveSave

SaveSave

SaveSave

18 Comments

I really appreciate whoever came up with "quilting and collecting fabric are two different hobbies." While I actually have a very usable stash for the type of quilting that I generally do, I have been collecting Halloween fabric for quite a few years. And every year October 1st rolls around and I wish I had a Halloween quilt. Then I very accurately realize there's just not a high likelihood that I could start and finish a Halloween quilt before Halloween.

You've heard of Christmas in July, right? Many crafters who make handmade gifts begin making those items in the summer. Last year, I decided that if Christmas in July was a thing, so was Halloween in April... and I marked my calendar for April 1st of this year to start my Halloween quilt. Surely, if I began a quilt in April could have it done by October.

April came and went and I finally started the quilt in May. I chose the Strip It Down pattern by  Quilt Theory. It's a great pattern that could easily go together in a day, except of course that I work on many projects at once and I had to order my background fabric. I had a finished quilt top by the beginning of September, so I selected the backing fabric (which I didn't photograph, but you'll have to take my word is an awesome purple polka dot on black) and sent the quilt to Tami for longarm quilting. I chose a computerized spider web panto that I'd seen her use on another quilt, and a variegated orange thread. I'm thrilled with how her quilting jazzed up my quilt.

The large panels in each strip are a great place to feature fun prints and there are no seams to match up. The background panels are great for a solid fabric to feature an interesting quilting motif or a nice patterned fabric. I'm a firm believer in using a striped binding whenever reasonable and I'm happy I went with this black and white stripe. It made me a little dizzy to look at the yardage, but these skinny little strips are just perfect!


You can see my goal in this post. Linking up to OMG October Finish Link-Up and TGIFF at Anja  Quilts. I've also linked up to the 2017 Q4 Finish Along link up. See my whole Q4 list here.

SaveSave

SaveSaveSaveSave

SaveSave

SaveSaveSaveSave

SaveSave

SaveSave

SaveSave

10 Comments

I'm pleased to announce that my first self-published pattern is available on Craftsy! (Update: You can now purchase the PDF pattern directly from me in my pattern shop.) Last Fall, I designed the Zoom Zoom quilt that I gave to our 4-year-old friend who had just become a big brother. The race car fabric was from my stash and I designed the cuddle quilt to feature the fun print. From that design I created the Back and Forth baby quilt pattern for you. This new version features Guppies for Lunch by Michael Miller Fabrics and coordinating Kona Solids. It would also be lovely featuring a different novelty or floral print.

The Back and Forth baby quilt pattern is designed to feature a medium to large scale print, surrounded by coordinating fabrics. It works well with a variety of solids or blenders. It's the perfect size for a baby or as a cuddle quilt for a toddler.

The quilt goes together in a day and the instructions are thorough enough for you to easily complete this quilt with no prior experience sewing partial seams. The pattern includes quilting ideas as well as instructions on creating straight and bias binding. The quilt finishes at 35 1/2" x 41". Consider using my machine binding tutorial for a super fast finish!

Below are my original Zoom Zoom quilt and the Kaffe version that Laura created when she tested the pattern.