Monthly Archives: December 2019

2 Comments

Happy Hanukkah!

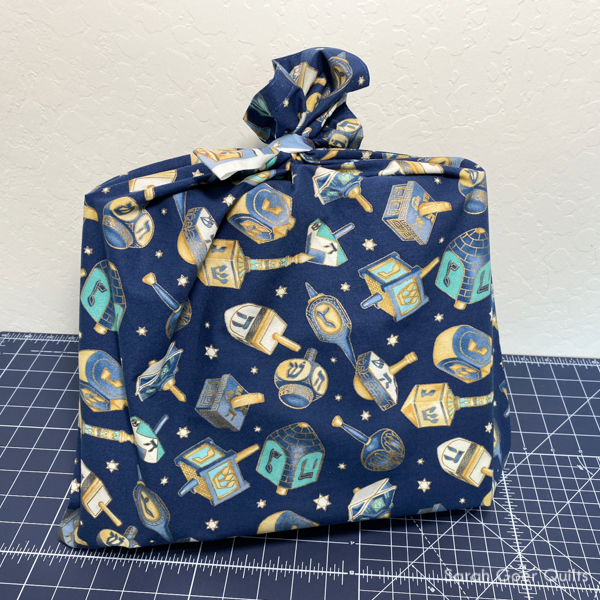
I've been on a quest to make enough reusable Hanukkah gift bags to wrap the gifts for all eight nights before Hanukkah started this evening. Last month I shared a tutorial for a quick pillowcase style gift bag. I whipped together three final bags this afternoon and wrapped everything up. I'd still like to make a few more, but with a couple reused paper bags and boxes, and four of the reusable gift bags from Amazon, I was all set. I'm still feeling so appreciative of the bag I received as a gift.

My tutorial shows the most polished version I've made this year, with french seams, and a hemmed top edge, but there are ways to make this quick project even faster. On numerous bags I used the selvage edge to speed things up. Positioning the selvage at the top edge of the bag saves the need to hem the top edge. Or having the selvage edge along the side of the bag meant the seam could be a simple straight stitch seam (which I pressed open) before stitching the bottom edge with a french seam and hemming the top. On one bag I serged the seams as well as the top edge.

I have just a few more pieces of Hanukkah fabric that I will fashion into bags to eliminate the need for the couple of paper bags/boxes I used this year.

Opening the first gift of Hanukkah. He got Legos. :-)

Here's a peek at the inside of my hemmed edge and my french seam (on the right side) from my gift bag tutorial. Everything was stitched up with 50wt Aurifil. Depending on the fabric you chose, the hem could be fancied up with a decorative stitch.

This is a great time to visit your local quilt shop for sales on Christmas and Hanukkah fabric. Stock up now and make bags throughout the year to be ready for next holiday season. Or go with fun fabrics you love that would work year round for gift giving.

These were all for gifts given within our house, but I would use cloth bags for gifts given to other family members and friends, giving them the option to keep the bag to reuse themself or I could take it back for future gift giving.

I'm participating in the 31 Day Blog Writing Challenge with Cheryl of muppin.com.

2 Comments

The fabric featured in this post was given to me by Island Batik.

Last week I shared the Tula Pink dress I made for my niece. She must have been excited to wear it because she flew home and took her first steps that night!

I'm concluding my time as an Island Batik Ambassador this month, so my 3D challenge is my final project made in response to the monthly Ambassador challenges. Our challenge was to make a project of any size incorporating 3D by any method of our choice. This could be actual 3D, or an illusion on a flat quilt (think Tumbling Blocks for an example of this). I was all set to make a quilt. I've always liked the look of a drop shadow pieced on quilts. I had chosen a fabric collection. I had trimmed down the squares. I had pressed the grey solid batik that would be my drop shadows and done the math on cutting requirements. Then I decided it would be way more fun to make another dress for my newly walking niece.

I opted for the same pattern as her last dress, but a different look. The beauty of this pattern (besides the ease) is in the versatility. The pattern includes three different sleeve lengths, an optional bottom ruffle, and an optional sash. While it's designed with stripwork in the skirt (like this first one I made), It can be simplified with a single fabric for the skirt (like the baseball dress I made my daughter four years ago).

The hardest part of the decision making process for this new dress was finding coordinating fabrics in the sizes I need. I basically needed a full WOF (width of fabric) half yard for the skirt. This reduced the fullness of the skirt slightly. Then I needed smaller pieces for the bodice and arms to coordinate. I really wanted the skirt to be a more bold print with like-solids for the bodice and arms, but the fabric stash did not provide for my vision.

The green I settled on for the skirt and the red sleeves come from the Batik Foundations Blenders. The bodice is a remnant from my Fortune Teller quilt.

This is already a quick and easy pattern, and with the single panel of fabric for the skirt I think it cuts the construction time in half. The design of the dress is reversible. The front and back are identical in the pattern. I opted to leave out a size tag so the dress could really be worn each way since the bodice section on the front and back were fussy cut from different sections of the blue fabric. On one side the bodice is mostly green scrolls on blue and on the other side the print is mostly red on blue.

Most of this dress is sewn on the serger, but I pieced the one skirt seam with a straight seem that I pressed open. I left the selvage on to avoid needing to serge or otherwise finish the edges. This is a great benefit of using a panel of fabric that is WOF.

I enjoy having just the right thread for a project. I used Aurifil 50wt Grass Green (#1114) for piecing the skirt, attaching it to the bodice and topstitching on the hem of the skirt and on the bodice panels. I used Aurifil 50wt Red (#2250) for top stitching on the sleeves.

Thank you to Island Batik for two years of colorful fun as an Island Batik Ambassador!


I'm linking up to the Beauties Pageant.

I'm participating in the 31 Day Blog Writing Challenge with Cheryl of muppin.com.

We attended a Christmas party in the Willow Glen neighborhood of San Jose this evening. The party included a horse drawn carriage to see the lights in the neighborhood. What an impressive display!

Those last two photos show a couple of the other party vehicles out to enjoy lights, a trolley car and a party bike.

I'm participating in the 31 Day Blog Writing Challenge with Cheryl of muppin.com.