Yearly Archives: 2015

10 Comments

In June I showed you my Q2 bee blocks. Here's the Q3 bee block report.

July

The Bee Hive:  Kristen chose these low volume and blue Ripples blocks for her month. I had a great time pulling in a ton of different fabrics to use in this one. What fun this is going to be when she gets it all together.

do. Good Stitches: In July Julie picked these blocks. The 12" blocks went together very quickly. I loved using that spoon fabric for the first time!

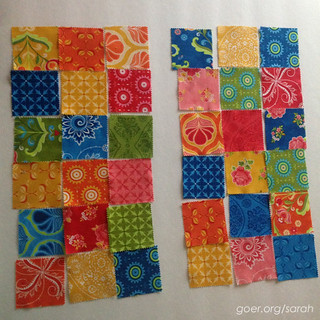
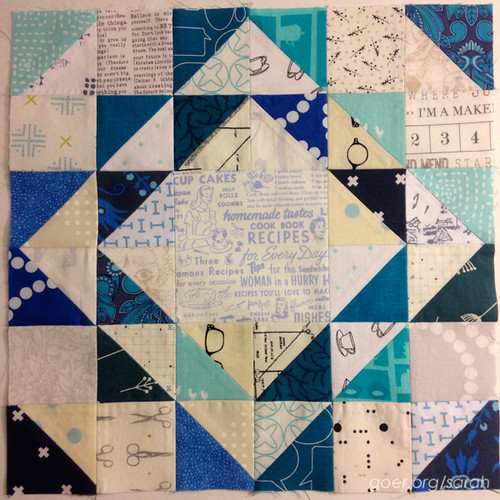
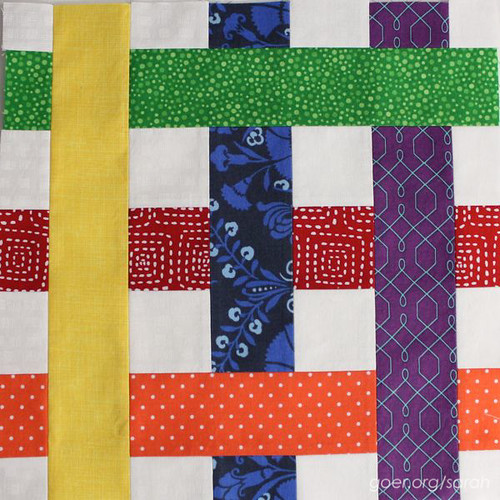
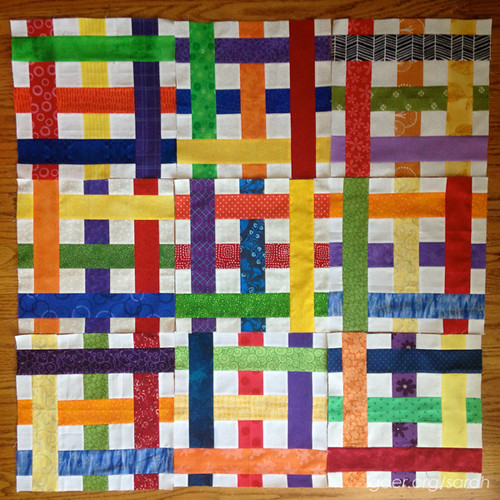
Stash Bee: July was my month for Stash Bee and I picked Rainbow Simply Woven blocks. Here's the block I made as a sample, and mine with the first 8 blocks that I received. I've gotten all the blocks from my bee (no current photo of the whole group) and want to make some more to go with them before I start piecing them together. Not sure what size quilt I'm aiming for yet. I love these. Thanks to everyone in my bee!


August

Stash Bee: We made Curved Log Cabin blocks for Jennifer. I made mine on the late side, so I picked purple to round out the palette she received from the group. The sewing went together quickly on these (it felt much faster than the cutting). Maybe it helped that I was working with one of my favorite colors!

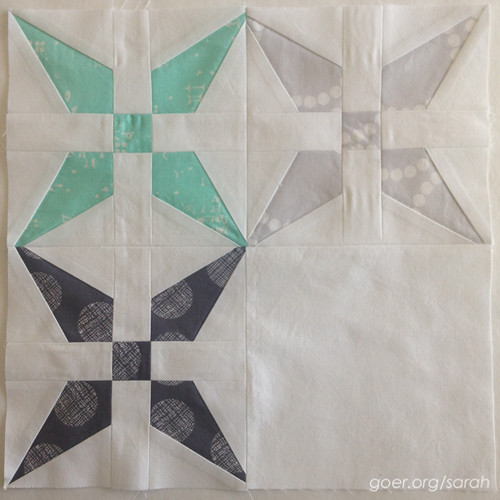
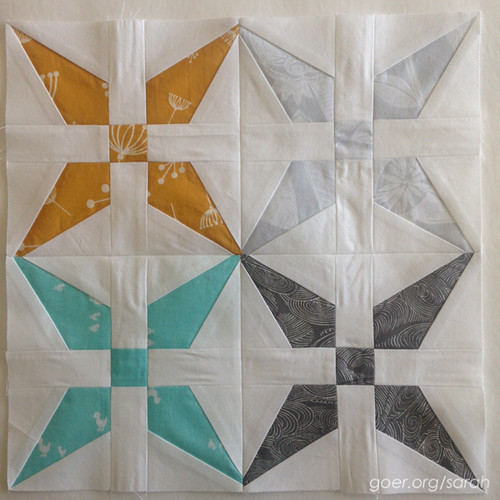
do. Good Stitches: Heather chose these blocks for us to make in August. I felt a little too lazy to mark my blocks like she showed, so I created a paper pieced section for each three piece corner for each star. I even managed to chain paper piece them in long strips... which was a little nutty, but helped make things go more quickly. I think her option for us making our blocks with three (and a blank) or 4 stars will create an interesting design element in the finished quilt.


September

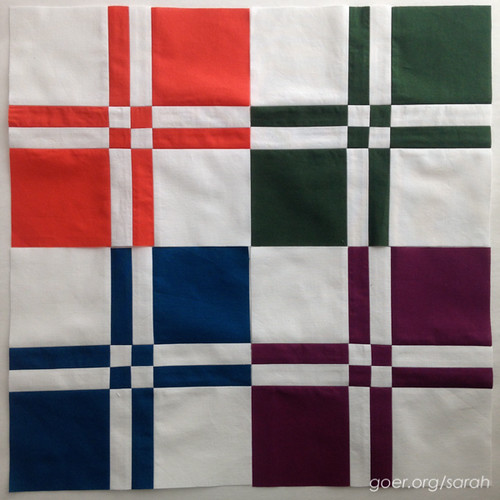
do. Good Stitches: This month we made solid jewel tone and white Disappearing 4-Patch blocks (finished size 8"). Quick and easy, but since my stash is lacking in solids I'm glad I could find a good variety of jewel tones.

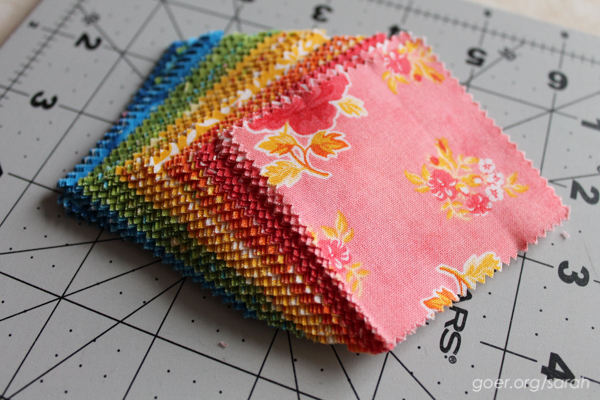
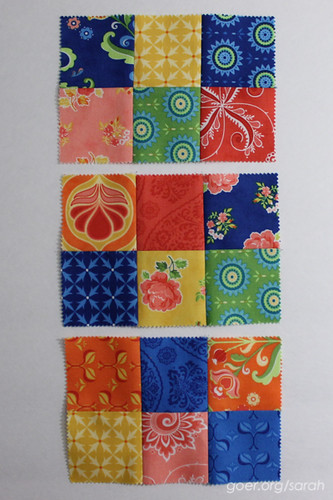
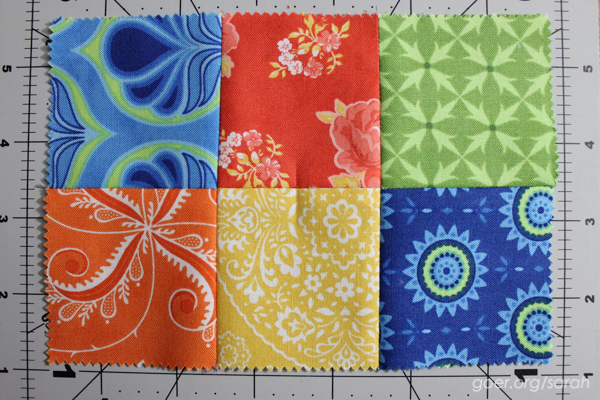
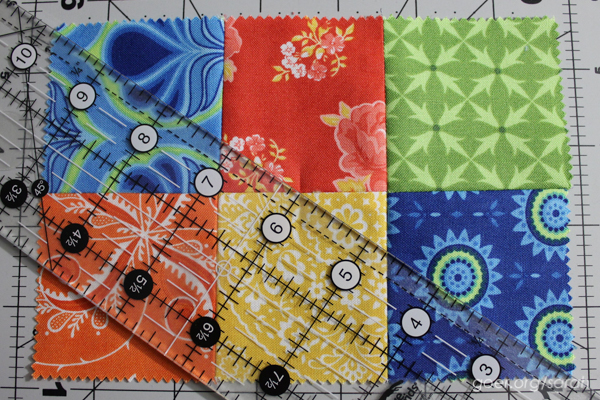
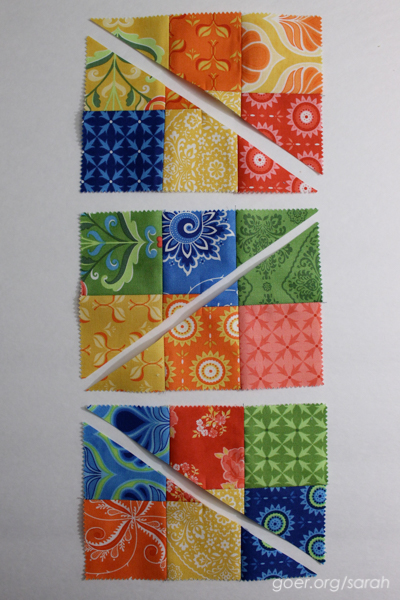
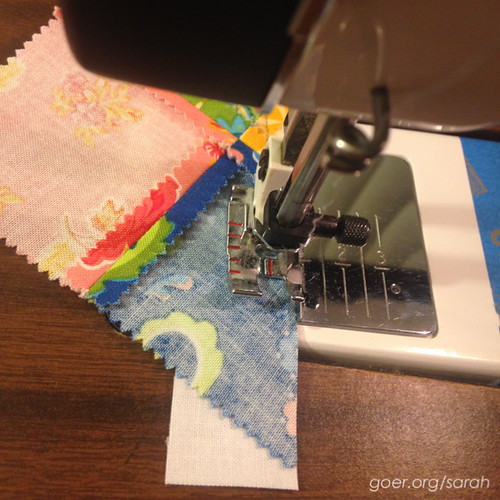
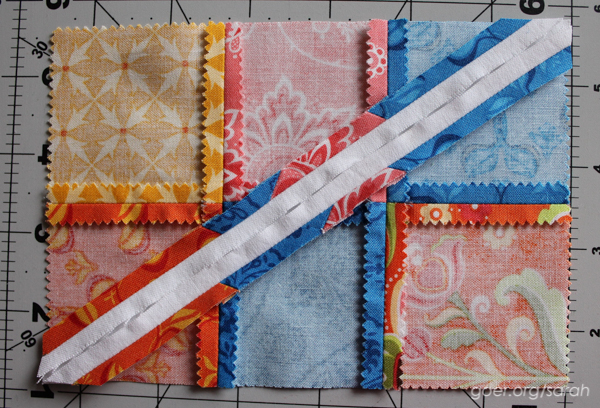
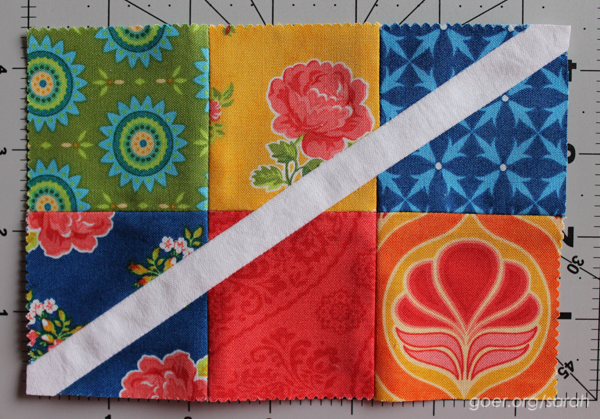
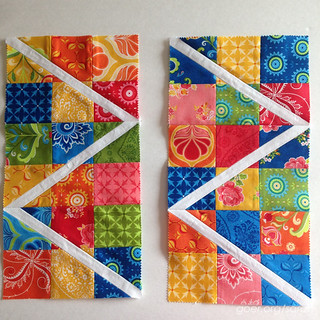
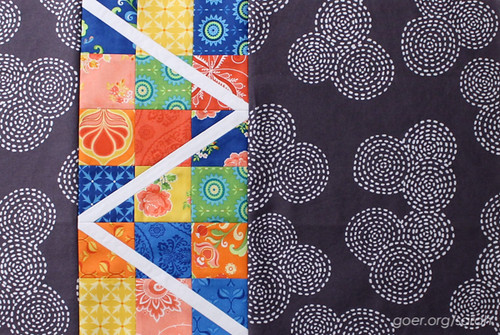
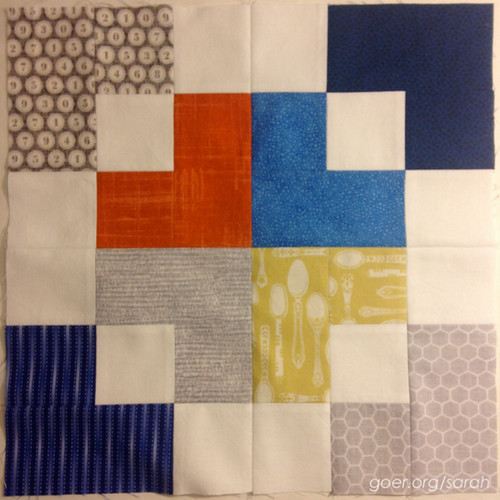
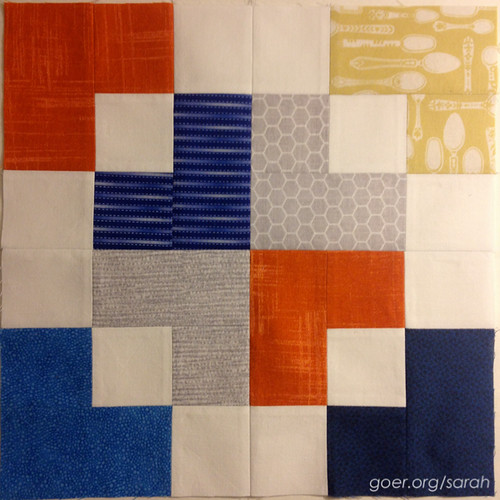
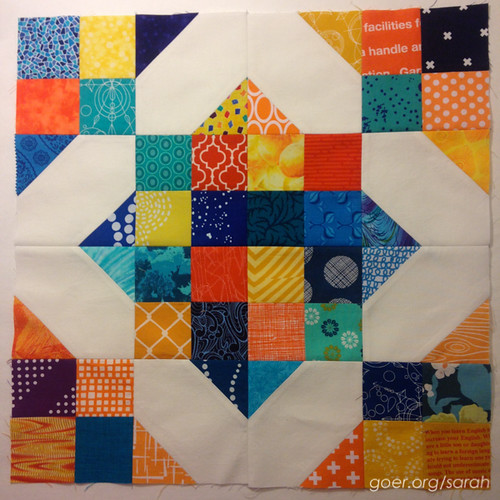
Stash Bee: Katie asked us to make Scrappy Crossroads blocks for her. Her palette was navy, blue, teal, orange and gold (and maybe touches of dark purple). I had fun going through my past project scraps to cut 2 1/2" squares. There are 48 feature fabrics in this block! Do you recognize any of these from my finished projects?

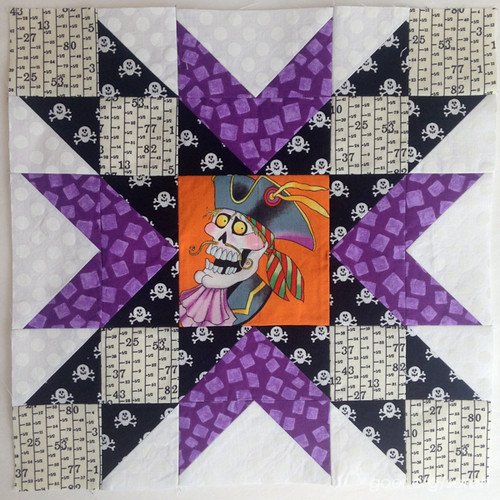
The Bee Hive: Last month I cut into Halloween fabric for the first time to make my Halloween Mini for the swap. It was so fun to work on and I was glad that Lisa gave me an excuse to use some more of my Halloween fabric for her Double Star block. She loves Halloween and skulls but wants to maker her project "fun and quirky." I thought this guy was the perfect choice!


Have you participated in a quilting bee? If so, which one? What was your favorite part? If you haven't participated in a bee and would like to try one, Stash Bee signups for 2016 open on October 28th.

22 Comments

I just can't resist a great swap theme. The early mosaics for the Home Sweet Home Mini Quilt Swap convinced me to dive it. This swap was a little different in that we were paired with partners to make for each other. That makes this the first time I've not shown my finished mini online in advance of mailing it. Since Brittany knew it was for her. My September goal post showed my first seam, the curved curtain in the window.

Brittany told me "I like retro houses and campers, but anything bright is good with me!" I couldn't decide on an existing camper pattern, so I created my own. It's made by piecing the camper (except for the hitch and wheel), then cutting out the outline of the camper to applique to the background. I used turned-edge machine applique for the wheel and the camper. The hitch is simply fused and stitched in place. I had a great time designing it and making it... and actually made two so I could have one for myself. My camper is done, but the quilt isn't quite finished yet. Here's the one I sent to Brittany. It measures 20" x 16".

I also made her this tiny little quilt. I took inspiration from Completely Cauchy's itty bitty piecing and whipped this up. It finished at 5" x 5". I think it has 83 pieces.

I'm linked up to ALYoF September Finishes, TGIFF and Finish It Up Friday.

I'm linked up to the Finish Along Q3 Finishes Party. See my whole Q3 goal list here.

14 Comments

I'm participating in the Mini Charm Challenge, organized by Kylie (@sewkylie on Instagram). Welcome to my tutorial for the Zig Zag Placemat.

Materials (for one placemat)

  • 18 - 2 1/2" squares from a mini charm pack (or cut your own!)
  • 3" x 8" contrasting fabric (white shown)
  • fat quarter of coordinating front fabric (grey/white round stitch shown)
  • fat quarter of backing fabric
  • 14" x 20" piece of batting
  • 62" finished binding (be sure to make a little extra)

For this project I used Fancy by Lily Ashbury for Moda. All of my seams are stitched with a shorter stitch length and 1/4" seam allowance. Seams are pressed open.

Cutting Instructions

Step 1: Cut your contrasting fabric into three 1" x 8" strips.

Step 2: Cut your front coordinating fabric into two pieces, 3 1/2" x 12 1/2" and 9 1/2" x 12 1/2".

Step 3: Cut backing fabric and batting 14" x 20".


Sewing Instructions

Step 1: Choose a layout for your charm squares. Each placemat will use a 3 by 6 array of squares. Here are my layouts for the two placemats I made. The beauty of using a mini charm pack is that everything coordinates perfectly!

Step 2: Stitch the charm squares into "6-packs" so you have three units per placemat, three squares wide by two squares tall. These units should measure 6 1/2" wide by 4 1/2" tall, unfinished.

TIP: To get those seams lined up as perfectly as possible, I press my seams open, and then use a straight pin right through the seams in both layers. Here, you can see what that looks like from the top and bottom. (Note: These pictures were taken from a later step in the process, but the idea is the same to build the 6-packs.)

Step 3: Slice the 6-packs in half, corner to corner. You'll need one to go the opposite direction of the other two. I have two going "downhill" and one going "uphill." I started by marking the center of my block by folding a crease into the middle of the center squares. Then I lined up my straight edge from corner to corner (a bit hard with the pinked edges on the charms) and through that center point made by my crease and the seam.

Step 4: Stitch the 1" strips of zig zag fabric into your 6-packs. The 8" long pieces should be just a smidge longer than your diagonal cut edge of your 6-pack. When lining up edges for sewing, the strip should hang past the edge of the 6-pack equally on each end, roughly 1/8" to 3/16". Piece with an accurate 1/4" seam allowance. This will allow this strip to simply replace the seam allowance and the finished unit should remain 6 1/2" x 4 1/2". Viewing the back of your seam you should see the edges of the strip touching each other.

Step 5: Trim each 6-pack down to 6 1/2" x 4 1/2". This should mostly be trimming of the edges of the strip you've just sewn in.

TIP: Since the edges may be hard to line up accurately, use your ruler to line up the corner square's seams at the 2 1/4" mark in both directions.

Step 6: Piece together your three 6-pack units to create the zig zag. Here are my zig zags for two placemats. These units measure 6 1/2" x 12 1/2". Refer back to my tip in step 2 for lining up seams.

Step 7: Attach the 3 1/2" wide piece to the left of the above unit and the 9 1/2" wide piece to the right. This gives you the full placemat, with an unfinished measurement of 18 1/2" x 12 1/2".

Step 8: Quilt and bind as desired.


Please visit other bloggers in the Mini Charm Challenge:

Sept. 14 - Jennie at Clover and Violet: Curvy Top Pencil Pouch
Sept. 15 - Lisa at Banana Cherie: NaKoa Mini Quilt
Sept. 16 - Me. Thanks for visiting!
Sept. 17 - April at The {Studio} Blog: Mini Charm Baby Bib
Sept. 18 - Nina at Nina with Freckles: Cute as a Button Mini Quilt
Sept. 19 - Konda at Moose on the Porch Quilts: Happy Hexi Flowers Small Quilt
Sept. 20 - Mary at See Mary Quilt: Rainbow Byte Mini Quilt
Sept. 21 - Kylie at Sew Kylie: Patchwork "Sew" Wall Decor