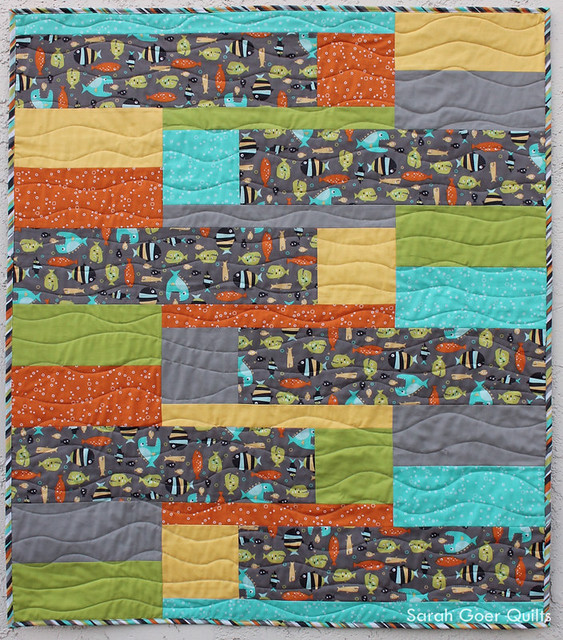
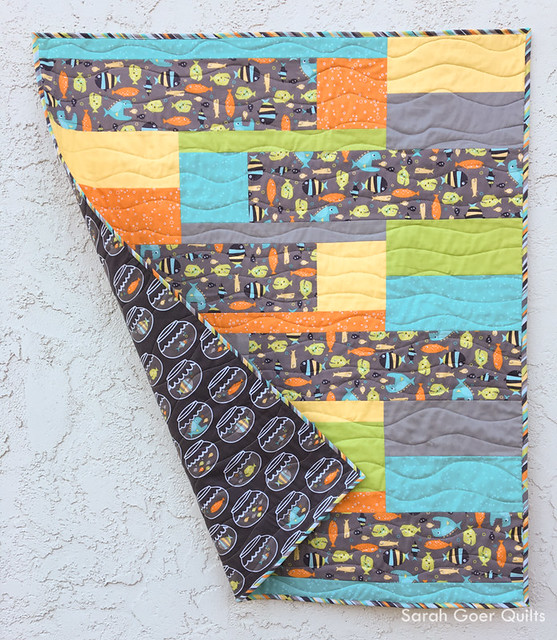
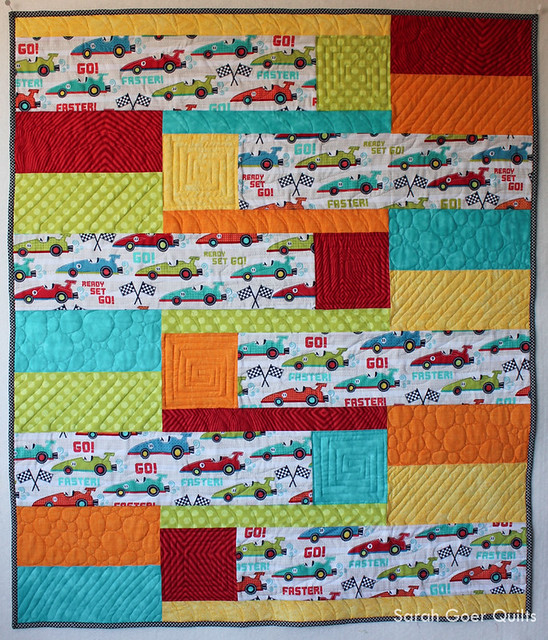
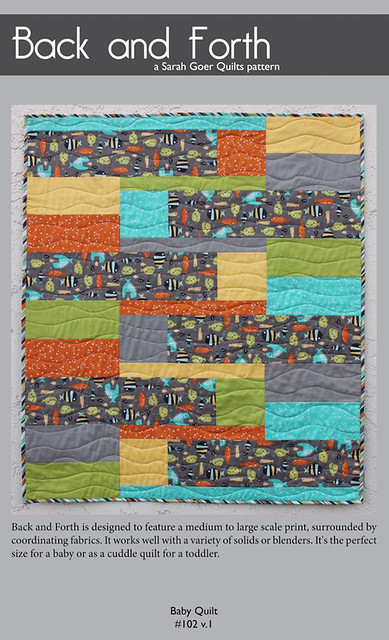
I'm pleased to announce that my first self-published pattern is available on Craftsy! (Update: You can now purchase the PDF pattern directly from me in my pattern shop.) Last Fall, I designed the Zoom Zoom quilt that I gave to our 4-year-old friend who had just become a big brother. The race car fabric was from my stash and I designed the cuddle quilt to feature the fun print. From that design I created the Back and Forth baby quilt pattern for you. This new version features Guppies for Lunch by Michael Miller Fabrics and coordinating Kona Solids. It would also be lovely featuring a different novelty or floral print.
The Back and Forth baby quilt pattern is designed to feature a medium to large scale print, surrounded by coordinating fabrics. It works well with a variety of solids or blenders. It's the perfect size for a baby or as a cuddle quilt for a toddler.
The quilt goes together in a day and the instructions are thorough enough for you to easily complete this quilt with no prior experience sewing partial seams. The pattern includes quilting ideas as well as instructions on creating straight and bias binding. The quilt finishes at 35 1/2" x 41". Consider using my machine binding tutorial for a super fast finish!
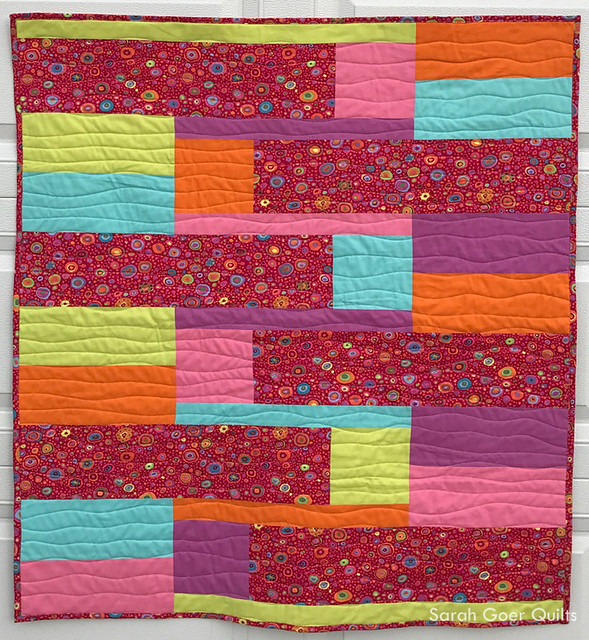
Below are my original Zoom Zoom quilt and the Kaffe version that Laura created when she tested the pattern.
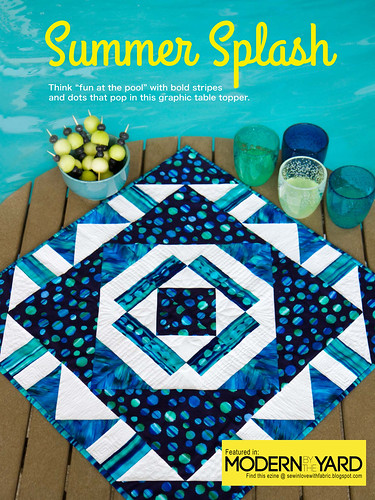
I'm so excited to share that my first magazine pattern is out today in Modern By the Yard, the free quarterly e-zine by Benartex. I had a great time working with a bright summer palette of blues that made me think of relaxing by the pool. I hope you enjoy my graphic mini quilt pattern. Please share pictures if you make one. You can use #sarahgoerquilts on social media.
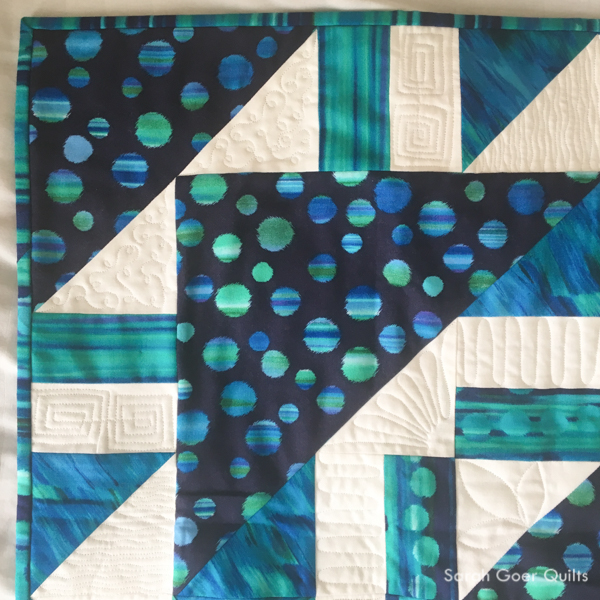
When I created my quilt I wanted to feature that navy dot fabric without cutting it up, which led to some interesting construction methods. ;-) I chose dense quilting using a variety of motifs in the white sections to really make the blues pop!
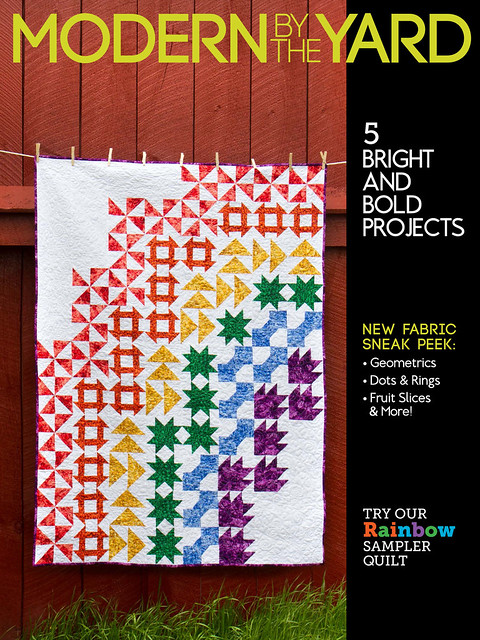
I hope you enjoy this latest issue of Modern by the Yard. Head over the Sew in Love with Fabric for previews of all the projects and a link to the full issue which you can view online or download as a PDF. This beautiful cover quilt was created by Alison from Little Bunny Quilts.
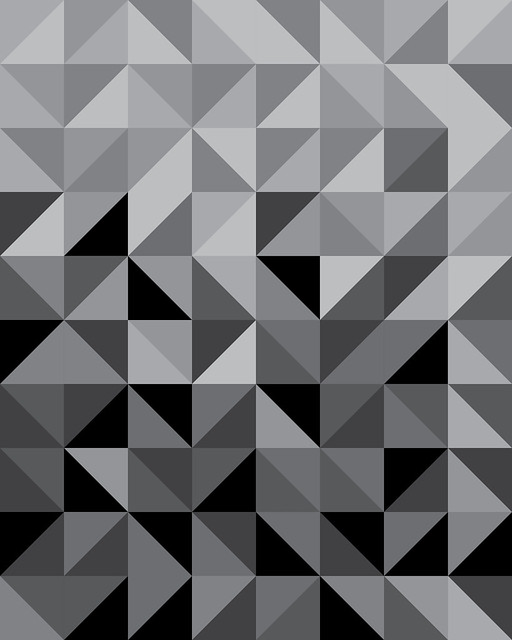
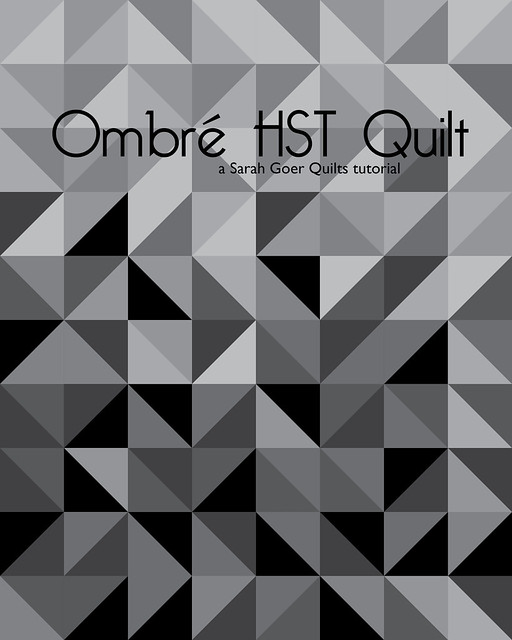
Inspired by a quilt that my friend Mary shared with me from Pinterest, I decided to design an Ombré HST quilt mathematically. This was the result.
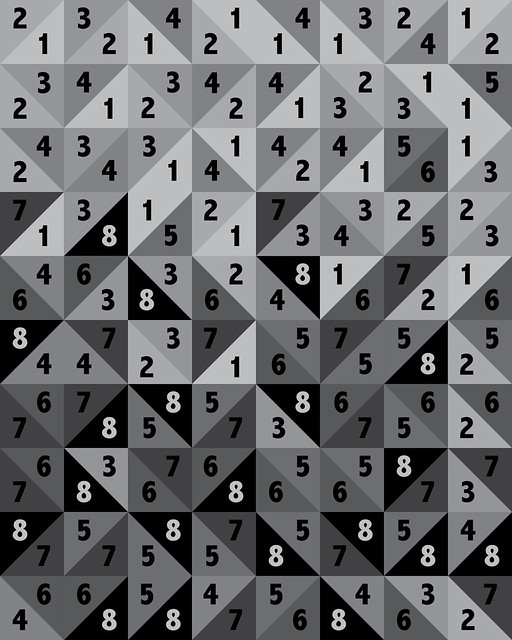
I chose to use a gradient of eight different values, numbered 1-8 from lightest to darkest. I began by drawing a 7 by 9 rectangle in my graph notebook and randomly adding diagonal lines in each square. 63 squares meant 126 triangles, so dividing that by 8 different values, there should be 15.75 triangles of each value. I used six of my values 16 times each, and two of them 15 times each, filling in the triangles somewhat randomly while using the lower numbers more frequently at the top of the quilt and the higher numbers more frequently at the bottom of the quilt. The last numbers I filled in were 4 and 5.
Knowing that it would be easiest to make HSTs two at a time, I counted up my pairings and found that seventeen combinations were used an odd number of times (meaning that two at a time HSTs would not be very efficient). Seventeen was the perfect number of squares to add one extra row and one extra column to my design, so my design became 10 rows of 8 HSTs. My final adjustment was to make sure that I had used each value an equal number of times. Then I converted my numbers to the graphic above.
Make Your Own Quilt
This design can be made by choosing eight solids (or blenders or prints if you wish) in a variety of values. Tip: Use the black and white option on your camera phone to view the values of your fabrics; this way you can ensure contrast and verify that you have a range of values. Cut out ten squares of each of the eight fabrics. Choose your finished size of HSTs and cut the squares one inch larger. Create two at a time HSTs and trim to 1/2" larger than your finished size. Want a baby quilt? Use a fat quarter of each fabric*. Cut 5" squares and trim HSTs to 4 1/2" for a 32" x 40" finished quilt. Want a throw quilt? Use a half yard of each fabric. Cut 8" squares and trim HSTs to 7 1/2" for a 56" x 70" finished quilt. (Scroll to the bottom of this post for a calculator to make any size quilt.) Use the list below for cutting and piecing and the diagram that follows for block placement to create your version of my design. Or go random and use your design wall to audition the layout of your design. Have fun!
(*One option for creating this quilt in a baby quilt size is to choose a Kona fat quarter bundle. I like these color options: Lush Lagoon, Sky Gazer, Powder Room, and Lavender Fields. You could use the extra fat quarters as part of the backing.)
Label swatches of your fabrics #1-8, in order by value, lightest to darkest. Cut ten squares from each of your eight fabrics. Make the following 80 HSTs.
using 1 square of each value, create 2 HSTs (24 total from this section)
1-5 (example, use one value 1 square and one value 5 square to make 2 HSTs)
1-6
1-7
2-5
2-6
2-7
3-4
3-6
3-7
4-6
4-7
6-8
using 2 squares of each value, create 4 HSTs (32 total from this section)
1-2 (example, use two value 1 squares and two value 2 square to make 4 HSTs)
1-3
2-4
3-8
4-8
5-7
6-7
7-8
using 3 squares of each value, create 6 HSTs (24 total from this section)
1-4 (example, use three value 1 squares and three value 4 squares to make 6 HSTs)
2-3
5-6
5-8
Like it in grey? Try these Kona solids: (1) Silver, (2) Ash, (3) Iron, (4) Pewter, (5) Steel, (6) Coal, (7) Charcoal, (8) Black.
Make Your Version Any Size Use the handy slider below to choose what size you'll cut your initial squares. Trim to the size indicated for a finished quilt in the indicated size.
Cut 4" squares. Trim HSTs to 3.5" squares.
Finished quilt will be 24.5" by 30.5”. Finished blocks will be 3" squares.