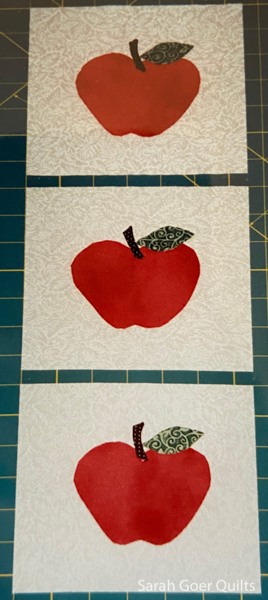
Yesterday I shared my improv hammock quilt block. The second block I made for Chris was a book.

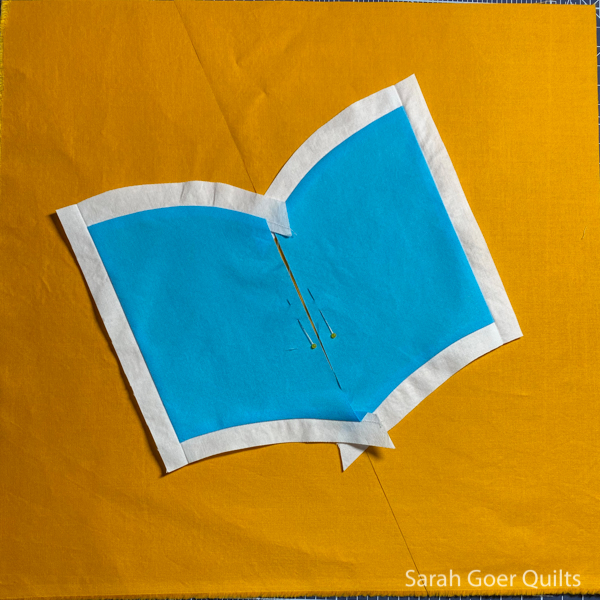
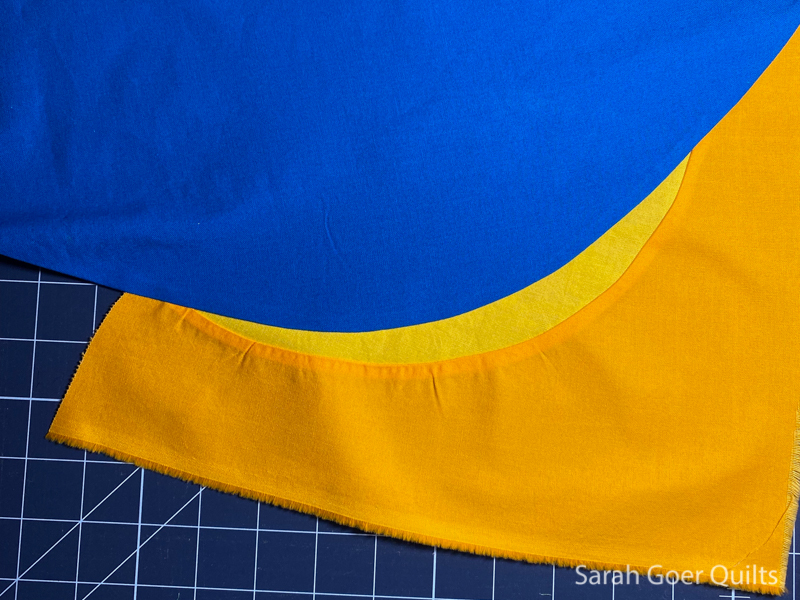
The book block was less tricky. I started by cutting book page shaped pieces out of the blue fabric. Then I added borders of white on three sides. I used the blue and white book pages as my template for cutting the background. These strips are about 5/8" wide. Rectangles were cut for the sides and I used the curve edge of the blue fabric as my template to cut the curves white strips.

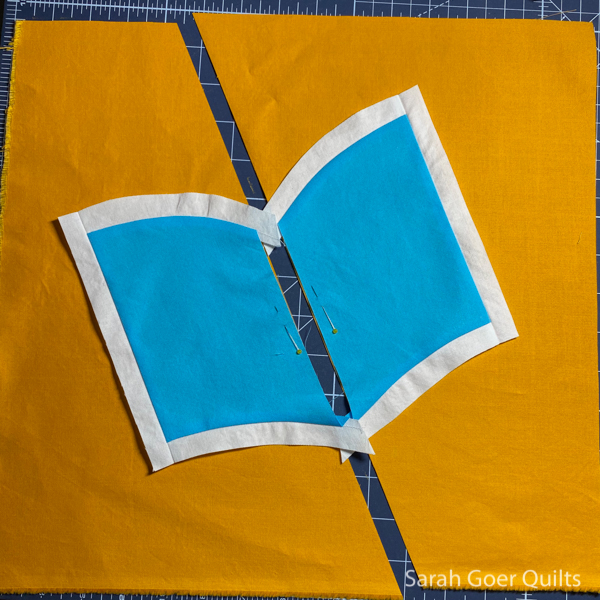
Next, I cut out the book shape from my background fabric, starting with the diagonal cut that aligns with the spine of the book.

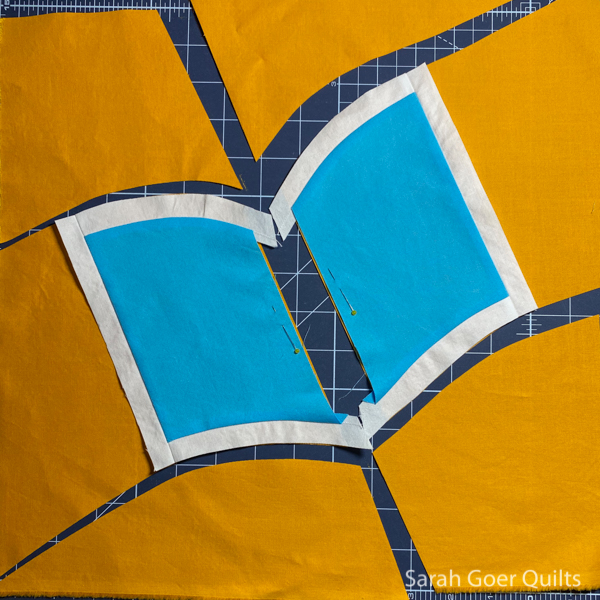
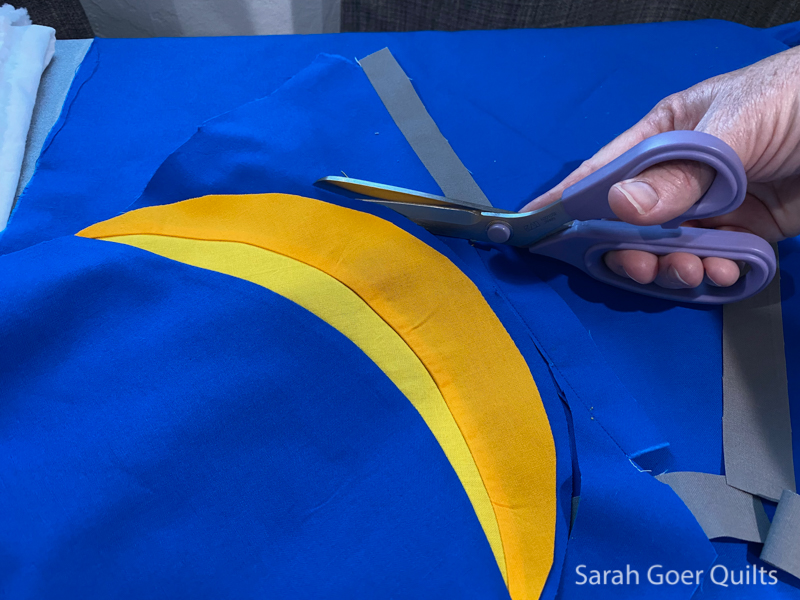
I used my rotary cutter to follow the curve of the book along the top and bottom of each side. Since these are fairly gentle curves this technique works pretty well. (If these were more precise or sharper curves like a Drunkard's Path, it becomes more important that the two curves that are cut are actually different curves so the stitching falls along the same curve on both pieces. This is why Drunkard's Path templates or rulers have an inner and an outer template piece.)

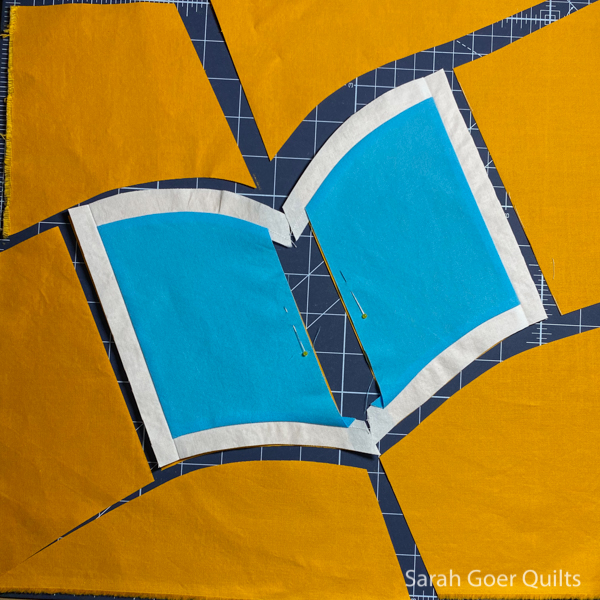
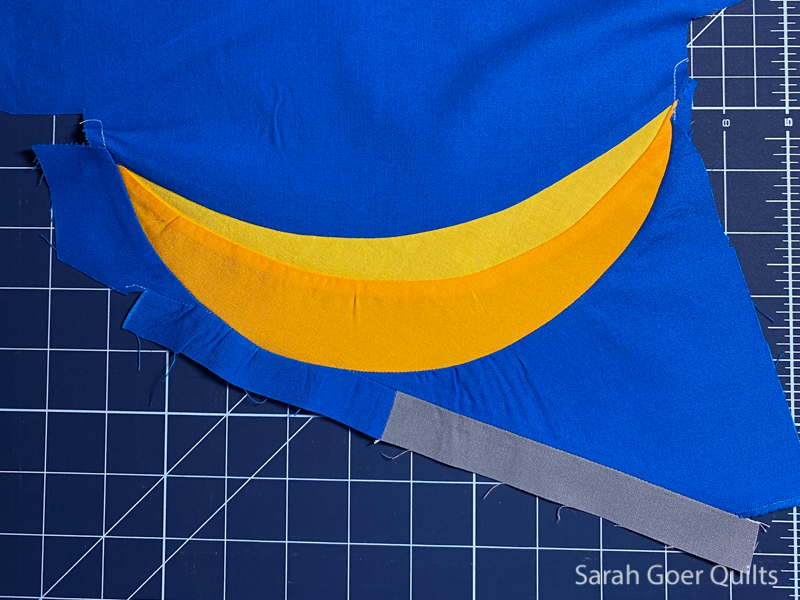
Last cut was to trim along the straight sides of the book.

Here's what my background looked like when it was all cut up. (Of course, I oversized the starting piece of fabric to account for seam allowances and extra wiggle room.)

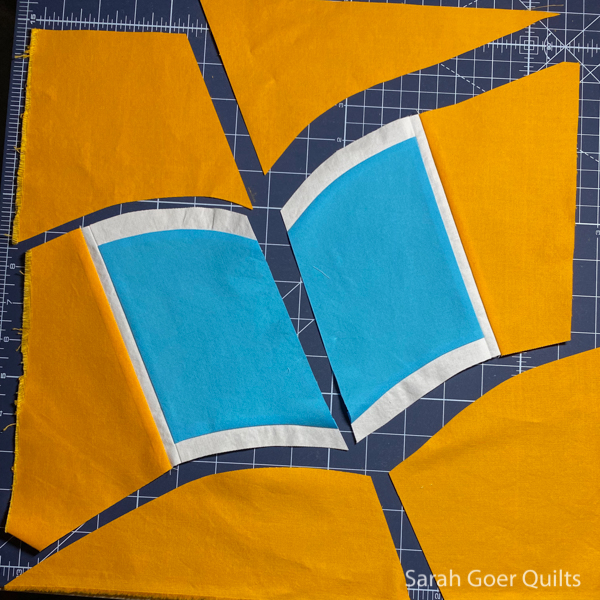
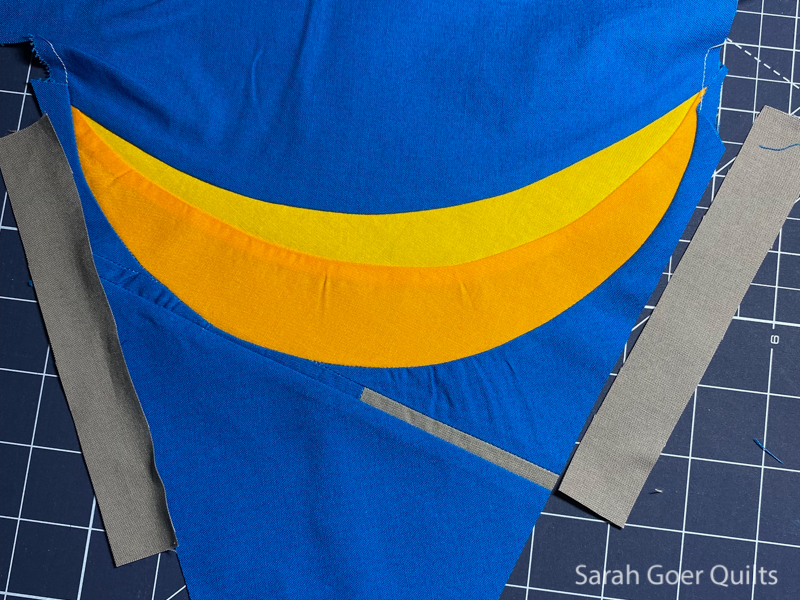
I removed the two yellow pieces in the center and replaced with the blue and white book pages. First I sewed the seams on the straight outer side edges of the book. Then I added the improv curves to the top and bottom of each section. Finally, my last seam was the central seam along the spinoff the book.

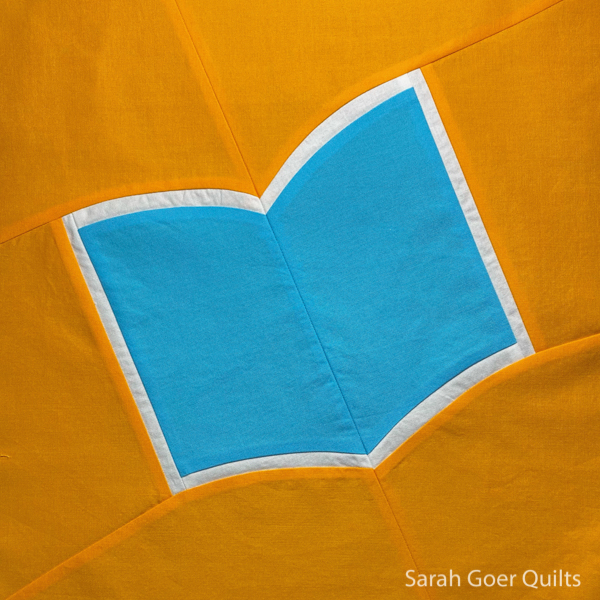
This block also finishes at a little larger than 12" square. If you missed the other block I made for Chris, I shared about it yesterday.

You can see more blocks that were made for Chris as well as other blocks for the Quilts Unscripted Bee on Instagram.

Fun fact: It's been just about 6 years since I sewed my very first improv curve.

4 Comments

In July, Chris asked for blue and yellow blocks showing what summer represented for us.

My immediate thought was a hammock, because last summer my daughter and I spent many hours in the backyard hammock together reading. Eventually, I came around to making a book block for my second block. (Check back tomorrow for that block.)

The hammock was a tricky construction. It was created with improv piecing using smooth improv curves and slice and insert methods to put the frame in the right place. I used this reference photo of my backyard hammock (hello draught "lawn"!) as a guide for proportions and angles. I'm feeling quite pleased with the engineering feat of this block. Here's how I did it...

The grey strips for the frame may have been about 3/4" wide. I cut a bunch and laid them out in the orientation of the frame. I cut some blue 3/4" strips which would be needed to add onto the grey for some seams.

I cut my initial hammock piece freehand with a rotary cutter. This gave me a plan. Then I just had to figure out how to make it work to all go together.

In order to add dimension to the fabric portion of the hammock I pieced a second, darker yellow onto my initial curve. You can see that I left lots fo space to trim my final shape for my hammock.

Then I pieced on a large piece of blue for the background above the hammock. When I have no idea what I'm doing I use large pieces, because it's usually easier to trim down than to add on.

Next up was starting to piece the frame. These were mostly done slice and insert style. I just eyeballed the length of each piece of the frame to approximate the proportions from my photo of my yard hammock.

This was probably the trickiest seam. I had to piece in the blue background beneath the hammock, but one part of the frame gets pretty close. Here I'm using scissors to cut the same curve from my blue fabric to match the lower edge of the hammock.

Sewing a curve that went across a seam made this tricky. Not perfect, but pretty good. This might be the first evidence that I was going to have some problems in the top corners. I chose to ignore that for now and keep working on the frame.

I pieced more frame in the lower right and was thinking about how to insert the frame between these two pieces. I think I realized I should have added blue onto the grey and that piece in the lower right had to be rebuilt.

Auditioning grey strips for the length and angles needed for the side pieces of the frame.

Here I'd sewn on the base and side pieces of the frame, further exacerbating the problems in the upper corners. Again, ignoring that problem. I've also laid out the other three legs of the hammock. This helped me get the angles right.

Slice and insert to build the leg pieces.

Second leg attached. Again, I'm piecing on extra big pieces that I'll trim down.

Trimmed the lower left and right to continue the angle of the section above it.

Planning the slice and insert sections for the last two legs.

The hammock is built! But... I need to address those problem spots at the upper corners.

I lopped off the top corners at an angle that worked to not lose any of the hammock. My last two seams were to piece in background to fill those corners, nice and neatly.

The block finishes at around 12" square. I left it oversize for Chris to trim down as she put her quilt together.

2 Comments

After a summer hiatus, Show Me Something is back! Thank you to everyone who showed us their quilts outdoors back in June.

There are many ways to use appliqué in quilting. This summer I took not one, but three(!) fusible appliqué classes! My very first appliqué blocks were three apple blocks I made for the block of the month at my very first quilt guild meeting, which I attended back in... 2002. (See first photo below.) I was so excited to participate and so disappointed when I found out the blocks were appliqué that month. But I powered on and made three blocks. They were hand stitched. I used freezer paper templates to fold the fabric over and press the folded edge before stitching. Some people love needle turn appliqué, but I've never given it a try. I'd love to hear about your favorite appliqué technique or tool in the comments. And please share up to 3 new or old quilt finishes for Show Me Something Appliqué. You have until September 30 to linkup, plenty of time to make something new if you'd like.


My very first appliqué blocks, circa 2002.

Sometimes just one piece of appliqué really changes a quilt, like this pumpkin leaf.

These are some of my fused appliqué blocks from Lisa Walton's Fantastic Fusion class this summer.

And this is my composition from Laura Wasilowski's class in July.

One more! A combination of fussy cut Nemo and Dory atop improv curves.


I look forward to seeing your finished quilts and where you've taken them!

Here are the linkup details:

  • The monthly Show Me Something quilt linkup will start on the first of the month and continue until midnight (PST) on the last day of the month.
  • You may linkup a maximum of 3 new or old finished projects that fit the theme.
  • You may linkup a blog post or Instagram post.
  • Participation in the linkup grants me permission to use an image of your project in a future blog post, with credit and a link back to your post.
  • If you linkup from a blog post, please link back to this post in your post. If you post from Instagram, you can tag me @sarahgoerquilts.
  • Visit others in the community who share their projects... and leave comments. :-)


You are invited to the Inlinkz link party!

Click here to enter