12 Comments

Most of the past week was spent stitching my block and preparing my post for the New Block Hop I participated in this week. If you haven't checked out those posts, we have some amazingly talented participants with some really awesome blocks. (Links to day one posts and to the hosts can be found in my last post.) Beyond that, everything has been about preparing to quilt a number of quilts. That number happens to be five.

The Quilts

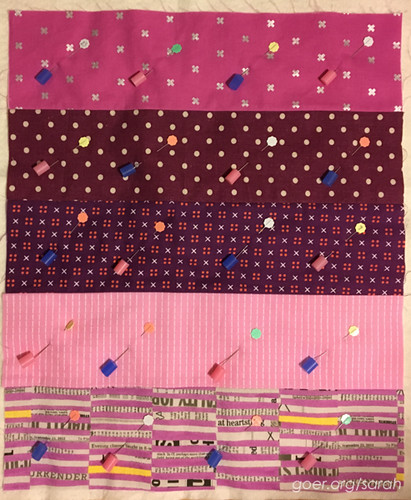
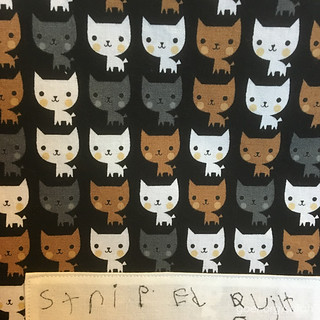
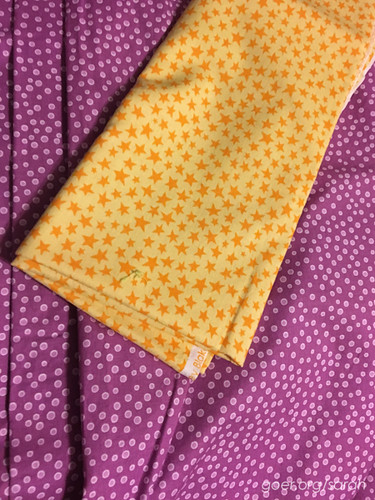
  1. I helped my daughter baste her doll quilt. She's getting very excited to give her gift. Here's the front view and a peek at the backing/label. I love that she's named it Striped Quilt.
  2. I have a secret project that is basted and ready for some straight line quilting. No pics.
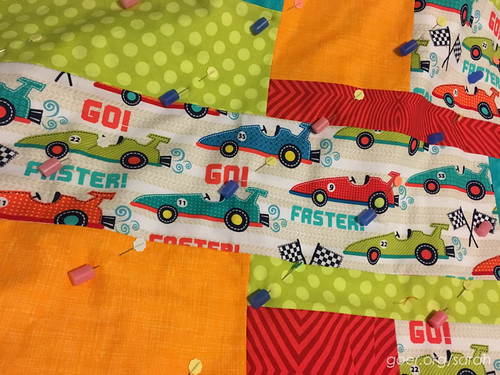
  3. The race car quilt is basted and ready to quilt. I'm going for some Jess inspired free motion on that one. 
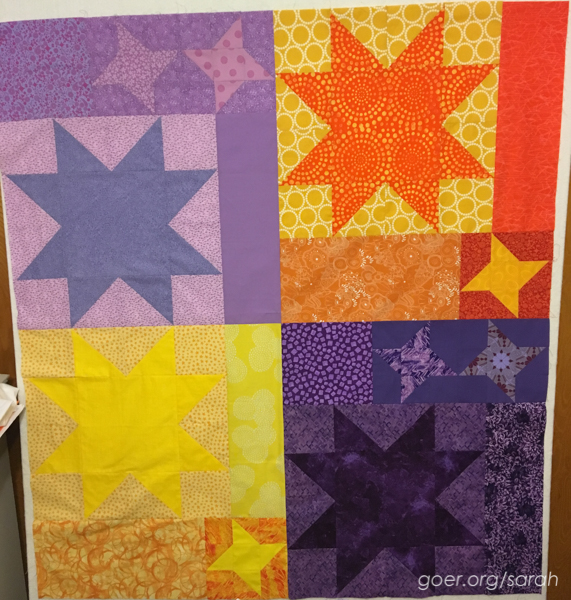
  4. My sister and brother-in-law requested another quilt for my baby nephew to play on so I'll be finishing up Star Light Star Dark for them. I've chosen backing (see below) and binding fabrics for this one, and made the label. (Edited: I'm linking up to the Star Light Star Dark Final Linky Party with my finished quilt top.)
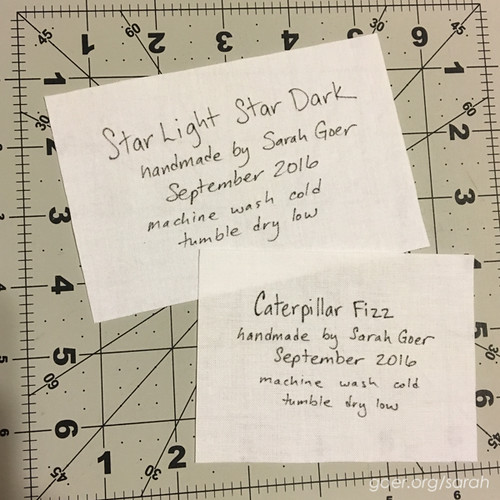
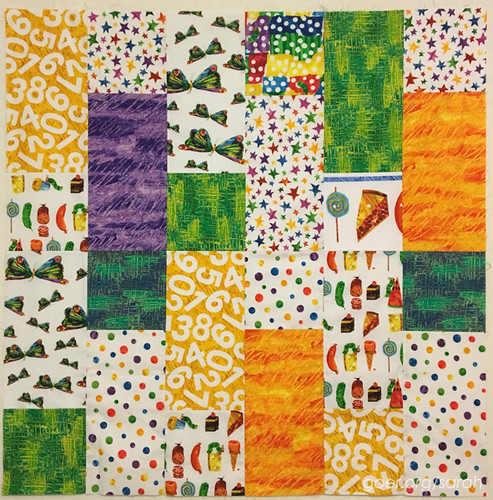
  5. I hope to crank out a fast finish on a Very Hungry Caterpillar baby quilt to deliver this weekend. It's all ready to baste. I love that it's small enough to not need a pieced backing. The label is above. 

Now I'm hoping for some great sewjo and a few really productive days of quilting. Fingers crossed.


A Little Bit About My Quilting Process

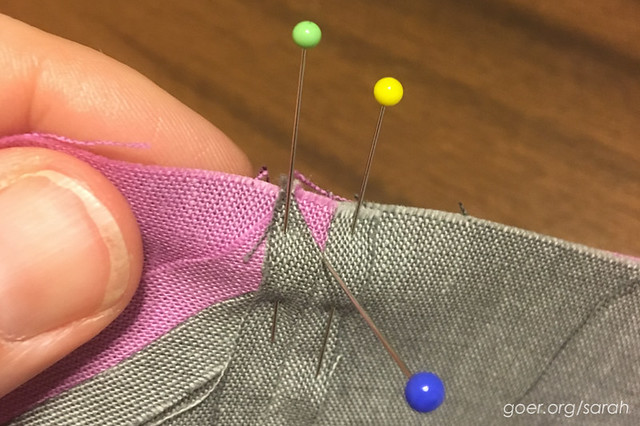
I start by working on my hardwood floor to baste, using blue tape to tape down only my backing fabric. I pin baste. I like to use Clover Flower Head Pins and Pinmoors. I am very generous with the number of pins I use, pinning every 3-4" to avoid shifting. Generally, I put all the pins in, remove the tape and then sit in a comfortable seat while I put on the Pinmoors. (I love how fast and easy they are to remove during quilting.) I use Quilter's Dream cotton batting exclusively. My quilts usually stay in California, and it doesn't get that cold here. My preferred batting weight is Select. I use both walking foot and free motion quilting, all done on my domestic machine, which has a 7" throat (the space to the right of the needle). The largest quilt I think I've quilted on it to date is Bold Blooms, which is 65" x 83". Our king-sized bed quilt is the one quilt I've sent out to a long arm quilter. (I just wanted it done!) I use a closed toe darning foot for free motion quilting, but wish I had an open toe darning foot. I think that's about it. Let me know if I missed anything you'd like to know about!

Thanks for visiting!

80 Comments

Welcome to my blog, especially to any first time visitors finding me through the blog hop. I'm joined by almost 70 quilters over the next three days for the 2016 Cloud9 New Block Blog Hop, hosted by Yvonne @Quilting Jetgirl, Cheryl @Meadow Mist Designs and Stephanie @Late Night Quilter. Each participant has designed and created a 12" finished block that will be donated to the hosts to make into charity quilts. And we've each created a free tutorial of our block for you.  Our hosts curated this Berry Harvest bundle of Cirrus Solids from Cloud 9: Amazon, Sky, Iris, Lilac, and Shadow. Cloud9 generously donated fat quarters of each fabric to each participant.

I love this palette. Purple is my absolute favorite color and, in general, I'm a fan of the cool side of the spectrum. Early in the design process I began toying with a design involving transparency since I liked the idea of two layers of the lighter color "overlapping to create" the darker color. Initially I was working only with rectangles. It was late in the game that I decided to make one shape a triangle, forming a trapezoidal overlap. This also allowed me to create a design with rotational symmetry within the block. Here is my final design, Geometric Transparency.


CUTTING

Dark Fabrics (Amazon & Iris), cut from each:
A. (1) 2.5-inch by 3.5-inch rectangle.

Light Fabrics (Sky & Lilac), cut from each:
B. (1) 1.5-inch by 8.5-inch rectangle
C. (1) 2.5-inch by 5.5-inch rectangle
D. (1) 3.75-inch square
E. (2) 2.5-inch squares

Background Fabric (Shadow), cut:
F. (2) 1.5-inch by 12.5-inch rectangles
G. (2) 1.5-inch by 10.5-inch rectangles
H. (1) 4.5-inch square
I. (2) 1.5-inch by 3.5-inch rectangles
J. (2) 1.5-inch by 2.5-inch rectangles
K. (2) 3.75-inch squares


Piecing Directions

Sew all seams with an accurate 1/4" seam allowance. My seams are pressed open, using a shortened stitch length of 2.0. I find pressing seams open helps me match up points and makes free motion quilting easier.

Step 1: Use 2.5-inch by 3.5-inch dark fabric and coordinating light 2.5-inch square. Mark diagonal on each square as shown in first photo below. Sew on marked line and trim off excess fabric 1/4" from stitching (second photo below). Press open (no photo) and set aside.


Step 2: Pair each 3.75-inch light squares with a 3.75-inch background square. Mark and sew on the diagonal. Trim 1/4-inch from stitching line and press open. Trim to 3.5-inch square.


Step 3: Attach HSTs from step 2 to 1.5-inch by 3.5-inch rectangles of background fabric as shown below.


Step 4: Piece sections to form each row. Rows should finish at 10.5-inches wide.
Row 1: G (no piecing)
Row 2: B + H
Row 3: C + unit from step 1 + E
Row 4: unit from step 3 + H + unit from step 3
Row 5: E + unit from step 1 + C
Row 6: H + B
Row 7: G (no piecing)


Step 5: Attach rows in order shown. Pay particular attention to matching up points. These photos show how I matched up my points when connecting rows 4 and 5.

Use straight pin to go through the fabric 1/4-inch from the edge, directly through the seams for each triangle. Pin should be perpendicular to fabrics.

Push layers of fabric together so they are flush, then pin fabrics together on either side of the vertical pin. Remove vertical pin and sew.

Once all rows are connected, your block should look like this.


Step 6: Attach 1.5-inch by 12.5-inch background rectangles to each side to finish the block. Unfinished block should measure 12.5-inches square.


Finishing
Each of the following options is made with 20 identical blocks, creating a quilt with a finished size of approximately 48" by 60".

Option 1: Straight set.

Option 2: Alternate Set.

Option 3: Tossed Set.

Option 4: Starburst Set.

Option 5: Rotational Set.


Please check out today's other blocks:

Host: Yvonne @Quilting Jetgirl (PLUS GIVEAWAY)
Abigail @Cut & Alter
Janice @Color, Creating, and Quilting!
Lorinda @Laurel, Poppy, and Pine
Melva @Melva Loves Scraps
Renee @Quilts of a Feather
Kathryn @Upitis Quilts
Kim @Leland Ave Studios
Amanda @this mom quilts
Holly @Lighthouse Lane Designs
Irene @Patchwork and Pastry
Jennifer @Dizzy Quilter
Karen @Tu-Na Quilts, Travels, and Eats
Anne @Said With Love
Suzy @Adventurous Applique and Quilting
Sharla @Thistle Thicket Studio
Kathleen @Smiles From Kate
Amanda @Gypsy Moon Quilt Co.
Chelsea @Patch the Giraffe
Jinger @Trials of a Newbie Quilter
Anja @Anja Quilts
Daisy @Ants to Sugar

Visit Meadow Mist Designs on the 13th and Late Night Quilter on the 14th for links to the remaining participants. Thank you for visiting!

I'm linking up to Main Crush Monday.

10 Comments

This is my 13th time participating in Color Play Friday with Trina and Lorinda and this post celebrates their first anniversary of running Color Play Friday! Congratulations to you both. It's been so fun to join you this year. Be sure to visit their posts today (links at the bottom) for their Birthday Bash Giveaways!

Today's photo is a colorful birthday cake and I just couldn't resist going with the rainbow. I picked the gold confetti dots fabric because of the little bit of gold peeking out from under the cake. I could make so many palettes from this photo. What colors stand out to you?

I created my palette with Palette Builder 2.1 by Play Crafts.

Solids:
Kona Tomato
Kona Carrot
Kona Corn Yellow
Kona Jungle
Kona Riviera
Kona Cerise
Kona Snow
Kona Butter

Prints:
Dumb Dot in Red by Michael Miller
Hatch in Papaya by Timeless Treasures
Mini Pearl Bracelets in Meyer Lemon by Lizzy House, Andover
Freckled in Evergreen by Tamara Kate, Michael Miller
XOXO in Rashida Cobalt by Cotton & Steel
Sun print in Orchid by Katarina Roccella, Art Gallery
Confetti Border Pearlized in Rose Gold Glimmer by Michael Miller

Check out the other palettes this week at:

If you'd like to participate in Color Play Friday you can visit In An Otter Life or Laurel, Poppy and Pine for the rules, their contact information, and next week's photo.

Thanks for visiting!