Welcome!
I'm so excited to be here for the Dot Crazy Blog Hop with Benartex. These vibrant, cheerful designs by Weeks Ringle and Bill Kerr were so fun to work with. I had a hard time narrowing down the palette since I loved all the prints! I decided to feature the Fun & Games print in blue so I could fussy cut for a kaleidoscope effect. Check out Weeks and Bill's fussy cutting video tutorial.
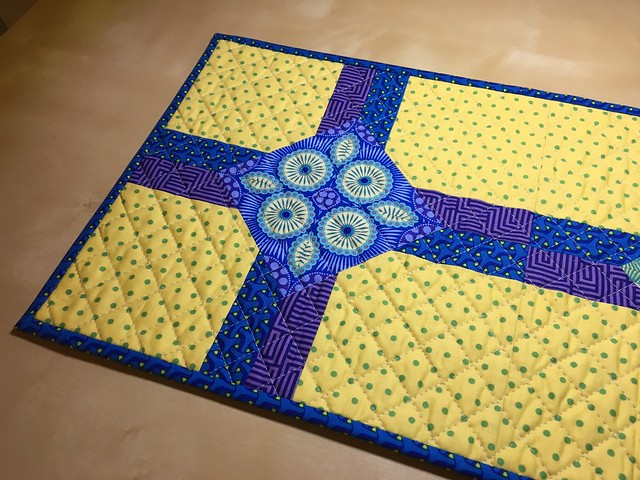
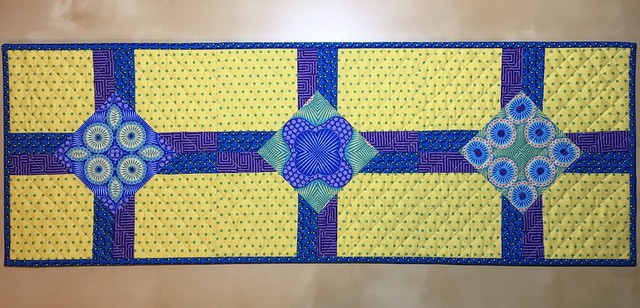
My table runner is made of three blocks and finished at about 10" x 30". It is quilted with 50 wt Aurifil #2600 (Dove) and features Small Dot in yellow, Jax in blue, Maze in purple, and Fun & Games in blue, all from the Dot Crazy line.

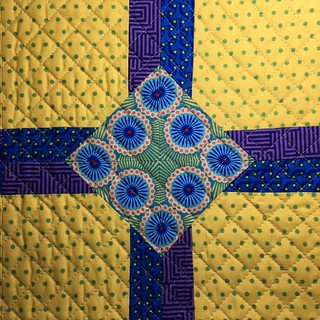


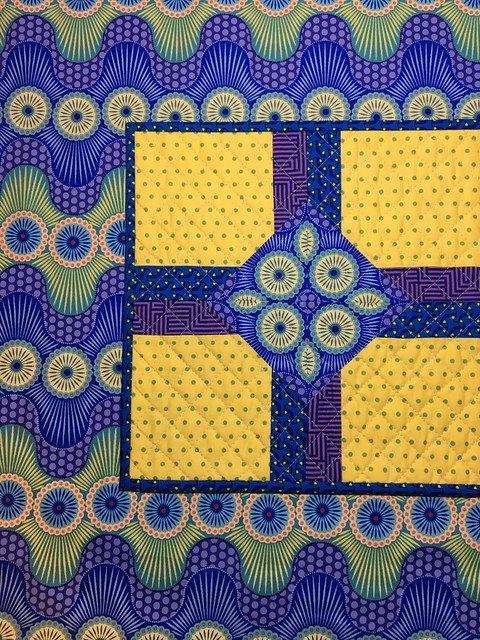
Here's a peek of the Fun & Games prints that I fussy cut for my block's centers. You could get quite a variety of centers from this one print.
BLOCK TUTORIAL
My 10" finished blocks are made from four identical sections. Here's how to create your own!
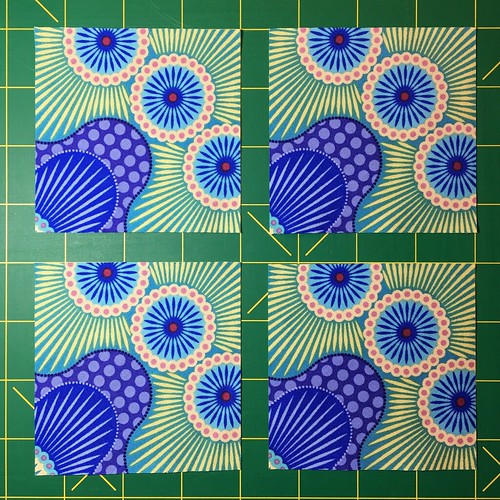
Fussy cut four 3 1/2" identical squares. (You'll only see about half of the print in the finished block.) Note: These squares are not cut on grain. You'll have bias edges on these squares, so take care to not stretch the fabric as you sew. New to fussy cutting? There are great tips for how to mark your ruler to help with precision in Weeks and Bill's video.
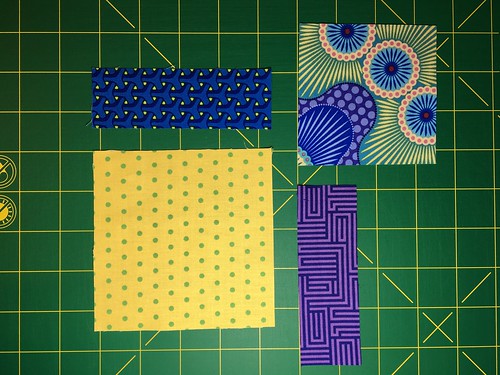
For each section of the block you'll need (1) fussy cut 3 1/2" square, (1) 4 1/2" square of background (yellow), and (2) 1 1/2" x 4 1/2" rectangles of a contrasting value/color (blue and purple). Remember, you'll need four of these sets for one finished 10" block.
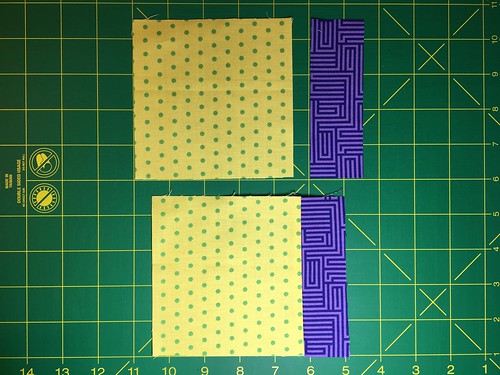
Sew 1 1/2" x 4 1/2" rectangle to 4 1/2" x 4 1/2" background square. Press seams open.
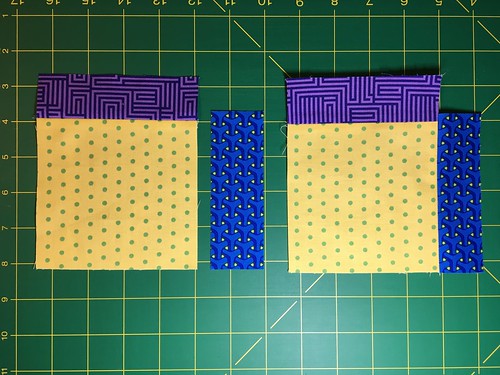
Sew second 1 1/2" x 4 1/2" rectangle to unit as shown. Press seams open.
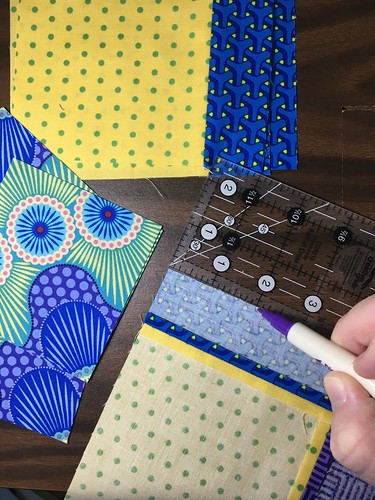

On the wrong side, mark 2" from the edge of each 1 1/2" rectangle.
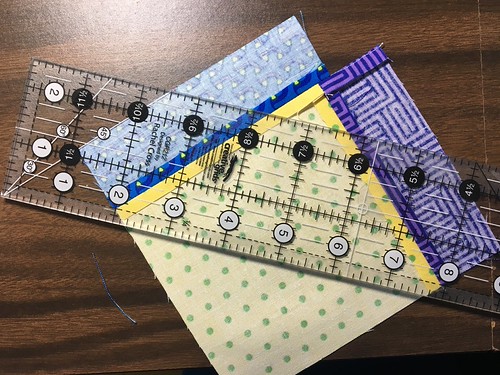
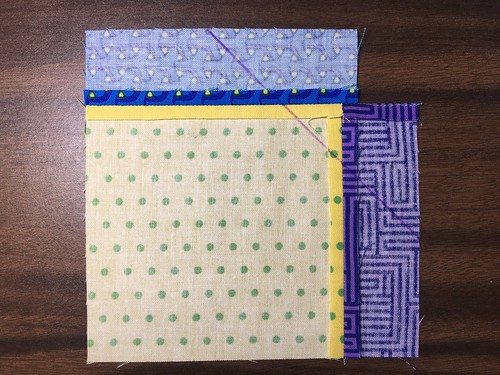
Using a ruler, mark a line connecting these two dots. (Top edge of ruler shown.)
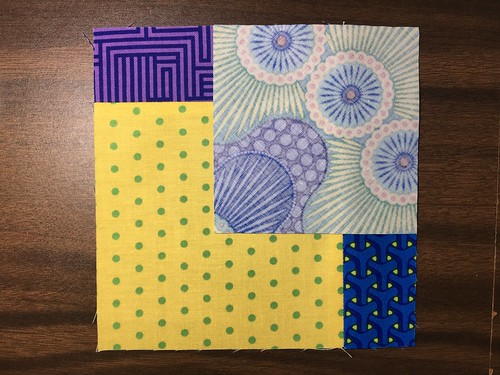
Align unit from above with fussy cut square, right sides together so edges line up as shown. Corners of fussy cut square should touch dots from previous step.
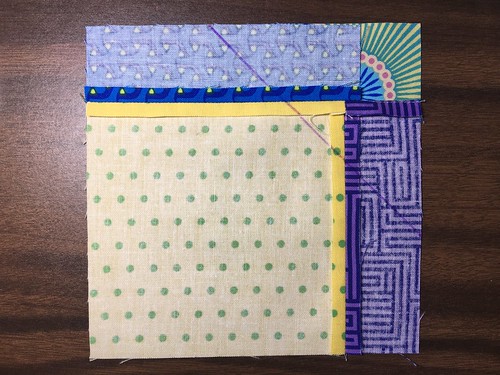
Flip over this fabrics, your marked line is your sew line. Sew on this line. Then trim 1/4" from sewn line and press seams open.
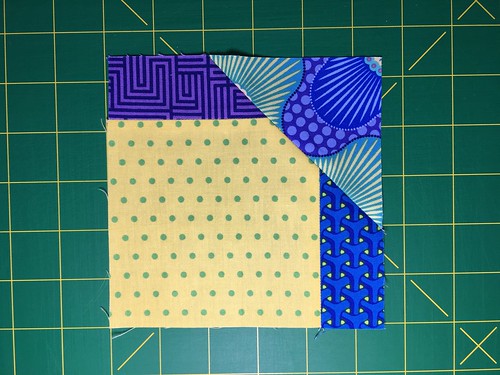
Tada! Here's the first of four sections for your block. Paying attention to placement of each fabric, make 4 identical sections. These should measure 5 1/2" square.
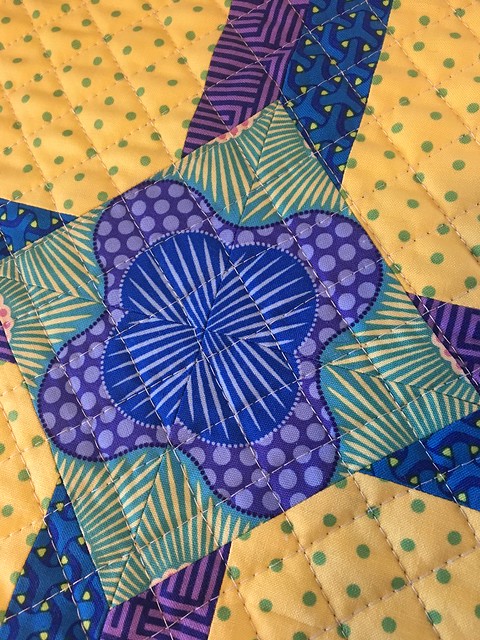
Putting four identical units together will create a kaleidoscopic center to your block!

GIVEAWAY (US addresses only) - GIVEAWAY HAS ENDED
For your chance to win a fat quarter bundle of Dot Crazy fabrics, leave any comment below. Newsletter subscribers can leave a second comment for a bonus entry. (Not a subscriber yet? Subscribe in the purple bar at the top of my blog, click to confirm your subscription in the email that comes to you, and leave a comment on this post telling me you're a new subscriber.) Entry deadline is 11:59pm EST on Tuesday, December 26. I will email the randomly selected winner and they will have 48 hours to reply with their (US) shipping address or I will select a new winner. EDIT: Angela J Short is our winner! :-)
Be sure to visit the other stops on the Dot Crazy Blog Hop:
Dot Crazy Intro and Interview @ Sew in Love with Fabric
Technique Tuesday Fussy Cutting Tutorial @ Sew in Love with Fabric
Dots Squares @ Love to Color My World
Thank you for visiting!



Clara Chandler
I enjoyed your project using the Dots fabric and the tutorial.
Clara Chandler
After browsing your blog, I signed up as a new subscriber. Looking forward to more inspiration in your posts.
Cecilia
Great job! Your placemats are gorgeous! Thanks for the tutorial.
Cecilia
I'm a new subscriber! ????
Robin. RK
Excellent tutorial. I now look forward to creating using this tecnique. Thank you.
Robin
Just to let you know I am now a subscriber to your newsletter :)
Yvonne @Quilting Jetgirl
This is beautiful, Sarah! I love the kaleidoscope effect you created with your meticulous (fussy) cutting.
Cindy Shelley
Great pattern. Love the step by step pictures. Thanks for the opportunity to win a fat quarter bundle.
Quilting Tangent
Thanks for the tutorial and showing the 3 different designs.
Cyndy
I loved these prints and your use of them is so much fun.
Dawn
Great tutorial and table runner! Thanks for sharing!
Dawn
I'm a new subscriber ☺
Lori Morton
Thank you for the Awesome Tutorial!! Love your Runner!! Thank you for chance to win your Give-a-way too!!
Merry Christmas Blessings! :)
Lori Morton
Found your Blog thru this Hop... & signed up as new Follower!! :)
Beth T.
I love this! I'll definitely be using my Best Press for those bias edges, because the effect is absolutely worth it.
Mel
Love the fussy cut kaleidoscopes!!! Will make for a festive addition to any table!!
Angela J Short
Really cool table runner. Neat colors. Enjoy the holidays!!
Angela J Short
I am already a subscriber.
Rolene
Maybe I will do this as a baby quilt!!! ---I guess two quilts....twins!!!
Colleen
What fun fabrics!
Lisa Marie
What a great way to use the fabric that you fussy cut. I find that type of geometric prints to be challenging. Your runner turned out so pretty!
Thunder
Beautiful runner, thanks for showing us how you did it. Merry Christmas.
Thunder
I am a new subscriber. :)
Susan Spiers
Love these fabric patterns & colors - perfect for fussy cutting! Very nice! Thank you for sharing, Susan
Susan Spiers
I am now a newsletter subscriber! Thank you, Susan
Lisa Marie
I have subscribed to your newsletter.
Carla Hundley
Awesome work on
this quilt! Love this
fabric.
Carla from Utah
Barb K.
Great pattern--and beautiful fabrics!
Darrell H
Beautiful table runner and a pattern done differently for a different design. I love it.
Rita S
What a simple way to make it look so complicated. Thanks for sharing.
Rita
I love thee look of the placemats.
Rochelle Summers
Thank you for the wonderful instructions for your blocks in the table runner. I can now see how this would be easier than I originally thought to make. It no longer sounds scary.
Rochelle Summers
I'm new to your email list. Look forward to many more interesting posts.
Kathleen
This is an awesome collection and I love what you made with it.
Allison
Love the block and fabric combination!
Verna A.
I really like those center blocks--just amazing!
Verna A.
I'm a new newsletter subscriber.
Linda
Great Tutorial! Thanks for a neat Giveaway!
Tabitha Keener
I love how you created your block! So pretty! Thanks
Tabitha Keener
I signed up for the Newsletter! Thanks
Betsy
Your runner is Beautiful. I love how you preselected the center fabric to make the motif. Thanks for sharing
Betsy
I'm a subscriber
lee
Your runner is lovely!! thank you!
Regina
I love the effect that you achieved with your fussy cutting.
Lucy Blum
Love your table runner! Great technique!
Jan N.
Love your table runner and the pattern! This fabric collection is fabulous.
Jan N.
I'm a new follower and look forward to seeing more of your work.
Nancy
Your table runner turned out great. Thanks for sharing your process.
Christi
I really like how you did the mitered corners. Very nice. I will remember that special part. I love dots.
Christi
I am a follower.
Janie M
Sew inspirational. Thank you for the tutorial. I knew it was a kaleidoscope just by looking at the pictures.
Judy Chastain
That's a beautiful table runner. I love the way you fussy cut the prints for the block centers.
Ellee
Great placemats!
Ellee
I am a new subscriber.
Nancy
Thanks so much for the great tutorial. I have really been interested in making a kaleidoscope project, and now I feel like I understand the process better.
Rosalind Gutierrez
Thank you for the helpful tutorial especially at this busy season.
Rosalind Gutierrez
I am a new subscriber.
Nancy
I just signed up for your newsletter. Can't wait to start reading about your projects.
LeAnne L
Easy technique for a kaleidoscope. Thank you.
Sheila Collins
What a fun table runner! I appreciate the time and effort that went into your pictures and instructions. Nicely done!
Judy Forkner
I love your fussy cut blocks!
Judy Forkner
I just signed up for your newsletter!
sharon
How nice to see something not red or green in december.
Your table runner is so colorful perfect for the upcoming winter
sharon
with my comment i became a subscriber
Mary D
Ooh your table runner could certainly live at my house. I love it. Thanks for sharing how your process for making it. I love those patterned fabrics too.
Happy holidays to you.
Mary D
I am also a new subscriber and I look forward to seeing your creations. I have added you to my Bloglovin feed too.
Dana Gaffney
Beautiful project, thanks for the inspiration!
Karen
Way cool! I like seeing your fussy cutting! I'm always nervous about using larger prints but you give me a good idea!
Gayle
That fabric looks crazy fun!
Sally
What a fun pattern! I enjoy using fussy cutting to make interesting new designs.
Sherril McGann
Fun fabrics!