
Welcome to those of you who are here to share a finish with TGIFF or to check out what everyone else has been up to. I'm excited to be hosting Thank Goodness It's Finished Friday! On Tuesday I showed you my first little Open Wide Zippered Pouches. I think I could easily become addicted. (There will certainly be some made as gifts soon.) Such a nice fast project! Participating in the Open Wide Pouch Swap on Instagram was a lot of fun. I've really enjoyed watching people share their creative ideas. I'm looking forward to the arrival of my package.
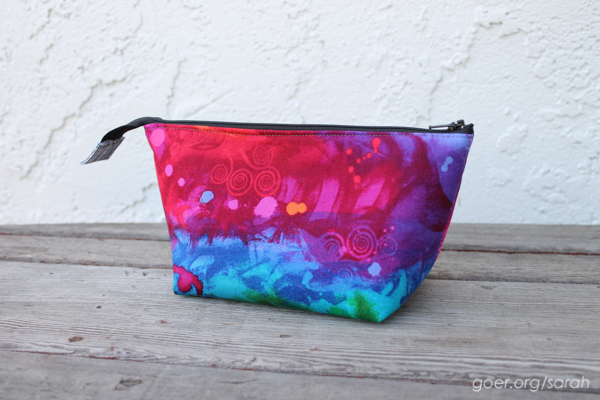
I knew that I wanted to piece the outer panels for the pouch I was sending to my partner. And, how can a person go wrong with Alison Glass fabric? So I used the her Mercury prints and designed a rainbow panel for the outside. I have to say, I'm kind of in love with it and it was really hard to send away. Perhaps I will make myself something similar.


The pattern from Noodlehead has three sizes and includes measurements for a pouch with one fabric on the exterior or a pouch with a contrast bottom (two exterior fabrics). I started with this option but knew I wanted more "work room" for the piecing in my upper section, so I made my contrast bottom pieces smaller (5.5" tall) to accommodate this change. This left me 6.5" by 14" (unfinished) for my upper section.
I don't have process pictures/diagrams, but here are my measurements for the upper portion of my pouch (for one side).
The upper (attached to the zipper) text piece is 14" wide by 2" tall.
The lower (attached to the black print *with a 1/2" seam allowance*) text piece is 14" wide by 2.25" tall.
The pieces for the rainbow panel in the middle are 3.25" tall. The text pieces are .75" wide; the 5 colored panels in the center are 1.75" wide; the blue and pink end pieces are 3.5" wide. When I pieced them I pressed the seams to the colored pieces with a 1/4" seam allowance. I trimmed this strip to 14" once it was pieced. Then I attached it to the upper and lower text pieces with a 1/4" seam allowance. From here I continued with the directions on the Noodlehead tutorial.
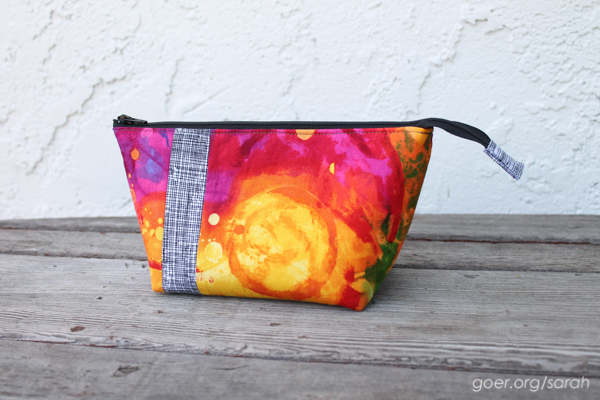
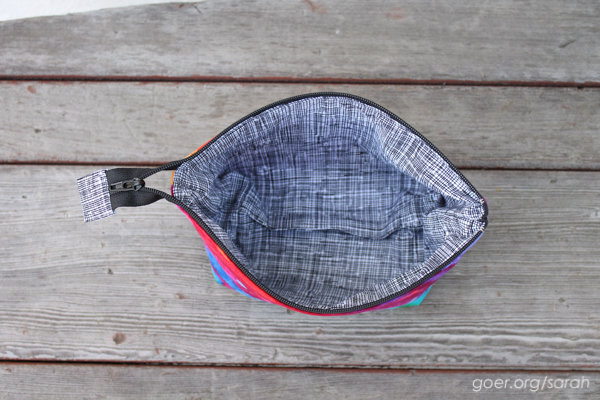
I also had scraps from the awesome rainbow fabric large enough to make a small sized pouch... well almost. I pieced in a black and white strip of fabric to stretch my scraps to be large enough. I used the same black and white print for the lining. I thought I was making this to give away. Now I'm not so sure. ;-)
Thank you for visiting! If you're new to my site, here are some of my latest quilt finishes:
- Rainbow Mini Swap
- Jungle of Animals (my son's first finish)
- Prince Charming
- Stellar Wind


I've linked up to Needle and Thread Thursday.
This finish is one of my Q2 Finish Along goals. I'm linking up with the Q2 Finishes party.
 I've been trying to finish up some older projects and stash bust some of my older fabrics... many from when I started quilting in 2002. I recently decided to put together this baby quilt. The feature fabric was leftover from


