Tag Archives: planned improv

8 Comments

I shared the first of my five mini quilts completed during my 100 day project a couple months back. The project I actually started piecing on day 1 back in July was this yellow quilt. Day 1 started with these first five pieces sewn together.

I'd started the project with a plan for the color palette (black, white, and shades of yellow) and the intent to make a log cabin that would finish at 16 1/2" square. I'd chosen the three black and white prints you see here, and before I started cutting or sewing I thought this version would be a quarter log cabin and chose the text print to be my starting corner. (This was about the largest square I could cut from the scrap of this text print.) As I added the black prints, I opted to fussy cut the placement of the dots and arrows. And I started with my lightest and brightest yellows. My black logs finish at 1/2" wide because that's what worked with the prints.

When I came back to it on day 2, the text print no longer wanted to be in the corner so I started building on all four sides of the log cabin. I kept my black logs at 1/2" finished and decided my yellow logs would get larger as I went. The first four yellow logs (one on each side) all finish at 1/2" wide. I also continued the pattern of adding the black to two side, then the yellow to the same two sides before I moved to the opposite half of the block.

Sometimes I lay my fabrics out to get a visual of where the fabric placement will me. I snap a quick photo as reference. Since I often work on multiple projects at once, you can see my pink/coral/white/yellow solids for some bee blocks peeking out from underneath.

My final design choice was to finish with the log cabin off center. At some point I did the math to determine the sizes of my yellow logs so the quilt would finish at 16 1/2" square.

I free motion quilted with Aurifil 50wt Yellow (#2135), beginning in the center with a daisy, then cursive l's (in increasingly larger sizes) in each yellow log.

I used corner triangles for my label and to use for a hanging rod and machine bound with Kona black. Keeping with my system of backing the quilts with a fat quarter from my stash, I picked this bug print since the front reminded me of a bumble bee.

I'll have to write in more about the 100 Day Project and the Improv Log Cabin series on my label, but the essentials are there, name and date completed.

You can see the other quilts in the series here:

6 Comments

The products featured in this post were given to me by Aurifil, OLFA, and Michael Miller.

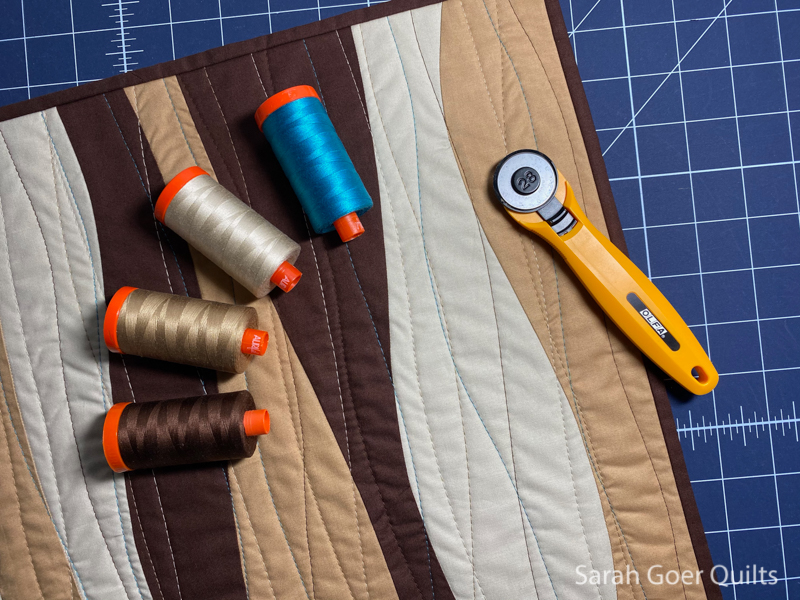
I'm excited to share that I'm today's stop for the final 2020 installment of the Aurifil Slice and Stitch Challenge. Way back in November of 2019 I signed up as one of the Aurifil Artisans to participate. I was very excited about the Color Builder thread boxes that Aurifil had recently released. (They are such a feast of color!)

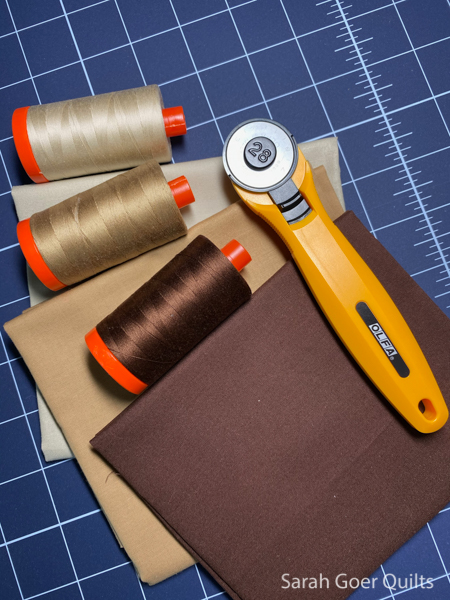
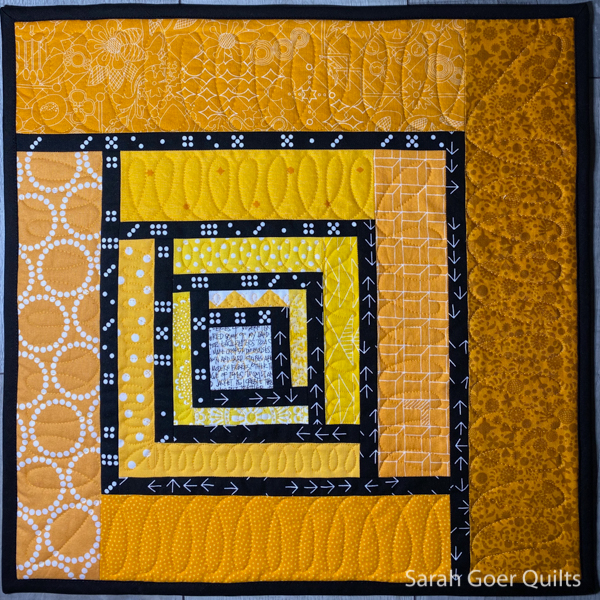
For the challenge I received the Florence Brown Aurifil Color Builder with three large spools of 50wt in Ermine (#2312), Toast (#6010), and Chocolate (#2360), a trio of Michael Miller Cotton Couture fat quarters in Khaki, Ginger, and Brown, an OLFA 28mm rotary blade (with refills), and a 24” x 36” OLFA cutting mat in Navy.

I enjoy planned improv piecing. I start with a set of rules or guidelines. This might be a color palette, a tool, a technique, or something else. My color palette and tools were provided for me. I knew I wanted to add a little bit of another color. Eventually, I landed on improv curves as my plan. (Scroll down for a mini tutorial on how I cut and sew improv curves.)

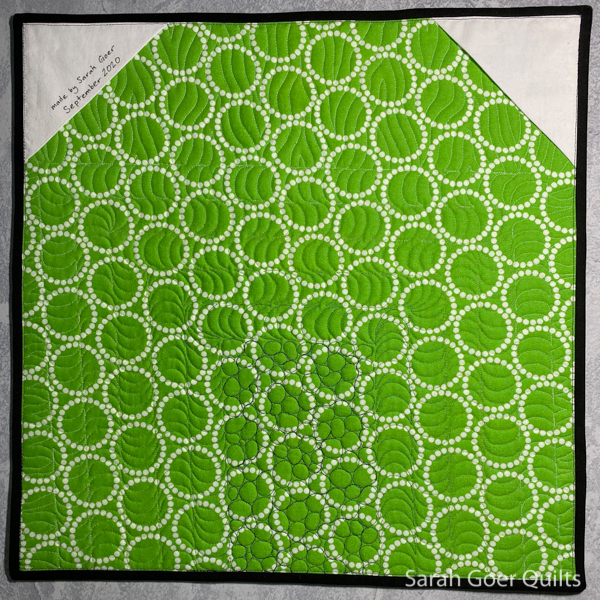
Initially I was considering a table runner with improv curves in khaki, ginger, and brown and thought I'd appliqué on some leaves in fall colors. I'm not terribly fond of the process of appliqué, so I pivoted to just improv curves. I eventually settled on a two-sided square table topper, because I had just enough fabric to make it entirely from my three fat quarters.

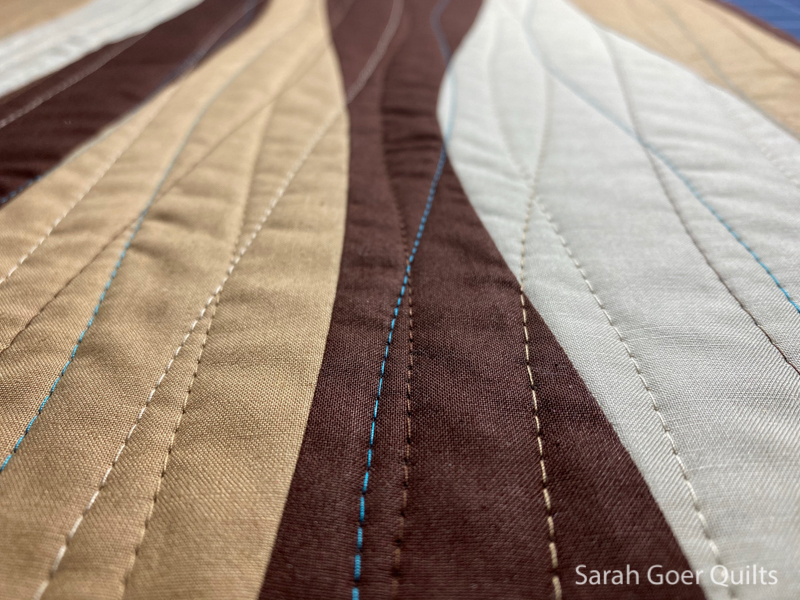
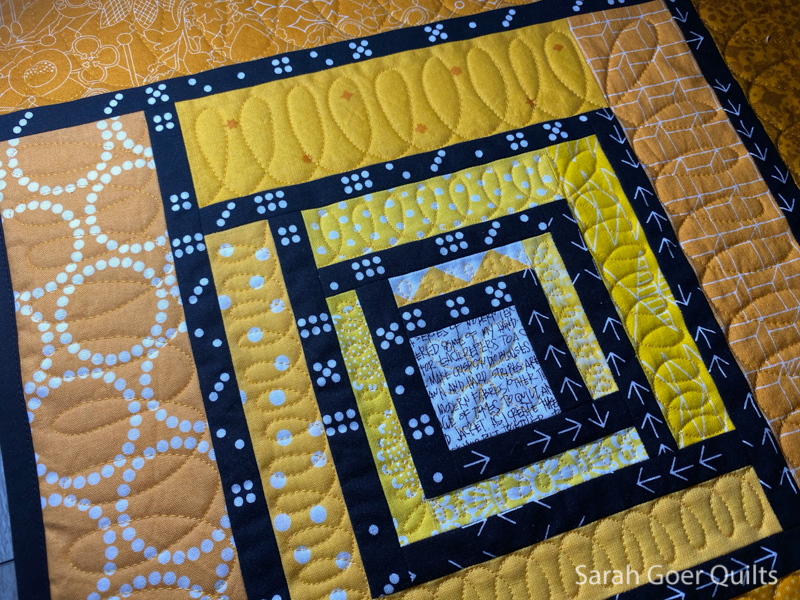
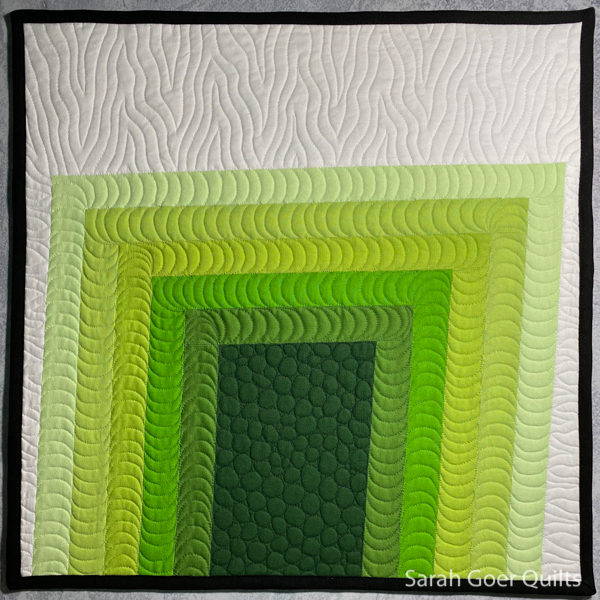
To complement the curved piecing, I opted for organic, curved walking foot quilting in four colors, adding a tiny splash of color with Aurifil 50wt Dark Turquoise (#4182).

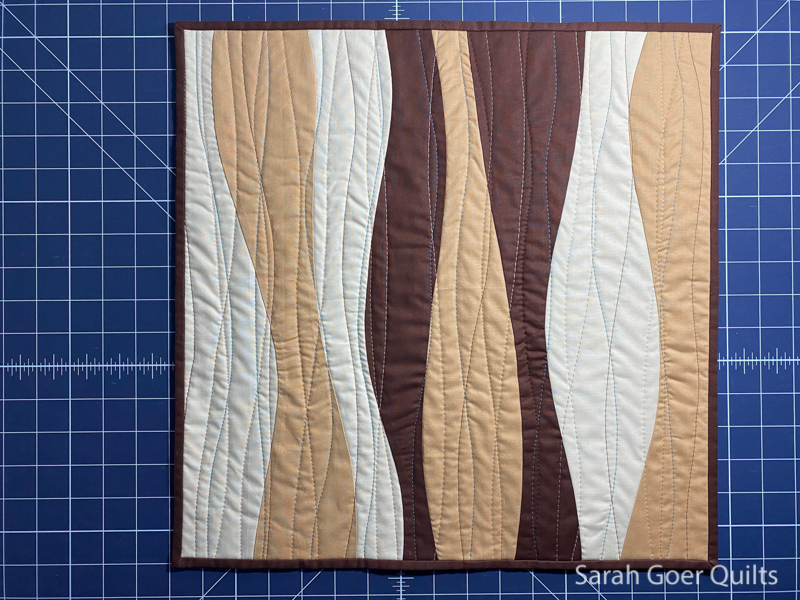
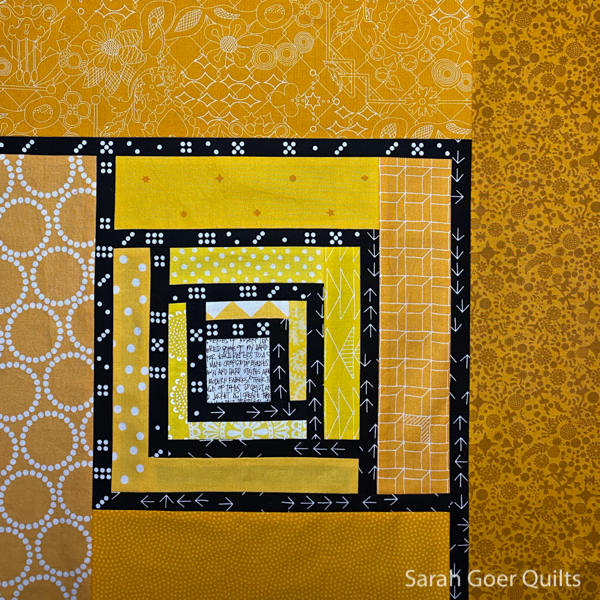
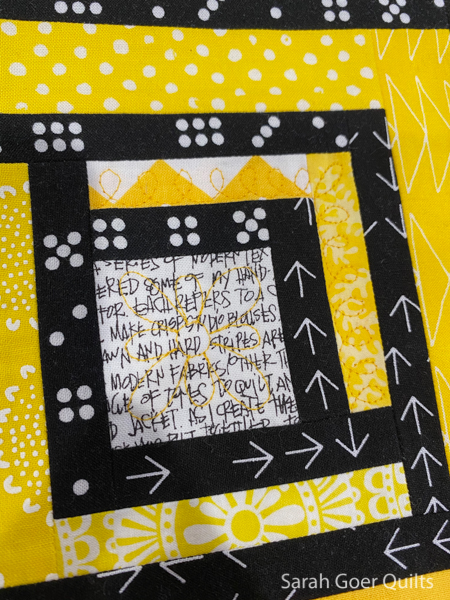
My finished quilt is 16 1/2" x 16 1/2".

Thank you to Aurifil, OLFA, and Michael Miller for supplying me with everything featured in this quilt.


Improv Curve Tutorial

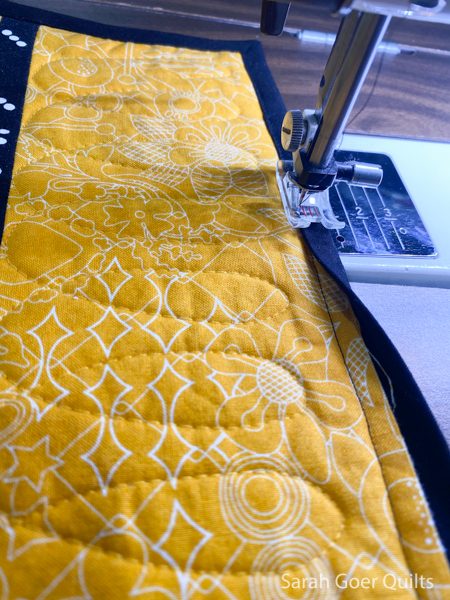
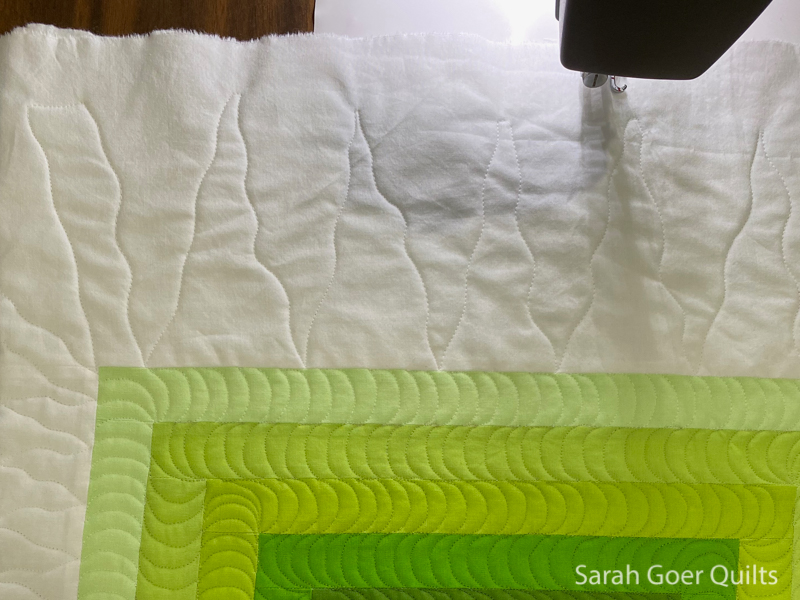
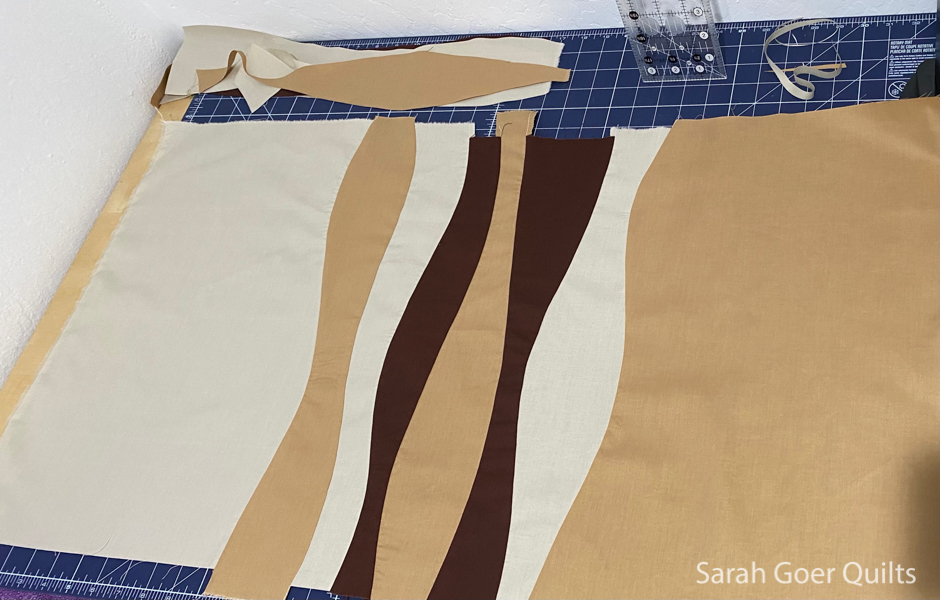
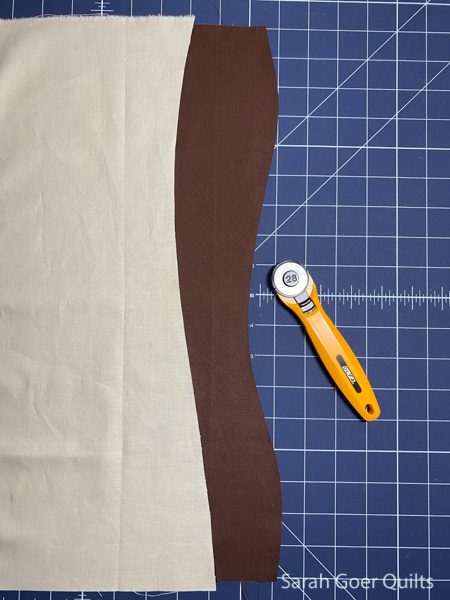
In general when I create improv curve piecing I make units that are oversized and trim them down after piecing. In the third photo from the top of this post above you can see my in progress work on my cutting table. The top and bottom edges are not aligned at all. If I wanted to create an 8" block I would probably start with pieces of fabric that were 10" wide.

Step 1: Lay two fabrics right side up, overlapping by a couple inches. (Not shown.) Slowly and carefully (keep those fingers out of the way!) cut through both layers with your rotary cutter (but no ruler or template), making a smooth improv curve. Always cut away from you. Remove the edges you've cut off of both fabrics so you have two pieces that fit together like a puzzle with the same curve cut. (This is more easily seen in the step 2 bottom photo below.) Here I have removed a little of the khaki fabric to the right of the cut and the edge of the brown fabric to the left of the cut:

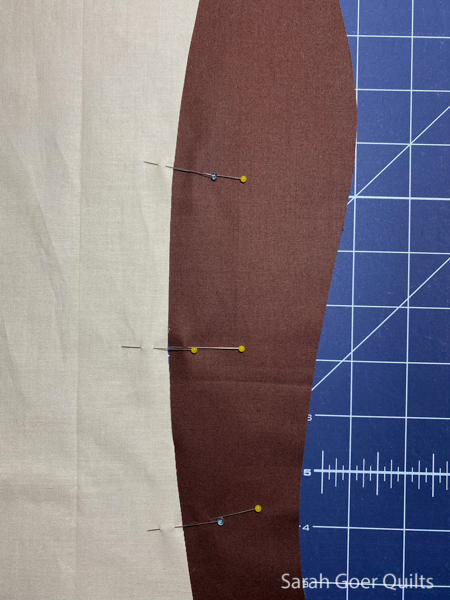
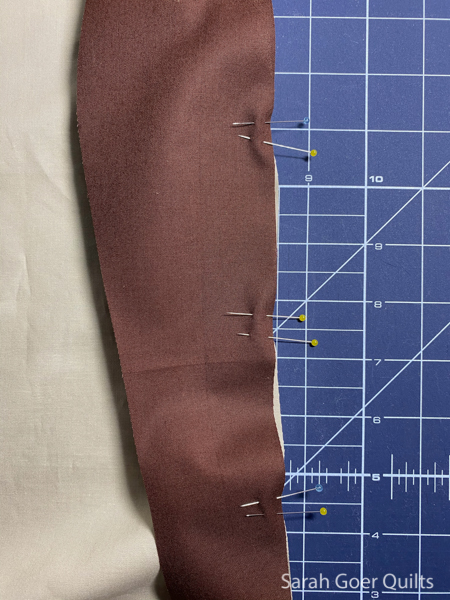
Step 2: Using your marking method of choice, mark points that align on the two fabrics. Here I have chosen to use two straight pins, one in the khaki and one in the brown. These points should line up when piecing the fabrics together. If the fabrics are difference lengths, also mark where the edge of one fabric hits the other. I have not pinned the fabrics together at this point, as you can see in the second photo below.

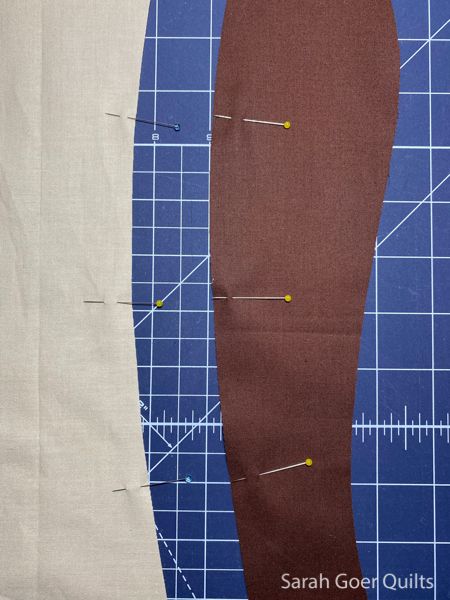
Step 3: Flip the right piece of fabric over and place onto the left piece, right sides together. Use your marks as a guide for pinning the two pieces at those points only. Since I had two pins that were used for marking I have pinned twice at each point. A single pin should work fine as well.

Step 4: Sew with a quarter inch seam allowance. The curved cut gives you a bit of stretch along the edge of your fabric. As you sew, gently stretch the (only the) longer fabric between each pair of pins. This will change depending on which part of the curve you are on. In general, you'll be gently stretching the fabric that has a concave curve in that section. Do not remove pins until you get close to them. Take care to make sure that your bottom fabric is laying flat to avoid puckers. If you are ending up with too much of one fabric when you get close to the pin try stretching the longer fabric a bit more when you sew that section. This part take a little finesse, so practice until you like your results. Smoother, flatter curves will be easier to sew. This technique is not recommended for a drunkard's path 1/4 circle where the two pieces really need to be cut from different templates.

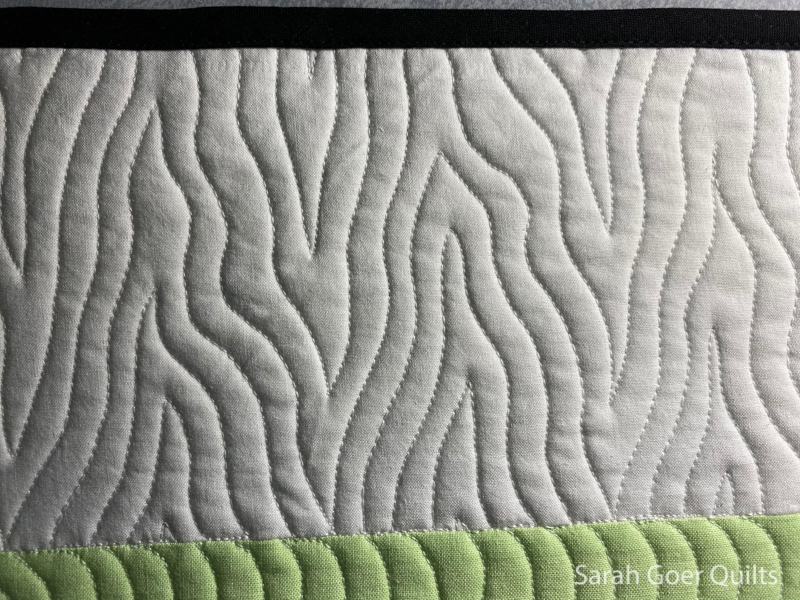
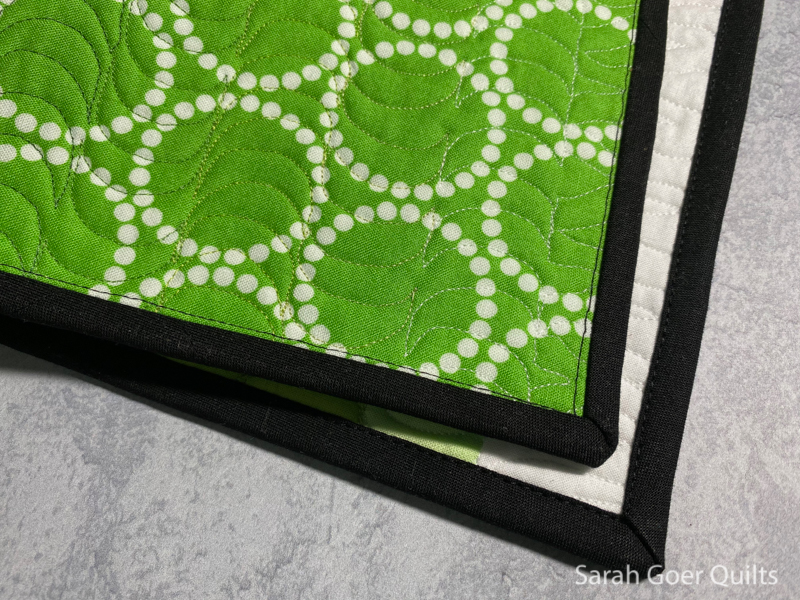
I generally prefer to press my seams open, but improv curves are a time when I press the way the fabric wants to go. If you are using high contrast fabrics you should be able to press to the dark side. And if you want to try it, pressing open can work as well. The seam shown above is the left seam below on the finished back of the quilt.


Sarah is a quilt artist, pattern designer, teacher, and lecturer who is passionate about using bold color and geometric design in both traditional and improv quilts. She enjoys inspiring others in their creativity. As a former math teacher Sarah loves the geometry and math of quilting. She is currently visiting guilds virtually to present lectures and workshops on Zoom. Sarah lives in San Jose, California with her husband and two quilters kids.

Keep up with Sarah by signing up for the Sarah Goer Quilts Newsletter.

10 Comments

Way back on July 20, I started a new 100 Day Project. I knew that with everything I had going the scope of my project would need to be lightweight and flexible. I also wanted a more focused scope than the last 100 Day Project (which morphed over time and I stopped after day 49).

I chose for this new project to be 15 minutes of sewing daily to work on expanding my series of Improv Log Cabin mini quilts that I started at the beginning of the year. 15 minutes a day meant some days I would be piecing. Some would be quilting, or making binding, or even just choosing fabrics. Forward momentum daily. For consistency, I would continue making 16 1/2" x 16 1/2" mini quilts. Why these dimensions? Because I have a ruler that size and a fat quarter can easily be used for backing fabric. Win win!

The first two in the series were created in response to Project QUILTING prompts in January and February. In each of these quilts I had limited myself to a palette of black, white, and one color. My bindings were solid black.

Generally speaking, I gravitate to the design and piecing steps of the quilting process. A finished quilt top can hang around for a long time in my life. The flexibility of this project allowed me to just piece quilt tops for the first many days. On day 30, I finished my 4th quilt top and decided it was time to switch gears so I'd have some finishes before day 100. On day 56, I finished my second mini quilt, the one I'm sharing with you today.

I chose a variety of values of green Kona and white in order to maintain my "black (the binding), white, and one color" rule. This is the first quilt in the series to be entirely solids (on the front). The logs of my 3/4 log cabin are 1 inch wide (finished). I chose nested Cs for the quilting, alternating direction for each color. The center was filled in with pebbles. (This is infinitely easier now that I own an open toe free motion quilting foot for my machine.)

The white background was filled in with wavy triangles. These were created by first making the large wavy zig-zag (see below) and then filling in on each side with echo quilting.

It just takes a little bit of free-motion quilting for me to remember that I really do enjoy it. I favor motifs like the wavy zig-zag that are more organic, and therefore forgiving. But I just can't resist the siren call of more precise and picky designs. Even if my work isn't perfect, the resulting texture is so rewarding.

I chose to match my thread to each fabric. My lightest green fabric was lighter than my lightest green thread, so I used white thread on both the lightest green and white fabrics. Left to Right these are 50wt Aurifil Forest Green (#4026), Very Dark Grass (#2890), Grass Green (#1114), Spring Green (#1231), Light Avocado (#2886), and White (#2024).

I'm backing my mini quilts with fat quarters from my stash in coordinating colors. I chose Mini Pearl Bracelets for this one. (I look forward to using the scraps of this fabric in a future project.)

The quilt is machine bound in solid black.

I would really love to work with this design again either on a larger scale or making a block-based quilt with a bunch of these blocks.

I have two more quilt tops to quilt up and bind. Then maybe I can squeeze a 5th mini quilt into these 100 days.

Have you done a 100 Day Project? What was the scope of your project? Did you enjoy it? Where there parts of the project that you found challenging?

You can read all about the other quilts in the series here: